YOGA ASANA BY SARASWATI OJHA
•Télécharger en tant que PPTX, PDF•
8 j'aime•1,278 vues

B.P.Ed. 2016-2018

Recommandé
Contenu connexe
Tendances
Tendances (20)
En vedette
En vedette (20)
Similaire à YOGA ASANA BY SARASWATI OJHA
Similaire à YOGA ASANA BY SARASWATI OJHA (20)
Dernier
Dernier (20)
YOGA ASANA BY SARASWATI OJHA
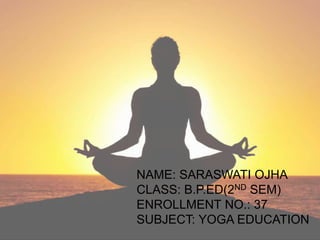
- 1. NAME: SARASWATI OJHA CLASS: B.P.ED(2ND SEM) ENROLLMENT NO.: 37 SUBJECT: YOGA EDUCATION
- 2. Amity school of physical eduaction & sports sciences • Subject:- Yaga Eduacti☺1on • Submmited To:- Dr Ajit Kumar • Date:-8 ”th feb 20171
- 3. Movement position Standing position Sitting position Laying position Forward bending 1:-Utkatasana 2:-uttanasana 1:-poschimottasana 2:janusirsasana 2 1:-Halasana 2:-supta paschimottasana Backward Beanding 1: Salutation pose 2:- virabhadrasana 1:-ustrasana 2:-padma bhujangasana 1:-Dhanurasana 2:-matsyasana Sideward bending 1:-parivrtta trikonasana 2:-parivrtra parsvaksasana 1:- ardha bhaka kapotasana 1:-supta padangusthasana Balance 1:-Tadasana 2:-Salutation pose 1:-Bakasana 1:- eka padaasana
- 4. VRIKSHASANAS • DESCRIPTION: Vrikshasana has taken from Sanskrit word Vrska ( वृक्षासन). It comprises two words Vriksh means tree and asana indicating towards a Yogic posture. If somebody pronounced Vrikshasana, it should be as vrik-shah- sana. PROCRDURE: Stage :1--- • Stand erect. Keep the feet together. • Fold the right leg and placed it at the top of left thighs with the toes of right leg should pointed downwards. • The right leg should perpendicular to the left leg. • Extend your arms above your head. • Inhale and try to make Namaskar mudra with your palms. • Stage:- 2-- • Balance the pose as long as you can because balancing is utmost important in Tree pose. • Try to make your spine straight and feel the stretching from toes to fingers. • Stage 3:-- • With deep exhale bring your arms and leg down. • Repeat the same with left leg. It completes one round. • Do three-five rounds. • No. of rounds may increase as per your convenience.
- 6. BENEFITS * It stretches the entire body from toes to fingers, thus invigorates you. • It gives tranquillity to your mind thus good for those who are facing the problem of depression and anxiety. • It increases your stamina, concentration and immunity. • It is good for your hips as it helps to open it. • It is beneficial for those who are experiencing sciatica. But one should practice it under the supervision of a yoga expert. • It enhances the flexibility of legs, back and chest muscles. • It makes your ankle stronger. • Tree pose yoga precautions
- 7. CONTRA-INDICATION • High blood pressure • Low blood pressure • Migraine • Insomnia • Acute knee problems • Hip injury
- 8. UTKATASANA • DISCREPTION: The "Chair Pose" or "Utkatasana" is also known as the "Fierce" or "The Powerful Pose". The positioning of this asana is just like sitting on a chair except that you need to balance yourself without the use of a chair. The fierceness or power signifies what each part of the body tries to achieve. In this pose, the imaginary chair enables you to locate that strength in your body. The “Chair Pose” in yoga also helps in the stimulation of the heart and diaphragm.
- 10. PROCEDURE: • Stage :1- • To perform this pose, you should first start off with the "Tadasana" or "The Mountain Pose". • Your big toes should be touching each other and your heels should be kept a little apart. • Your lower belly should be sucked in a little to support your spine. Move your shoulder blades down and keep your chest open and thrust out across your shoulders. • Then, take a deep breath and lift your arms over your head. You can keep your arms up with the palms joint together, facing inward, or just keep them parallel to each other. Your arms should be kept at the same level or in front of your ears. • Stage:2- • Bring your lower ribs towards your pelvis. Then, breathe out and bend your knees. Try to make the thighs as parallel to the ground as possible. The knees should come out in front of the feet. The torso should lean a little forward over the thighs till the torso makes a right angle with the upper part of the thighs. Your inner thighs should be parallel to each other and the heads of the thigh bones should be pressed to the heels. • Stage:3 • Keep the ends of your shoulders firm. Bring your tailbone down to the ground and towards your pubis to elongate the lower back. • Remain in this pose for 30 seconds to one minute. To release from the pose, you should straighten your knees while breathing in. Then, breathe out and bring your arms to the sides of your body, back into Tadasana. • s
- 11. CONTRA-INDICATION • Precautions while performing “The Chair Pose” include avoiding this pose if you suffer from low blood pressure, insomnia, and headaches. Also, practice this pose with caution if you have lower back pain. Other precautions include: • Make sure that you go into the pose only until you can maintain the natural lumbar curve. You should stop just before your lower back pops backwards or flattens. • If you have a shoulder injury, you should make sure to practice this pose with care. If you cannot raise your arms over your head without experiencing pain, move only within the areas where you don’t feel the pain. • Keep your gaze straight forward if you have neck pain of dizziness. • Beginner's tip
- 12. TRIKONASANA • DISCREPTION: The triangle pose is consisted of two Sanskrit words Trikon and Asana. The meaning of trikon (त्रिकोण) is triangle while the meaning of asana is pose. Triangle pose is very important for health & wellness. It has greater significance and relevance in the domain of sound health
- 14. PROCUDER: • Stage:1- • Stand erect. Now, keep distance between your legs about 3 to 4 feet • Extend your arms at the shoulder level. • Inhale and raises your right arm by the side of your head. • Now, bend your right arms with exhaling towards the left side by keeping your body weight equally on both the feet. You should ensure that the right arm become parallel to the ground. • Stage:2- • Maintain the position as per your comfort with normal breathing and come to the original position by inhaling. • Stage :3 • Do the same procedure with the left arm. • Perform three to five rounds of trikonasana.
- 15. BENEFITS • This asana is good to burn fat. Therefore, it is recommended to person who is facing the conditions of weight and obesity. • It is good for your backache • This Yoga pose is recommended for growing children to increase their height. • Triangle pose helps to strengthen your legs, knees and ankles. • Good for your digestion • It may be used for stress management. • Triangle pose helps to expand your chest and shoulders. • It ensures mobility of hip joints and neck and give proper stretch to your spine. • It strengthens the muscles in the thighs, hips and back.
- 16. CONTRA-INDICATION • This asana shouldn’t be performed who has severe back pain. • Avoid this yoga who is suffering from migraine. • A person is detected with diarrhea, high blood pressure, neck & back injuries, shouldn’t perform this asana. • Those who are experiencing dizziness shouldn’t look down at the floor during the final stage. • Cervical spondylosis should do it with proper precautions. • Don’t take the support of your knee while performing this asana as it exerts excess pressure to your knee that may lead to knee problems. • Having neck problems, don’t look up while performing this asana. It is better to gaze straight or look down to the floor.
- 17. TADASANA • DESCRIPTION:Tadasana or Mountain pose is one of the best yoga poses for beginners as it is a simple ‘sitting asana ‘that forms the basis for all the other standing asanas. The term Tadasana is a combination of the words ‘tada ‘(the Sanskrit word for mountain) and ‘asana’ (meaning posture).
- 19. PROCEDURE: • Stage:1- • . Stand erect with your feet together and your arms at your sides. 2. Press your weight evenly across the balls and arches of your feet while breathing steadily and rhyt1hmically . 3. Lift and spread your toes and the balls of your feet, then lay them gently on the ground. 4. Firm your thigh muscles and lift your knee caps, without tensing the muscles of your abdomen and then lift your inner ankles to strengthen the inner arches. 5. Imagine a line of energy all the way up along your inner thighs to your groin and from there through the core of your torso, neck, and head, and out through the crown of your head. Stage2:- 6. Turn your upper thighs slightly inward. Lengthen your tailbone toward the floor and lift your pubis toward your navel. 7. Press your shoulder blades into your back, then widen them across and release them down your back. 8. Without pushing your lower front ribs forward, lift the top of your sternum straight towards the ceiling. Stage 3:- 9. Widen your collarbones and hang your arms beside your torso. 10. Align the crown of your head directly over the center of your pelvis, with the underside of your chin parallel to the floor. Your tongue should be wide and flat on the floor of your mouth. Look slightly upward. 11. Stay in the pose for 30 seconds to 1 minute, breathing easily.
- 20. BENEFITS: • Improves posture and improves ability to sustain the pose for a longer period of time. • 2. Firms the abdomen and buttocks by working on your core stomach muscle. • 3. Strengthens the thighs, knees and ankles. • 4. Relieves sciatica. • 5. Reduces flat feet and helps to relieve constipation.
- 21. CONTRA-INDICATION • The benefits and importance of Tadasana are immense but there are certain circumstances when you should avoid this pose. Avoid Tadasana if you have low blood pressure as the blood may begin to pool in the lower half of your body if you hold the pose for too long. You should also avoid Tadasana if you have a headache as it could aggravate it. If you are pregnant, you will have to keep your keep your feet wider apart and if you have knock knees bring your heels slightly apart, but do this only after consulting a yoga trainer. The Tadasana pose for beginners generally consists of the same steps but the amount of time spent in this position is much shorter.
- 22. Paschimottasana(sitting) Description:The word Paschim literally means west, Uttana means stretched out and asana is pose. Here the word paschim (west) doesn’t mean the west side rather it indicated the back of the body. The back of body is referred as paschim here. Hence a posture in which back of the body or spine is stretched out is called paschimottanasana (forward bend pose).
- 24. Procedure:- • Stage:1- • Sit up with the legs stretched out straight in front of you on the floor. • Keep the spine erect and toes flexed towards you. • Bring your respiration to normal. • Breathing in, slowly raise your both the arms straight above your head and stretch up. • Slowly breathe out and bend forward from the hip joint, chin moving toward the toes keeping the spine erect. • Stage2:- • Place your hands on your legs, wherever they reach, without putting much effort. • If possible hold of your toes and pull on them to help you go forward. • Stay in this position as long as possible. • After the exertion limit reached inhale and raise up stretching up your arms straight above your head. • Stage3:- • Breathe out and bring your arms down placing the palms on the ground. • Relax for a while and try to feel the changes occurred in the body.
- 25. Benefits: • Stretches the whole spine specifically lower back, hamstring and hips. • Massages and tones the abdominal and pelvic organs. • Improves the circulation. • Stretches and strengthens the calf and thigh muscles. • Activates the spinal nerves • Tones the arms • Reduces abdomen fat
- 26. Contra-indication • Obesity • Indigestion • Less height • Useful for people who feel less energetic. •
- 27. Ustrasana • Description:Ustrasana, Ushtrasana, or Camel Pose is an asana. Sanskrit: उष्ट्रासन; Ustra – Camel, Asana – Pose; Pronounced As oos-TRAHS- anna • This asana, popularly called the Camel Pose, is an intermediate level backward bend. Ustra means camel in Sanskrit, and this pose resembles a camel. It is known to open up the heart chakra and increase strength and flexibility. This asana is also commonly referred to as the Ushtrasana.
- 29. Procedure: • Stage:1 • Begin the asana by kneeling on your mat and placing your hands on your hips. • You must ensure that your knees and shoulders are in the same line, and the soles of your feet are facing the ceiling. • Inhale, and draw your tailbone in towards your pubis. You must feel the pull at the navel. • Stage:2- • While you are doing that, arch your back. Gently slide your palms over your feet and straighten your arms. • Keep your neck in a neutral position. It should not be strained. • Stage:3- • Hold the position for about 30 to 60 seconds before you release the pose.
- 30. Benefits: • This asana helps improve digestion as it massages the internal organs. • It opens up the chest and frontal portions of the torso. • It strengthens the back and the shoulders. • It helps alleviate pain in the lower back. • It makes the spine more flexible and also helps in the betterment of your posture. • It relieves menstrual discomfort.
- 31. Contra-indication • It is best to practice this asana under the supervision of a yoga instructor. If you have a back or neck injury, or if you are suffering from either low or high blood pressure, it is best to avoid this asana. Those who suffer from insomnia or migraines must avoid this asana. •
- 32. Bakasana • Description:The word “Baka” is derived from the Sanskrit word which means Crane and the meaning of Asana is Posture. This Asana is very similar to the body posture of crane, so it is also named as Crane pose. Bakasana is a compact arm leveling posture that helps in strengthening the arms similarly as the abdominal organs.
- 34. Procedure: • Stage1:- • Stand in the position of Tadasana. • After taking the position of Tadasana, come down to the Uttanasana position. • While doing Uttanasana, keep your hands on the floor just in front of your feet. For this, you’ll need to bend a little more from your hips. • If you’re not capable to balance properly, attempt to keep a fold blanket below your hands so your body gets a platform to rest on. • Now Bend your arms a bit (as much as possible). • Attempt to carry your left leg up within the air. • Fold your knee and take a look at to rest your left knee on the outer facet of your left arm. • Fold the right leg from the knee and take a look at to put the right knee on the outer facet of the right arm. • Stage:-2 • There ought to be acceptable distance between each your hands, so it becomes easier for you to balance your body on your hands. • Stage:3- • Stay steady during this position for concerning 15-20 seconds, after that slowly-slowly release. • Repeat this process three times a day.
- 35. Benefits: • Regular practice of this pose will increase mental and physical strength. • Helps in to make your body more flexible. • It increases endurance capacity. • Practicing this posture on a daily routine helps you in strengthening your forearms, wrists and shoulders. • It provides a decent stretch to your higher back and even strengthens your abdominal muscles. • Note: –
- 36. Contra-indication • Those people who are suffering from Carpal Tunnel Syndrome, sciatica pain, slip disc, Spondilitis problems and wrist injury are not allowed to practice this asana. Be extra careful if you have shoulders injury or hamstrings while attempting this pose. If you are a beginner then don’t try this pose immediately, at first start with basics, when you are master in that then go for it .This is an advance Asana so try this Asana under the supervision of a yoga teacher.
- 37. Halasana • Description:The name comes from the Sanskrit words hala meaning “plow” and asana meaning “posture” or “seat”.So it is also named as plow pose. Halasana is one of the advanced yoga pose simple to practice and contains lots of benefit. Halasana rejuvenate the inner parts of one’s body and make it healthy again.
- 39. Procedure: • Stage:1- • Lie on the yoga mat or carpet and join the legs together • Raise your legs to make an angle of 90 degree. • Thrust the palms, raise the waist and legs, bending forwards curving the back and resting the legs on the floor above head. • Try to place the big toe on the floor and keep the legs straight. • Stage :2 • Balance the whole weight on the shoulder blade, shift both the hands over the head,join the fingers and hold the head with it and relax the elbows on the floor. • Try to remain in the position . • Stage:3- • Then release the fingers above the head, pressing the pals on the floor taking back thumb toe gently bring the body and legs to the floor • Relax and practice for 2 round more.
- 40. Benefits: • Practicing this asana regularly can avoid disease like diabetes,obesity,constipation,stomach disorder,Blood pressure and menstrual disorders • It makes your back bone elastic and flexible. • Halasana helps to reduce both belly and body fat. • It improves memory power.
- 41. Contra-indication • Those having neck pain,spondylosis and high blood pressure should not practice this yoga pose. • Pregnant ladies should not try this asana.
- 42. Dhanurasana • Description:Dhanurasana is consisted of two words: Dhanu means ‘bow’ and Asana indicates a Yoga pose. Thus the name is ‘the Bow Pose’ because in the final position, the body resembles a bow. In this pose, the abdomen and thigh representing the wooden part of the bow whereas legs lower parts and arms representing the bowstring.
- 44. Procedure: • Stage :1 First of all lie down in prone position • Exhale, bend your knees and hold the ankles with hands • While inhaling raise the thighs, head and chest as high as possible. • Stage:2 • Try to maintain weight of the body on lower abdomen. Join the ankles. Look upward and breathe normally. • While exhaling, bring down the head and legs up to knee joint. • Stage:3- • Maintain this position as long as you can hold and slowly come back to the original position.
- 45. Benefits: • Dhanurasana strengthens the back and the abdomen at the same time. • Keeps you active and energetic. • It helps improve upon stomach disorders. • Bow Pose also helps in reducing fat around belly area. • It is beneficial specifically to women as it improves reproductive system and helps improve menstrual disorders. . • Helps regulate the pancreas and is recommended for people with diabetes • Expands the thoracic region of the chest • Helps alleviate hunchback • Increases the appetite • Bow Pose combines the benefits of the Cobra and the Locust postures. • Balancing the weight of the body on your abdomen also reduces abdominal fat and keeps the digestive and reproductive systems healthy.
- 46. Contra-indication • If a Person suffering from high blood pressure, backpain, headache, migraine or abdomen surgery should not practice “Dhanurasana”. • Ladies should not practice this during pregnancy and in periods.
- 47. Supta padangusthasana • Description: Derived from its Sanskrit name (Supta = lie down + Pada= leg/foot + Angushtha= big toe + Asana = pose), this pose is the key to open and stretch your legs to the fullest. Many people perform this yoga posture unknowingly, without knowing the name, as a stretching exercise. The Reclined Big Toe Pose helps in improving both the mental as well as physical health of the practitioner.
- 49. Procedure: • Stage:1- • Come to lie on your back with your legs outstretched. • 2. Bend your right knee and hug your leg into your chest. • 3. Place a yoga strap around the ball of your right foot. Hold the ends of the strap with each hand. If you don't have a strap, try these alternatives. • 4. Straighten your right leg up toward the ceiling while holding tightly to the strap. • 5. Stretch your right leg upwards with the foot flexed, but keep the ball of the hip joint resting in the socket and both sides of your butt equally resting on the floor. In other words, don't allow your right hips to cone up off the floor just because you are lifting that leg. • Stage:2 • 6. Keep your left foot flexed and your left leg pressing towards the floor. • 7. Try pointing the right toes for a slightly different stretch. You can go back and froth between a flexed and pointed foot it you like. • Stage 3- • 8. Hold your leg up for 5 to 10 breaths. • 9. To come out, bend your right knee back into your chest, bring the left knee to join it, give your legs a little hug, and then do the same thing with your left leg raised.
- 50. Benefits: • Stretches the hamstrings and calves. Can help reduce back pain1 by addressing Flat Low Back Posture. • Contra-indication :Avoid doing this asana if you have a headache or diarrhea. • If you have blood pressure, raise your head and neck using a folded blanket, and then practice the asana.
- 51. Eka padasana • Description: Eka padasana is a balancing asana that requires stability, focus and core strength. The name is derived from the Sanskrit, eka, meaning “one,” pada, meaning “foot,” and asana, meaning “pose.”
- 53. Procedure • the body takes the form of a capital letter “T.” The arms are raised overhead with the palms facing each other or touching. The back leg lifts off the ground; the anchored leg is straight; and the arms, torso and back leg are parallel with the ground.
- 54. Benefits • Cultivates inner stability • Strengthens the legs, back, arms and shoulders • Opens the chest and lungs • Improves both posture and coordination • Energizes the body • Improves memory and concentration • Reduces anxiety by calming the mind • Strengthens the core muscles • Elevates the heart rate, burning calories and increasing stamina
- 55. Contra-indication • If you have any lower back or ankle injuries, this is not a pose you should attempt. • It is also important that you do this pose for the first few times in the presence of an instructor.
- 56. THANK YOU