Gêneros do Discurso e Comunicação
•Transferir como PPTX, PDF•
1 gostou•2,033 visualizações

O documento discute a comunicação e os gêneros do discurso segundo Bakhtin. Apresenta três pontos principais: 1) A linguagem leva em conta a situação de comunicação e resulta em enunciados próprios de cada esfera da atividade humana, chamados de gêneros do discurso. 2) A linguagem é posta em ação pelo falante em interação e contexto histórico. 3) A comunicação representa um contexto através de referências compartilhadas entre os interlocutores.

Recomendados
Mais conteúdo relacionado
Mais procurados
Mais procurados (20)
Destaque
Destaque (20)
Semelhante a Gêneros do Discurso e Comunicação
Semelhante a Gêneros do Discurso e Comunicação (20)
Último
Último (20)
Gêneros do Discurso e Comunicação
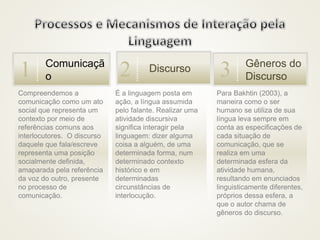
- 1. Para Bakhtin (2003), a maneira como o ser humano se utiliza de sua língua leva sempre em conta as especificações de cada situação de comunicação, que se realiza em uma determinada esfera da atividade humana, resultando em enunciados linguisticamente diferentes, próprios dessa esfera, a que o autor chama de gêneros do discurso. É a linguagem posta em ação, a língua assumida pelo falante. Realizar uma atividade discursiva significa interagir pela linguagem: dizer alguma coisa a alguém, de uma determinada forma, num determinado contexto histórico e em determinadas circunstâncias de interlocução. Compreendemos a comunicação como um ato social que representa um contexto por meio de referências comuns aos interlocutores. O discurso daquele que fala/escreve representa uma posição socialmente definida, amaparada pela referência da voz do outro, presente no processo de comunicação. Comunicaçã o1 Discurso2 Gêneros do Discurso3
- 2. OPERADORES ARGUMENTATIVOS • A argumentação faz parte da linguagem na medida em que desejamos, quando falamos ou escrevemos, persuadir nosso interlocutor. Algumas palavras são responsáveis pela sinalização da argumentação: os operadores argumentativos (criada por O. Ducrot). • A expressão operadores argumentativos e seu objetivo, era de se ter uma designação para certos elementos da gramática de uma língua que têm por função indicar a força argumentativa dos enunciados e a direção para qual apontam. • Para explicar como funcionam esses operadores há duas noções a serem utilizadas: Escala Argumentativa e Classe Argumentativa. • Uma classe argumentativa é constituída de um conjunto de enunciados que podem igualmente servir de argumento para uma mesma conclusão, ou seja, um grupo de enunciados que, na mesma medida, poderiam defender uma determinada posição.
- 5. Mas em vez de classe argumentativa, teremos uma escala argumentativa. VEJA: O show de Madonna foi um sucesso. • arg. 1 - compareceram personalidades do mundo artístico. • arg. 2 – compareceram pessoas influentes nos meios políticos. • arg. 3 - compareceu o Presidente da República. (Argumento mais forte) O show de Madonna não teve sucesso. • não compareceram personalidades do mundo artístico. • não compareceram pessoas influentes nos meios políticos. • não compareceu o Presidente da República.
- 6. Operadores cuja função é assinalar o argumento mais forte de uma escala são: até, mesmo, até mesmo, inclusive. Ex: O show de Madonna foi um sucesso, Compareceram personalidades do mundo artístico, pessoas influentes nos meios políticos e até o Presidente da República.
- 7. Mais operadores: Operadores que introduzem um argumento de modo que deixa subentendida a existência de uma escala com outros argumentos mais fortes: ao menos, pelo menos, no mínimo. A professora novata era muito ambiciosa. Queria ser no mínimo a diretora da escola. O show de Madonna não teve sucesso: o Presidente não compareceu, nem pessoas influentes nos meios políticos e nem mesmo personalidades do mundo artístico.
- 8. Portanto, logo, por conseguinte, pois, em decorrência, dentre outros. O alías, é argumento diferente, pois apesar de parecer desnecessário ele dá uma espécie de gole final resumindo ou coroando os outros e, também, ainda, nem (=não), não só… mas também, tanto… como, além de…, além disso…, a par de… etc. Somam Argumentos1 Argumento Decisivo2 Conclusão Relativa3
- 9. COMPARAÇ ÃO: MAIS QUE, MENOS QUE, TÃO, COMO, ETC. CONCLUSÃ O: OU, OU ENTÃO, QUER, SEJA, ETC.
- 10. MARCADORES DE PRESSUPOSIÇÃO: São os elementos linguísticos que, quando presentes no enunciado, introduzem nele outros conteúdos semânticos, os quais só existem com a presença deles. A esses conteúdos adicionais, que ficam à margem da discussão, dá-se o nome de pressupostos. Aos elementos linguísticos que introduzem, chamamos, então, marcadores de pressuposição. Verbos que indicam mudança ou permanência de estado: ficar, começar a, passar a, deixar de, continuar, permanecer, tornar-se, dentre outros.
- 11. VERBOS FACTIVOS: que são aqueles complementados pela enunciação de um fato (fato que, no caso, é pressuposto), são verbos de estado psicológico. Ex: lamentar, lastimar, sentir, saber, etc.
- 12. Conectores circunstanciais Quando a oração por eles Introduzida vem anteposta: desde que, antes que, depois que, visto que, etc.
- 13. Subentendidos ou Inferências: A diretora da Fundação Cultural da cidade comprou um belíssimo colar de esmeraldas e brilhantes. Para inferir essa informação, é preciso que o interlocutor tenha um determinado conhecimento de mundo, para fazer essa inferência. Trata-se de uma pressuposição não marcada linguisticamente, a qual chamamos de subentendido.
- 15. Modalizadores: Determinam o modo como aquilo que se diz é dito, apresentam a construção do sentido do enunciado, a intenção do dito pelo modo que se diz. Os recursos usados comumente são advérbios e adjetivos. Ex: É possível que amanhã faça sol. Certamente o seu filho será aprovado.
- 17. Infelizmente não poderei comparecer a reunião amanhã. É com prazer que recebemos você nesta empresa. Francamente, esse seu vestido está muito curto. O candidato foi extremamente feliz na escolha do tema da prova oral.
- 19. Exemplos: 1. Se eu tivesse saído mais cedo de casa, não perderia o voo. No exemplo, o verbo está no pretérito imperfeito do subjuntivo. Se o subjuntivo expressa dúvida, incerteza, possibilidade, eventualidade, o verbo da outra frase deve necessariamente ser empregado no futuro do pretérito, uma vez que esse tempo expressa também uma afirmação condicionada, isto é, depende de algo, ao se referir a fatos que não se realizaram e que, provavelmente, não se realizarão.
- 20. Correlações entre os tempos verbais da Língua Portuguesa: presente do indicativo + presente do subjuntivo: Solicito que você compareça à sala do diretor imediatamente. Pretérito perfeito do indicativo + pretérito imperfeito do subjuntivo: Solicitei que você comparecesse à sala do diretor imediatamente. Futuro do subjuntivo + futuro do presente do indicativo: Se você comparecer à sala do diretor, ficarei bem mais tranquila.
- 21. Mundo Narrado: quando o falante narra o mundo, ele se utiliza dos elementos da linguagem que fazem a mensagem seja compreendida como um relato. Mundo Comentado:Todas as vezes que a manifestação linguística não constituir um relato, empregam-se os elementos do mundo comentado, os quais quando empregados, apontam que o locutor está em tensão. Atos locucionários: consiste na emissão de um conjunto de sons. Atos Ilocucionários: a ação é feita ao se dizer o que se diz: “Declaro aberta a sessão.” Perlocucionários: são destinados a exercerem efeitos sobre o interlocutor… assustar, persuadir, agradar…etc Proposição: é uma afirmação de que algo é verdadeiro ou falso. Usamos frases para exprimir proposições.
- 23. SÃO AS VOZES QUE SE ENCONTRAM NO TEXTO ALÉM DA DO AUTOR. PODEM EXPRESSAR CONCORDÂNCIA OU DISCORDÂNCIA E SEREM IMPLÍCITAS OU EXPLÍCITAS. A IRONIA TAMBÉM PODE INTRODUZIR PONTOS DE VISTA DISCORDANTES DO ENUNCIADO VERBAL. EX: Meu marido não é sem educação. Pelo contrário, trata a
Notas do Editor
- For reproduction steps for this slide, refer to slide number 8 in this template.
- Picture and text with reflection(Basic)To reproduce the picture effects on this slide, do the following:On the Home tab, in the Slides group, click Layout and then click Blank. On the Insert tab, in the Illustrations group, click Picture. In the Insert Picture dialog box, select a picture, and then click Insert. Under Picture Tools, on the Format tab, in the bottom right corner of the Size group, click the Size and Position dialog box launcher. In the Size and Position dialog box, on the Size tab, resize or crop the picture as needed so that under Size and rotate, the Height box is set to 3.17” and the Width box is set to 10”. Resize the picture under Size and rotate by entering values into the Height and Width boxes. Crop the picture under Crop from by entering values into the Left, Right, Top, and Bottom boxes. Select the picture. On the Home tab, in the Drawing group, click Arrange, point to Align, and then do the following:Click Align to Slide. Click Align Top.Under Picture Tools, on the Format tab, in the Picture Styles group, click Picture Effects, point to Reflections, and then under Reflection Variations click Half Reflection, touching (first row, second option from the left). On the Insert tab, in the Text group, click Text Box, and then on the slide, drag to draw the text box.Enter text in the text box, select the text, and then on the Home tab, in the Font group, select Impact from the Font list and then enter 42 in the Font Size box.On the Home tab, in the Paragraph group, click Align Text Right to align the text right in the text box.Select the text box. Under Drawing Tools, on the Format tab, in the WordArt Styles group, click Text Effects, point to Reflection, and then under Reflection Variations click Half Reflection, touching (first row, second option from the left). Under Drawing Tools, on the Format tab, in the bottom right corner of the WordArt Styles group, click the Format Text Effects dialog box launcher. In the Format Text Effects dialog box, click Text Fill in the left pane, select Solid fill in the Text Fill pane, and then do the following:Click the button next to Color, and then under Theme Colors, click White, Background 1 (first row, first option from the left). In the Transparency box, enter 12%.On the slide, drag the text box onto the picture to position as needed. To reproduce the background on this slide, do the following: Right-click the slide background area, and then click Format Background. In the Format Background dialog box, click Fill in the left pane, select Gradient fill in the Fill pane, and then do the following:In the Type list, select Radial.Click the button next to Direction, and then click From Center (third option from the left).In the Angle box, enter 0⁰.Under Gradient stops, click Add or Remove until two stops appear in the drop-down list.Also under Gradient stops, customize the gradient stops that you added as follows:Select Stop 1 from the list, and then do the following:In the Stop position box, enter 10%.Click the button next to Color, and then under Theme Colors click White, Background 1, Darker 5% (second row, first option from the left).Select Stop 2 from the list, and then do the following: In the Stop position box, enter 99%.Click the button next to Color, and then under Theme Colors click White, Background 1, Darker 35% (fifth row, first option from the left).
- Picture-filled text with reflection(Basic)To reproduce the text effects on this slide, do the following:On the Home tab, in theSlides group, click Layout, and then click Blank.On the Insert tab, in the Text group, click Text Box, and then on the slide, drag to draw the text box.Enter text in the text box, select the text, and then on the Home tab, in the Font group, select Franklin Gothic Heavy from the Font list, select 36 from the Font Size list, and then click Bold.On the Home tab, in the Paragraph group, click Center to center the text in the text box.On the Home tab, in the Font group, click Character Spacing, and then click More Spacing. In the Font dialog box, on the Character Spacingtab, in the Spacing list, select Expanded. In the By box, enter 2.Under Drawing Tools, on the Format tab, in the WordArt Styles group, click the arrow next toText Fill, and then click Picture. In the Insert Picture dialog box, select a picture and then click Insert. Under Drawing Tools, on the Format tab, in the WordArt Styles group, click Text Effects, point to Reflection, and then under Reflection Variations select Tight Reflection, touching (first row, first option from the left). Under Drawing Tools, on the Format tab, in the WordArt Styles group, click Text Effects, point to Bevel, and then under Bevel click Angle (second row, first option from the left). To reproduce the background on this slide, do the following:Right-click the slide background area, then click Format Background. In the Format Background dialog box, click Fill in the left pane, select Gradient fill in the right pane, and then do the following:In the Type list, select Linear.Click the button next to Direction, and then clickLinear Down (first row, second option from the left).In the Angle box, enter 90%. Under Gradient stops, click Add or Remove until three stops appear in the drop-down list.Also under Gradient stops, customize the gradient stops that you added as follows:Select Stop 1 from the list, and then do the following:In the Stop position box, enter64%.Click the button next to Color, and thenunder Theme Colorsclick Black, Text 1, Lighter 5% (sixth row, second option from the left).Select Stop 2 from the list, and then do the following:In the Stop position box, enter65%.Click the button next to Color, and then under Theme Colorsclick Black, Text 1, Lighter 5% (sixth row, second option from the left).Select Stop 3 from the list, and then do the following:In the Stop position box, enter100%. Click the button next to Color, and then under Theme Colors click Black, Text 1, Lighter 25% (fourth row, second option from the left).
- Quote in perspective (Basic)To reproduce the effects on this slide, do the following:On the Home tab, in theSlides group, click Layout, and then click Blank.On the Insert tab, in the Text group, click Text Box, and then on the slide, drag to draw the text box.Enter text in the text box, select the text, and then on the Home tab, in the Font group, select Georgiafrom the Font list, enter 27 in the Font Size box, and then click Italic.On the Home tab, in the Paragraph group, click Align Text Left to align the text left in the text box.Select the text box. Under Drawing Tools, on the Format tab, in the WordArt Styles group, click the arrow next to Text Fill, and then under Theme Colors click White, Background 1 (first row, first option from the left). Under Drawing Tools, on the Format tab, in the WordArt Styles group, click Text Effects, point to 3-D Rotation, and then under Perspective, click Perspective Relaxed Moderately (second row, second option from the left).Under Drawing Tools, on the Format tab, in the WordArt Styles group, click Text Effects, point to 3-D Rotation, and then click 3-D Rotation Options. In the Format Text Effects dialog box, click 3-D Rotation in the left pane, and then do the following in the right pane:In the Y box, enter 324.8°.In the Perspective box, enter 80°.To reproduce the background on this slide, do the following:Right-click the slide background area, and then clickFormat Background.In the Format Background dialog box, click Fill in the left pane, and then in the right pane click Picture or texture fill.Under Insert from, click File. In the Insert Picture dialog box, select a picture and then click Insert.
- Custom animation effects: horizontal scrolling text(Basic)To reproduce the text effects on this slide, do the following:On the Home tab, in theSlides group, click Layout, and then click Blank.On the Insert tab, in the Text group, click Text Box, and then on the slide, drag to draw the text box. Enter text in the text box. (Note: You may want to add a bullet point at the end of your text, as in the example above. On the Insert tab, in the Text group, click Symbol. In the Symbol dialog box, in the Font list, select (normal text).In the Subset list, select General Punctuation.In the Character Code box, enter 2022 to select BULLET, and then click Insert.)Select the text. On the Home tab, in the Font group, do the following:In the Font list, select Gill Sans MT.In the Font Size list, select 36.Click Bold.Click the arrow next to FontColor, and then under Theme Colors click White, Background 1 (first row, first option from the left).On the Home tab, in the Paragraph group, click Align Text Left to align the text left in the text box. (Note: If the text wraps to more than one line, drag the adjustment handles on the text box to widen it until the text fits on one line.)Drag the text box to the left of the lower left edge of the slide. (Note: To see beyond the edges of the slide, on the View tab, click Zoom, and then in the Zoom dialog box, in the Percent box, enter 40%.) To reproduce the animation effects on this slide, do the following:On the Animations tab, in the Animations group, click Custom Animation.On the slide, select the text box. In the CustomAnimation task pane, do the following:Click AddEffect, point to Entrance, and then click More Effects.In the Add Entrance Effect dialog box, under Basic, click Fly In. Select the animation effect (fly-in effect for the text box). Click the arrow to the right of the select effect, and then click Effect Options. In the Fly In dialog box, do the following:On the Effect tab, in the Direction list, select From Right.On the Timing tab, do the following:In theStart list, selectWith Previous.In the Speed box, enter 16 seconds.In the Repeat list, select Until End of Slide.On the slide, select the text box. On the Home tab, in the Clipboard group, click the arrow under Paste, and then click Duplicate.In the CustomAnimation task pane, select the second animation effect (fly-in effect for the second text box). Click the arrow to the right of the selected effect, and then click Timing. In the Fly In dialog box, on the Timing tab, in the Delay box, enter 8. (Note: You may need to adjust the delay time if the length of your text is different than the example above.)On the slide, drag the second text box on top of the first text box. On the Home tab, in the Editing group, click Select, and then click Selection Pane. In the Selection and Visibility pane, press and hold CTRL, and then select both text boxes. On the Home tab, in the Drawing group, click Arrange, point to Align, and then do the following:Click Align Selected Objects.Click Align Middle.Click Align Center.To reproduce the background effects on this slide, do the following: Right-click the slide background area, and then click Format Background. In the Format Background dialog box, click Fill in the left pane, and then select Picture or texture fill in the Fill pane. Under Insert from, click File. In the Insert Picture dialog box,select a picture, and then click Insert.On the Home tab, in the Drawing group, click Shapes, and then under Rectangles click Rectangle (first option from the left). On the slide, drag to draw a rectangle.Select the rectangle. Under Drawing Tools, on the Format tab, in the Size group, do the following:In the Shape Height box, enter 7.5”.In the Shape Width box, enter 1”.Under Drawing Tools, on the Format tab, in the Shape Styles group, click the arrow next to ShapeOutline, and then click No Outline.On the Home Tab, in the Drawing group, click the arrow next to Shape Fill, point to Gradient, and then click More Gradients. In the Format Shape dialog box, click Fill in the left pane, select Gradient fill in the Fill pane, and then do the following:In the Type list, select Linear.Click the button next to Direction, and then click Linear Right (first row, fourth option from the left).Under Gradient stops, click Add or Remove until two stops appear in the drop-down list.Also under Gradient stops, customize the gradient stops that you added as follows:Select Stop 1 from the list, and then do the following:In the Stop position box, enter 0%.Click the button next to Color, and then under Theme Colors click Black, Text 1 (first row, second option from the left).In the Transparency box, enter 0%.Select Stop 2 from the list, and then do the following: In the Stop position box, enter 100%.Click the button next to Color, and then under Theme Colors click Black, Text 1, (first row, second option from the left). In the Transparency box, enter 100%.On the slide, select the rectangle. On the Home tab, in the Drawing group, click Arrange, point to Align, and then do the following:Click Align to Slide.Click Align Left.Click Align Middle.Select the rectangle. On the Home tab, in the Clipboard group, click the arrow under Paste, and then click Duplicate.Select the duplicate rectangle. On the Home Tab, in the Drawing group, click the arrow next to Shape Fill, point to Gradient, and then click Linear Left (second row, third option from the left).With the duplicate rectangle still selected, on the Home tab, in the Drawing group, click Arrange, point to Align, and then do the following:Click Align to Slide.Click Align Right.Click Align Middle.
- Custom animation effects: descending text levels(Basic)To reproduce the rectangleon this slide, do the following:On the Home tab, in theSlides group, click Layout, and then click Blank.On the Home tab, in the Drawing group, click Shapes, and then under Rectangle click Rounded Rectangle (second option from the left). On the slide, drag to draw a rectangle.Select the rectangle. Under Drawing Tools, on the Format tab, in the Size group, do the following:In the Shape Height box, enter 3.08”. In the Shape Width box, enter 4.33”.Under Drawing Tools, on the Format tab, in the Shapes Styles group, click the arrow next to Shape Outline, and then click No Outline.Under DrawingTools, on the Format tab, in the bottom right corner in the Shapes Styles group, click the Format Shape dialog box launcher. In the Format Shape dialog box, click Fill in the left pane, select Gradient fill in the Fill pane, and then do the following:In the Type list, select Linear.Click the button next to Direction, and then click Linear Down (first row, second option from the left).Under Gradient stops, click Add or Remove until two stops appear in the drop-down list.Also under Gradient stops, customize the gradient stops that you added as follows:Select Stop 1 from the list, and then do the following:In the Stop position box, enter 0%.Click the button next to Color, and then under Theme Colors click White, Background 1 (first row, first option from the left).In the Transparency box, enter 25%.Select Stop 2 from the list, and then do the following: In the Stop position box, enter 20%.Click the button next to Color, and then under Theme Colors click White, Background 1 (first row, first option from the left).In the Transparency box, enter 69%.Also in the Format Shape dialog box, click Shadow in the left pane. In the Shadow pane, click the button next to Presets, under Outer click Offset Diagonal Bottom Left (first row, third option from the left), and then do the following:In the Transparency box, enter 72%.In the Size box, enter 100%.In the Blur box, enter 11.81 pt.In the Angle box, enter 141°.In the Distance box, enter 19.7 pt. Also in the Format Shape dialog box,click 3-D Format in the left pane, and then do the following in the 3-D Format pane:Under Bevel, click the button next to Top, and then under Bevel click Circle (first row, first option from the left). Next to Top, in the Width box, enter 7 pt, in the Height box, enter 7 pt.Under Surface, click the button next to Material, and then under Standard clickMetal (fourth option from the left). Click the button next to Lighting, and then under Neutral click Contrasting (second row, second option from the left). In the Angle box, enter 75°.On the slide, drag the rectangle into the bottom right corner. To reproduce the rectangle animation effects on this slide, do the following:On the Animations tab, in the Animations group, click Custom Animation.On the slide, select the rectangle. In the CustomAnimation task pane, do the following:Click AddEffect, point to Entrance,and then click More Effects. In the Add Entrance Effect dialog box, under Moderate,click Ascend. Select the animation effect (ascend effect for the rectangle). Under Modify: Ascend,do the following:In theStart list, selectWith Previous. In theSpeed list, selectMedium. To reproduce the text effects on this slide, do the following:On the Insert tab, in the Text group, click Text Box, and then on the slide, drag to draw the text box. Enter three lines of text with paragraph breaks in the text box. Select the text, and then on the Home tab, in the Font group, do the following:In the Font list, select Candara.In the Font Size list, select 28. Click the arrow next to Font Color,and then under Theme Colors click Aqua, Accent 5; Darker 50% (sixth row, ninth option from the left). On the Home tab, in the Paragraph group, click Align TextLeft to position the text left in the text box.On the slide, drag the text box onto the rectangle. To reproduce the text animation effects on this slide, do the following:On the Animations tab, in the Animations group, click Custom Animation.On the slide, select the text box. In the CustomAnimation task pane, do the following:Click AddEffect, point to Entrance,and then click More Effects. In the Add Entrance Effect dialog box, under Moderate,click Descend. Select the second animation effect (descend effect for the text box). Click the arrow to the right of the selected effect, and then click Effect Options. In the Descend dialog box, do the following:On the Timing tab, do the following:In theStart box, selectWith Previous. In theSpeed box, select1 seconds (Fast). On the Text Animation tab, in the Group text list, select By 1st Level Paragraphs.Also in the Custom Animation task pane, click the double arrow under the second animation effect to expand the list of effects, and then do the following:Select the new second animation effect in the list (descend effect for the first line of text). Click the arrow to the right of the selected effect, and then click Timing. In the Descend dialog box, on the Timing tab, in the Delay box, enter 1.Select the third animation effect (descend effect for the second line of text). Click the arrow to the right of the selected effect, and then click Timing. In the Descend dialog box, on the Timing tab, do the following:In the Start list select WithPrevious.In the Delay box, enter 1.5.Select the fourth animation effect (descend effect for the second line of text). Click the arrow to the right of the selected effect, and then click Timing. In the Descend dialog box, on the Timing tab, do the following:In the Start list select WithPrevious.In the Delay box, enter 2.To reproduce the background effects on this slide, do the following: On the Design tab, in the bottom right corner of the Background group, click the Format Background dialog box launcher.In the Format Background dialog box, click Fill in the left pane, select Picture or texture fill in the Fill pane, and then under Insert from click File.In the Insert Picture dialog box, select a picture, and then click Insert.
- Custom animation effects: line sweeps in picture and text(Basic)To reproduce the shape effects on this slide, do the following:On the Home tab, in theSlides group, click Layout, and then click Blank.On the Home tab, in the Drawing group, click Shapes, and then under Lines click Line (first option from the left).On the slide, press and hold SHIFT, and then drag to draw a straight, vertical line.Select the line. Under DrawingTools, on the Format tab, in the Size group, in the Shape Width box, enter 7.5”.Under DrawingTools, on the Format tab, in the ShapeStyles group, click the Format Shape dialog box launcher. In the Format Shape dialog box, click LineColor in the left pane. In the LineColor pane, select Solidline, click the button next to Color, and then under ThemeColors click Black, Text 1 (first row, second option from the left).Also in the Format Shape dialog box, click LineStyle in the left pane. In the LineStyle pane, in the Weight box, enter 2 pt.Under DrawingTools, on the Format tab, in the ShapeStyles group, click ShapeEffects, point to Glow, and then under GlowVariations click Accent color 1, 5 pt glow (first row, first option from the left). Under DrawingTools, on the Format tab, in the ShapeStyles group, click ShapeEffects, point to Glow, point to MoreGlowColors, and then under ThemeColors click White, Background 1 (first row, first option from the left).On the Home tab, in the Drawing group, click Arrange, point to Align, and then do the following:Click Align to Slide.Click AlignCenter.Click AlignMiddle.On the slide, select the line. On the Home tab, in the Clipboard group, click the arrow under Paste, and then click Duplicate.Drag the duplicate line slightly off the right edge of the slide.With the duplicate line still selected, on the Home tab, in the Drawing group, click Arrange, point to Align, and then do the following: Click Align to Slide. Click Align Middle.On the Insert tab, in the Illustrations group, click Picture. In the InsertPicture dialog box, select a picture, and then click Insert.On the slide, select the picture. Under Picture Tools, on the Format tab, in the bottom right corner of the Size group, click the Size and Position dialog box launcher. In the Size and Position dialog box, on the Size tab, resize or crop the picture as needed so that under Size and rotate, the Height box is set to 7.5” and the Width box is set to 5”. Resize the picture under Size and rotate by entering values into the Height and Width boxes. Crop the picture under Crop from by entering values into the Left, Right, Top, and Bottom boxes. On the Home tab, in the Drawing group, click Arrange, point to Align, and then do the following:Click Align to Slide.ClickAlignRight.ClickAlignMiddle.To reproduce the text effects on this slide, do the following:On the Insert tab, in the Illustrations group, click TextBox. On the slide, drag to draw a text box.Enter text in the text box, and then select the text. On the Home tab, in the Font group, do the following:In the Font list, select Arial.In the FontSize list, select 28.Click Bold.Click the button next to FontColor, and then under ThemeColors click White, Background 1 (first row, first option from the left).On the Home tab, in the Paragraph group, click AlignTextRight to align the text right in the text box. Drag the text box onto the left half of the slide.To reproduce the background effects on this slide, do the following:Right-click the slide background area, and then click Format Background. In the Format Background dialog box, click Fill in the left pane, select Gradient fill in the Fill pane, and then do the following:In the Type list, select Linear.Click the button next to Direction, and then click Linear Down (first row, second option from the left).Under Gradient stops, click Add or Remove until two stops appear in the drop-down list.Also under Gradient stops, customize the gradient stops that you added as follows:Select Stop 1 from the list, and then do the following:In the Stop position box, enter 40%.Click the button next to Color, and then click Black, Text 1 (first row, second option from the left).Select Stop 2 from the list, and then do the following: In the Stop position box, enter 100%.Click the button next to Color, and then click Black, Text 1, Lighter 50% (second row, second option from the left).To reproduce the animation effects on this slide, do the following:On the Animations tab, in the Animations group, click CustomAnimation. Select the line off the right edge of the slide. In the CustomAnimation task pane, do the following:Click AddEffect, point to Entrance, and then click MoreEffects. In the AddEntranceEffect dialog box, under Basic, click FlyIn.Select the animation effect (fly-in effect for the second line). Under Modify: Fly In,do the following:In the Start list, select After Previous.In the Direction list, select FromLeft.In the Speed list, select Fast.On the Home tab, in the Editing group, click Select, and then click Selection Pane.In the Selection and Visibility pane, select the first line you created (in the middle of the slide). In the CustomAnimation task pane, do the following:Click AddEffect, point to Entrance, and then click MoreEffects. In the AddEntranceEffect dialog box, under Basic, click FlyIn.Select the second animation effect (fly-in effect for the first line). Under Modify: Fly In,do the following:In the Start list, select AfterPrevious.In the Direction list, select FromRight.In the Speed list, select Fast.On the slide, select the picture. In the CustomAnimation task pane, do the following:Click AddEffect, point to Entrance, and then click MoreEffects. In the AddEntranceEffect dialog box, under Basic, click Wipe.Select the third animation effect (wipe effect for the picture). Under Modify: Wipe,do the following:In the Start list, select WithPrevious.In the Direction list, select FromRight.In the Speed list, select Fast.On the slide, select the text box. In the CustomAnimation task pane, do the following:Click AddEffect, point to Entrance, and then click MoreEffects. In the AddEntranceEffect dialog box, under Basic, clickFlyIn.Select the fourth animation effect (fly-in effect for the text box). Under Modify: Fly In,do the following:In the Start list, select WithPrevious.In the Direction list, select FromRight.In the Speed list, select Fast.
- Picture with three text columns(Intermediate)To reproduce the picture effects on this slide, do the following:On the Home tab, in theSlides group, click Layout, and then click Blank.On the Insert tab, in the Illustrations group, click Picture. In the Insert Picture dialog box, select a picture and then click Insert. Select the picture. Under Picture Tools, on the Format tab, in the bottom right corner of the Size group, click the Size and Position dialog box launcher.In the Size and Position dialog box, on the Size tab, resize or crop the picture as needed so that under Size and rotate, the Height box is set to 1.48” and the Width box is set to 9.17”. Resize the picture under Size and rotate by entering values into the Height and Width boxes. Crop the picture under Crop from by entering values into the Left, Right, Top, and Bottom boxes. On the Home tab, in the bottom right corner of the Drawing group, click the Format Shape dialog box launcher. In the Format Shape dialog box, click Line Color in the left pane, select Gradient line in the right pane, and then do the following:In the Type list, select Linear. Click the button next to Direction, and then click Linear Up (second row, second option from the left). Under Gradient stops, click Add or Remove until two stops appear in the drop-down list.Also under Gradient stops, customize the gradient stops that you added as follows:Select Stop 1 from the list, and then do the following:In the Stop position box, enter0%.Click the button next to Color, and then under Theme Colorsclick White, Background 1(first row, first option from the left).Select Stop 2 from the list, and then do the following:In the Stop position box, enter100%.Click the button next to Color, and then under Theme Colorsclick White, Background 1, Darker 25%(fourth row, first option from the left).Also in the Format Shape dialog box, click Line Style in the left pane, and then in the right pane, in the Width box, enter 1 pt. On the Home tab, in the Drawing group, click Shape Effects, point to Glow,and then do the following:Under Glow Variations,select any option in the first row (5 pt glow options).Point to More Glow Colors, and then under Theme Colors click White, Background 1, Darker 25% (fourth row, first option from the left).On the Home tab, in theDrawing group, click Arrange, point to Align, and then click Align Center.To reproduce the first column heading on this slide, do the following:On the Home tab, in the Drawing group, click Shapes, and then under Rectangles, click Rectangle (first option from the left). On the slide, drag to draw a rectangle.Under Drawing Tools, on the Format tab, in the Size group, do the following:In the Shape Height box, enter 1”.In the Shape Width box, enter 2.92”.On the Home tab, in the bottom right corner of the Drawing group, click the Format Shape dialog box launcher. In the Format Shape dialog box, click Fill in the left pane, select Gradient fill in the right pane, and then do the following:In the Type list, select Linear.Click the button next to Direction, and then click Linear Down (first row, second option from the left).Under Gradient stops, click Add or Remove until two stops appear in the drop-down list.Also under Gradient stops, customize the gradient stops that you added as follows:Select Stop 1 from the list, and then do the following:In the Stop position box, enter32%.Click the button next to Color, and then under Theme Colorsclick Tan, Background 2 (first row, third option from the left).Select Stop 2 from the list, and then do the following:In the Stop position box, enter100%.Click the button next to Color, and then under Theme Colorsclick Tan, Background 2, Darker 25%(third row, third option from the left).Also in the Format Shape dialog box, click Line Color in the left pane, select Gradient line in the Line Color pane, and then do the following:In the Type list, select Linear.Click the button next to Direction, and then click Linear Up (second row, second option from the left).Under Gradient stops, click Add or Remove until two stops appear in the drop-down list.Also under Gradient stops, customize the gradient stops that you added as follows:Select Stop 1 from the list, and then do the following:In the Stop position box, enter0%.Click the button next to Color, and then under Theme Colorsclick White, Background 1 (first row, first option from the left).Select Stop 2 from the list, and then do the following:In the Stop position box, enter100%.Click the button next to Color, and then under Theme Colorsclick White, Background 1, Darker 25% (fourth row, first option from the left).Also in the Format Shape dialog box, click Line Style in the left pane. In the right pane, in the Width box, enter 1 pt. On the Home tab, in the Drawing group, click Shape Effects, point to Glow, and then do the following:Under Glow Variations,select any option in the first row (5 pt glow options).Point to More Glow Colors, and then under Theme Colors click White, Background 1, Darker 25% (fourth row, first option from the left).On the slide, right-click the rectangle and then click Edit Text. Enter text in the text box and select the text. On the Home tab, in the Font group, select Gill Sans MTfrom the Font list and then select 24 from the Font Size list.On the Home tab, in the Paragraph group, click Align Text Left to align the text left within the text box.Under Drawing Tools, on the Format tab, in the WordArt Styles group, click the arrow next toText Fill, and then under Theme Colors click Tan, Background 2, Darker 75% (fifth row, third option from the left). On the Home tab, in the bottom-right corner of the Drawing group, click the Format Shapes dialog box launcher. In the Format Shapes dialog box, click Text Box in the left pane. In the right pane, under Internal margin, enter 1” in the Left box to increase the left margin in the rectangle to accommodate the embossed number. On the Home tab, in the Drawing group, click Shapes, and then under Lines, click Line (first option from the left).Press and hold SHIFT, and then on the slide, drag to draw a straight, vertical line. Under Drawing Tools, on the Format tab, in the Size group, in the Width box, enter 0.75”.On the Home tab, in the bottom-right corner of the Drawing group, click the Format Shapes dialog box launcher. In the Format Shapes dialog box, click Line Style in the left pane, and then do the following in the right pane:In the Width box, enter 2.25 pt.Click the button next to Dash type, and then click Round Dot (second option from the top). Also in the Format Shapes dialog box, click Line Color in the left pane. In the right pane, click the button next to Color, and then under Theme Colors click White, Background 1 (first row, first option from the left). On the slide, drag the line onto the rectangle, just left of the text box. On the Insert tab, in the Text box, click Text Box and then on the slide, drag to draw another text box. Enter 1 in the text box and select the text. On the Home tab, in the Font group, select Calisto MT from the Font list and then enter 50 in the Font Size box.On the Home tab, in the Paragraph group, click Center to center the text within the text box.Under Drawing Tools, on the Format tab, in the WordArt Styles group, click the arrow next toText Fill, and then under Theme Colors click Tan, Background 2, Darker 25% (third row, third option from the left). Drag the text box onto the rectangle, left of the dotted vertical line. On the Home tab, in the Editing group, click Select, and then click Selection Pane. In the Selectionand Visibility pane, press and hold CTRL to select the text box, line, and rectangle.On the Home tab, in the Drawing group, click Arrange, point to Align, and then click Align Middle. To reproduce the other column headings on this slide, do the following:On the Home tab, in the Editing group, click Select, and then click Selection Pane. In the Selectionand Visibility pane, press and hold CTRL to select the text box, line, and rectangle.On the Home tab, in the Drawing group, click Arrange, and then under Group Objects click Group.On the Home tab, in the Clipboard group, click the arrow under Paste, and then click Duplicate. Repeat the process until you have a total of three groups of shapes.Select each group in the Selection and Visibility pane and drag it on the slide to form a row under the picture. Also in the Selection and Visibility pane, press and hold CTRL and select all three groups.On the Home tab, in the Drawing group, click Arrange, point to Align,and then do the following:Click Align Middle. ClickDistribute Horizontally. To change the numbers in the duplicate text boxes (second and third from the left), click in each text box and edit the text. To reproduce the first column (the “subtext” portion) on this slide, do the following:On the Home tab, in the Drawing group, click Shapes, and then under Rectangles click Rectangle (first option from the left). On the slide, drag to draw the rectangle so that the top edge is just below the first column heading and the bottom edge is at the bottom of the slide. Under Drawing Tools, on the Format tab, in the Size group, in the Shape Width box, enter 2.92” so that the subtext column is the same width as the column heading above it. On the Home tab, in the Drawing group, click the arrow next toShape Outline, and then click No Outline.On the Home tab, in the bottom right corner of the Drawing group, click the Format Shape dialog box launcher. In the Format Shape dialog box, click Fill in the left pane, select Gradient fill in the right pane, and then do the following:In the Type list, select Linear.Click the button next to Direction, and then click Linear Down (first row, second option from the left).Under Gradient stops, click Add or Remove until three stops appear in the drop-down list.Also under Gradient stops, customize the gradient stops that you added as follows:Select Stop 1 from the list, and then do the following:In the Stop position box, enter0%.Click the button next to Color, and then under Theme Colorsclick White, Background 1 (first row, first option from the left).In the Transparency box, enter 100%. Select Stop 2 from the list, and then do the following:In the Stop position box, enter50%.Click the button next to Color, and then under Theme Colorsclick Tan, Background 2, Darker 25%(third row, third option from the left).In the Transparency box, enter 25%. Select Stop 3 from the list, and then do the following:In the Stop position box, enter100%.Click the button next to Color, and then under Theme Colorsclick White, Background 1(first row, first option from the left).In the Transparency box, enter 100%. On the slide, right-click the column and then click Edit Text. Enter text in the text box and select the text. On the Home tab, in the Font group, select Gill Sans MTfrom the Font list and then enter 22 in the Font Size box.On the Home tab, in the Paragraph group, click Center to center the text within the rectangle.Under Drawing Tools, on the Format tab, in the WordArt Styles group, click the arrow next toText Fill, and then under Theme Colors click White, Background 1, Darker 50% (sixth row, first option from the left). On the Home tab, in the bottom-right corner of the Drawing group, click the Format Shapes dialog box launcher. In the Format Shapes dialog box, click Text Box in the left pane. In the right pane, under Text layout, in the Vertical Alignment list, select Top. To reproduce the other columns (the “subtext” portion) on this slide, do the following:Select the first “subtext” rectangle. On the Home tab, in the Clipboard group, click the arrow under Paste, and then click Duplicate. Repeat the process until you have a total of three “subtext” rectangles.Drag each duplicate on the slide to form a row under the “text heading” rectangles. Press and hold SHIFT and select all three “subtext” rectangles. On the Home tab, in the Drawing group, click Arrange, point to Align, and then click Distribute Horizontally. To reproduce the background on this slide, do the following:Right-click the slide background area, and then clickFormat Background.In the Format Background dialog box, click Fill in the left pane, select Gradient fill in the right pane, and then do the following:In the Type list, select Radial.Click the button next to Direction, and then click From Center (third option from the left).Under Gradient stops, click Add or Remove until two stops appear in the drop-down list.Also under Gradient stops, customize the gradient stops that you added as follows:Select Stop 1 from the list, and then do the following:In the Stop position box, enter0%.Click the button next to Color, and then under Theme Colorsclick White, Background 1 (first row, first option from the left).Select Stop 2 from the list, and then do the following:In the Stop position box, enter100%.Click the button next to Color, and then under Theme Colorsclick Tan, Background 2(first row, third option from the left).
- Frames with faded pictures and text(Intermediate)To reproduce the picture effects on this slide, do the following:On the Home tab, in theSlides group, click Layout, and then click Blank.On the Insert tab, in the Illustrations group, click Picture. In the Insert Picture dialog box, select a picture and then click Insert. Select the picture. Under Picture Tools, on the Format tab, in the bottom right corner of the Size group, click the Size and Position dialog box launcher.In the Size and Position dialog box, on the Size tab, resize or crop the picture as needed so that under Size and rotate, the Height box is set to 3” and the Width box is set to 3”. Resize the picture under Size and rotate by entering values into the Height and Width boxes. Crop the picture under Crop from by entering values into the Left, Right, Top, and Bottom boxes. Repeat steps 2-4 to insert, resize, and crop another picture so that in the Size and Position dialog box, on the Size tab, under Size and rotate, the Height box is set to 3” and the Width box is set to 3”. Press and hold SHIFT and select both pictures. On the Home tab, in the bottom right corner of the Drawing group, click the Format Shape dialog box launcher. In the Format Picture dialog box, click Picture in the left pane, and then do the following in the right pane:Click the button next to Recolor, and then under Color Modes click Grayscale (first option from the left). In the Brightness box, enter 55%.In the Contrast box, enter -70%. Select both pictures. On the Home tab, in the Clipboard group, click the arrow under Paste, and then click Duplicate. Select the two duplicate pictures. Under Picture Tools, on the Format tab, in the Picture Styles group, click Picture Shape, and then under Basic Shapes click Frame (second row, fourth option from the left). On the slide, select one frame and drag the yellow diamond adjustment handle to increase or decrease frame width. Repeat this step on the other frame.Press and hold SHIFT and select both frames. On the Home tab, in the bottom right corner of the Drawing group, click the Format Shape dialog box launcher. In the Format Picture dialog box, click Picture in the left pane. In the right pane, click the button next to Recolor, and then under No Recolor,click No Recolor. Also in the Format Shape dialog box, click 3-D Formatin the left pane, and then do the following in the right pane under Bevel:Click the button next to Top, and then under Bevel click Circle (first row, first option from the left).Next to Top, in the Width box, enter 6 pt. Next to Top, in the Height box, enter 6 pt. Also in the Format Shape dialog box, click Shadow in the left pane, and then do the following in the right pane:Click the button next to Presets, and then under Outer click Offset Bottom (first row, second option from the left).In the Blur box, enter 30 pt. In the Distance box, enter 18 pt. Press and hold SHIFT and select one of the frames and the corresponding grayscale picture. On the Home tab, in the Drawing group, click Arrange, and then do the following to position the frame directly on top of the grayscale picture:Point to Align, and then click Align Selected Objects.Point to Align, and then click Align Center.Point to Align, and then clickAlign Middle. Click Group. Repeat step 14 with the other frame and corresponding grayscale picture. Select each group and drag them so they are next to each other at the desired position on the slide.Press and hold SHIFT and select both groups. On the Home tab, in the Drawing group, click Arrange, point to Align, and then click Align Middle. To reproduce the text effects on this slide, do the following:On the Insert tab, in the Text group, click Text Box, and then on the slide, drag to draw the text box.Enter text in the text box, select the text, and then on the Home tab, in the Font group, select Franklin Gothic Medium Condfrom the Font list and then enter 30 in the Font Size box.On the Home tab, in the Paragraph group, click Center to center the text on the slide.Under Drawing Tools, on the Format tab, in the WordArt Styles group, click the arrow next toText Fill, and then under Theme Colors click White, Background 1, Darker 50% (sixth row, first option from the left).On the slide, drag the text box to position it inside one of the frames.Repeat steps 1-5 to createtext for the other frame. To reproduce the horizontal line effects on this slide, do the following:On the Home tab, in the Drawing group, click Shapes, and then under Lines click Line (first option from the left).Press and hold SHIFT, and then on the slide, drag to draw a straight, horizontal line. Select the line. Under Drawing Tools, on the Format tab, in the Size group, in the Shape Width box, enter 10”.On the Home tab, in the bottom right corner of the Drawing group, click the Format Shape dialog box launcher. In the Format Shape dialog box, click Line Color in the left pane, and then do the following in the right pane:Select Solid line.Click the button next to Color, and then under Theme Colors click White, Background 1, Darker 35% (fifth row, first option from the left).Also in the Format Shape dialog box, click Line Style in the left pane, and then in the right pane, in the Width box, enter 0.75 pt.On the Home tab, in the Clipboard group, click the arrow under Paste, and then click Duplicate. Press and hold SHIFT and select both lines on the slide.On the Home tab, in the Drawing group, click Arrange, and then click Send to Back. Drag both lines so that they are positioned behind the pictures and frames. On the Home tab, in the Drawing group, click Arrange, point to Align,and then do the following:Click Align to Slide.Click Align Center.To reproduce the background on this slide, do the following:On the Design tab, in the Background group, click the arrow next to BackgroundStyles, and click Style 5 (second row, first option from the left). (Note: If this action is taken in a PowerPoint presentation containing more than one slide, the background style will be applied to all of the slides.)
- Tinted pictures in shapes(Intermediate)To reproduce the first shape effect from the left on this slide, do the following:On the Home tab, in theSlides group, click Layout, and then click Blank.On the Insert tab, in the Illustrations group, click Picture. In the Insert Picture dialog box, select a picture and then click Insert. Select the picture. Under Picture Tools, on the Format tab, in the bottom right corner of the Size group, click the Size and Position dialog box launcher.In the Size and Position dialog box, on the Size tab, resize or crop the picture as needed so that under Size and rotate, the Height box is set to 2.75” and the Width box is set to 2.92”. Resize the picture under Size and rotate by entering values into the Height and Width boxes. Crop the picture under Crop from by entering values into the Left, Right, Top, and Bottom boxes. Under Picture Tools, on the Format tab, in the Picture Styles group, click Picture Shape, and then under Rectangles click Round Diagonal Corner Rectangle (ninth option from the left).Under Picture Tools, on the Format tab, in the Picture Styles group, click Picture Effects, point to Shadow, and then under Inner click Inside Diagonal Top Left (first row, first option from the left). Under Picture Tools, on the Format tab, in the Picture Styles group, click Picture Effects, point to Glow, and then under GlowVariations, click Accent color 1, 8 pt glow (second row, first option from the left).Under Picture Tools, on the Format tab, in the Picture Styles group, click Picture Effects, point to Glow, point to More Glow Colors, and then under Theme Colors click White, Background 1 (first row, first option from the left). Under Picture Tools, on the Format tab, in theAdjust group, click Recolor, and then under Light Variations select Accent color 5 Light (sixth option from the left). Select the rectangle. Drag the left yellow diamond adjustment handle to the top left corner, to remove the rounding on the top left and bottom right corners. Drag the right yellow diamond adjustment handle slightly to the left, to round the top right and bottom left corners. To reproduce the middle shape effect from the left on this slide, do the following:On the Insert tab, in the Illustrations group, click Picture. In the Insert Picture dialog box, select a picture and then click Insert. Select the picture. Under Picture Tools, on the Format tab, in the bottom right corner of the Size group, click the Size and Position dialog box launcher.In the Size and Position dialog box, on the Size tab, resize or crop the picture as needed so that under Size and rotate, the Height box is set to 2.75” and the Width box is set to 4.32”. Resize the picture under Size and rotate by entering values into the Height and Width boxes. Crop the picture under Crop from by entering values into the Left, Right, Top, and Bottom boxes. Under Picture Tools, on the Format tab, in the Picture Styles group, click Picture Shape, and then under Rectangles click Round Diagonal Corner Rectangle (ninth option from the left).Under Picture Tools, on the Format tab, in the Picture Styles group, click Picture Effects, point to Shadow, and then under Inner click Inside Diagonal Top Left (first row, first option from the left). Under Picture Tools, on the Format tab, in the Picture Styles group, click Picture Effects, point to Glow, and then under GlowVariations, click Accent color 1, 8pt glow (second row, first option from the left).Under Picture Tools, on the Format tab, in the Picture Styles group, click Picture Effects, point to Glow, point to More Glow Colors, and then under Theme Colors click White, Background 1 (first row, first option from the left). Under Picture Tools, on the Format tab, in theAdjust group, click Recolor, and then under Light Variations select Accent color 1 Light (second option from the left).Select the rectangle. Drag the left yellow diamond adjustment handle slightly to the left, to decrease rounding on the top left and bottom right corners. Drag the rectangle on the slide to position it to the right of the first rectangle. To reproduce the third shape effect from the left on this slide, do the following:On the Home tab, in the Drawing group, click Shapes, and then under Rectangles, click Rounded Diagonal Corner Rectangle (ninth option from the left). On the slide, drag to draw a rounded rectangle.Select the rectangle. Under Drawing Tools, on the Format tab, in the Size group, do the following:In the Shape Height box, enter 2.75”.In the Shape Width box, enter 2.25”. Drag the rectangle on the slide to position it to the right of the second picture-filled rectangle. On the Home tab, in the Drawing group, click the Format Shape dialog box launcher. In the Format Shape dialog box, click Fill in the left pane, click Solid fill in the right pane, and then do the following:Click the button next to Color, and then under Theme Colors click Olive Green, Accent 3, Darker 25% (fifth row, seventh option from the left).In the Transparency box, enter 55%.Also in the Format Shape dialog box, click Line Color in the left pane, and then select No line in the right pane. Also in the Format Shape dialog box, click Shadow in the left pane, and then do the following in the right pane:Click the button next to Presets, and then under Inner click Inside Diagonal Top Left (first row, first option from the left).Click the button next to Color, and then under Theme Colors click Black, Text 1 (first row, second option from the left).In the Transparency box, enter 65%.In the Blur box, enter 5 pt.In the Angle box, enter 225°.In the Distancebox, enter4 pt.On the Insert tab, in the Text group, click Text Box, and then on the slide, drag to draw the text box. Enter text in the text box, select the text, and then on the Home tab, in the Font group, select Trebuchet MS from the Font list, enter 22 in the Font Size box, click the arrow next to Font Color, and then under Theme Colors click White, Background 1 (first row, first option from the left).On the Home tab, in the Paragraph group, click Align Text Left to align the text left in the text box.Drag the text box onto the olive green rounded rectangle. Press and hold CTRL and select both objects.On the Home tab, in the Drawing group, click Arrange, and then click Group.Press and hold CTRL and select the two pictures and the new group.On the Home tab, in the Drawing group, click Arrange, point to Align, and then do the following:Click Align Selected Objects.Click Align Middle.Click Distribute Horizontally.To reproduce the text below the shapes, do the following:On the Insert tab, in the Text group, click Text Box, and then on the slide, drag to draw the text box. Enter text in the text box, select the text, and then on the Home tab, in the Font group, select Trebuchet MS from the Font list, select 18 from the Font Size list, and then click the arrow next to Font Color and click Black, Text 1, Lighter 50% (second row, second option from the left).On the Home tab, in the Paragraph group, click Align Text Left to align the text left in the text box. To reproduce the white vertical line on the left side of the text box, select the space to the left of the text.On the Insert tab, in the Text group, click Symbol.In the Symbol dialog box, do the following:In the Font list, select (normal text).In the Subset list, select Latin-1 Supplement.In the Character Code box, enter 007C to select Vertical Line, and then click Insert.On the slide, select the vertical line. On the Home tab, in the Font group, click the button next to Font Color, and then under Theme Colors click White, Background 1 (first row, first option from the left).Select the text box. On the Home tab, in the Clipboard group, click the arrow under Paste, and click Duplicate.Drag the text boxes under each of the picture-filled rectangles. To reproduce the background on this slide, do the following: Right-click the slide background area, and then click Format Background. In the Format Background dialog box, click Fill in the left pane, select Gradient fill in the right pane, and then do the following:In the Type list, select Linear.Click the button next to Direction, and then click Linear Diagonal (first row, third option from the left).In the Angle box, enter 45°.Under Gradient stops, click Add or Remove until three stops appear in the drop-down list.Also under Gradient stops, customize the gradient stops that you added as follows:Select Stop 1 from the list, and then do the following:In the Stop position box, enter 0%.Click the button next to Color, and then click White, Background 1 (first row, first option from the left).Select Stop 2 from the list, and then do the following:In the Stop position box, enter 52%.Click the button next to Color, and then click Tan, Background 2 (first row, third option from the left). Select Stop 3 from the list, and then do the following:In the Stop position box, enter 100%.Click the button next to Color, click More Colors, and then in the Colors dialog box, on the Custom tab, enter values for Red: 170, Green: 164, Blue: 140.
- Custom animation effects: Shrink and position circular pictures(Intermediate)Tip: This slide design includes three large, circle-shaped pictures. Each picture has a 12” diameter and is larger than the slide. You will want to use drawing guides to reproduce the effects on this slide.To display and set the drawing guides, do the following:On the Home tab, in the Slides group, click Layout, and then clickBlank. On the View tab, in the Show/Hide group, select Ruler. Right-click the slide background and select Grid and Guides.In the Grid and Guides dialog box, under Guidesettings, selectDisplaydrawingguideson screen. (Note: One horizontal and one vertical guide will display on the slide at 0.00, the default position. As you drag the guides, the cursor will display the new position.) Do the following on the slide:Press and hold CTRL, select the vertical guide, and then drag it left to the 2.83 position. Press and hold CTRL, select the vertical guide, and then drag it right to the 2.83 position.Press and hold CTRL, select the horizontal guide, and then drag it upto the 0.83 position.To reproduce the first animated picture effect on this slide, do the following:On the Insert tab, in the Illustrations group, click Picture. In the Insert Picture dialog box, select a picture and then click Insert.On the slide, select the picture. Under PictureTools, on the Format tab, in the PictureStyles group, click Picture Shape, and then under BasicShapes click Oval (first row, first option from the left).Select the oval picture. Under Picture Tools, on the Format tab, in the bottom right corner of the Size group, click the Size and Position dialog box launcher. In the Size and Position dialog box, on the Size tab, resize or crop the picture as needed so that under Size and rotate, the Height box is set to 12” and the Width box is set to 12”. Resize the picture under Size and rotate by entering values into the Height and Width boxes. Crop the picture under Crop from by entering values into the Left, Right, Top, and Bottom boxes. On the Home tab, in the Drawing group, click Arrange, point to Align, and then do the following:Click Align to Slide.Click AlignCenter.Click AlignMiddle. On the Animations tab, in the Animations group, click CustomAnimation.On the slide, select the picture. In the CustomAnimation task pane, do the following:Click Add Effect, point to Entrance, and then click MoreEffects. In the Add Entrance Effect dialog box, under Subtle, click Fade, and then click OK. Under Modify: Fade, do the following:In theStart list, select With Previous.In the Speed list, select Medium.Click Add Effect, point to Emphasis, and then click MoreEffects. In the Add Emphasis Effect dialog box, under Basic, click Grow/Shrink, and then click OK. Under Modify: Grow/Shrink, do the following: In the Start list, select After Previous.In the Size list, in the Custom box, enter 20%, and then press ENTER. In the Speed list, select Medium.Click Add Effect, point to Motion Paths, and then click Left. Under Modify: Left, do the following:In the Start list, select With Previous.In the Speed list, select Medium.In the Custom Animation task pane, select the third animation effect (left motion path for the first picture). On the slide, select the left motion path. Point to the endpoint (red arrow) of the selected motion path until the cursor becomes a two-headed arrow. Drag the endpoint to the intersection of the drawing guides in the upper left area of the slide (2.83 vertical left and 0.83 horizontal top).To reproduce the second animated picture effect on this slide, do the following:On the Insert tab, in the Illustrations group, click Picture. In the Insert Picture dialog box, select a picture and then click Insert.On the slide, select the picture. Under PictureTools, on the Format tab, in the PictureStyles group, click Picture Shape, and then under BasicShapes click Oval (first row, first option from the left).Select the oval picture. Under Picture Tools, on the Format tab, in the bottom right corner of the Size group, click the Size and Position dialog box launcher. In the Size and Position dialog box, on the Size tab, resize or crop the picture as needed so that under Size and rotate, the Height box is set to 12” and the Width box is set to 12”. Resize the picture under Size and rotate by entering values into the Height and Width boxes. Crop the picture under Crop from by entering values into the Left, Right, Top, and Bottom boxes. On the Home tab, in the Drawing group, click Arrange, point to Align, and then do the following:Click Align to Slide.Click AlignCenter.Click AlignMiddle. On the Animations tab, in the Animations group, click CustomAnimation.On the slide, select the picture. In the CustomAnimation task pane, do the following:Click Add Effect, point to Entrance, and then click MoreEffects. In the Add Entrance Effect dialog box, under Subtle, click Fade, and then click OK. Under Modify: Fade, do the following:In theStart list, select With Previous.In the Speed list, select Medium.Click Add Effect, point to Emphasis, and then click MoreEffects. In the Add Emphasis Effect dialog box, under Basic, click Grow/Shrink, and then click OK. Under Modify: Grow/Shrink, do the following: In the Start list, select After Previous.In the Size list, in the Custom box, enter 20%, and then press ENTER. In the Speed list, select Medium.Click Add Effect, point to Motion Paths, and then click Up. Under Modify: Up, do the following:In the Start list, select With Previous.In the Speed list, select Medium.In the Custom Animation task pane, select the sixth animation effect (up motion path for the second picture). On the slide, point to the endpoint (red arrow) of the selected motion path until the cursor becomes a two-headed arrow. Drag the endpoint to the intersection of the drawing guides in the upper middle area of the slide (0.00 vertical and 0.83 horizontal top). To reproduce the third animated picture effect on this slide, do the following:On the Insert tab, in the Illustrations group, click Picture. In the Insert Picture dialog box, select a picture and then click Insert.On the slide, select the picture. Under PictureTools, on the Format tab, in the PictureStyles group, click Picture Shape, and then under BasicShapes click Oval (first row, first option from the left).Select the oval picture. Under Picture Tools, on the Format tab, in the bottom right corner of the Size group, click the Size and Position dialog box launcher. In the Size and Position dialog box, on the Size tab, resize or crop the picture as needed so that under Size and rotate, the Height box is set to 12” and the Width box is set to 12”. Resize the picture under Size and rotate by entering values into the Height and Width boxes. Crop the picture under Crop from by entering values into the Left, Right, Top, and Bottom boxes. On the Home tab, in the Drawing group, click Arrange, point to Align, and then do the following:Click Align to Slide.Click AlignCenter.Click AlignMiddle. On the Animations tab, in the Animations group, click CustomAnimation.On the slide, select the picture. In the CustomAnimation task pane, do the following:Click Add Effect, point to Entrance, and then click MoreEffects. In the Add Entrance Effect dialog box, under Subtle, click Fade, and then click OK. Under Modify: Fade, do the following:In theStart list, select With Previous.In the Speed list, select Medium.Click Add Effect, point to Emphasis, and then click MoreEffects. In the Add Emphasis Effect dialog box, under Basic, click Grow/Shrink, and then click OK. Under Modify: Grow/Shrink, do the following: In the Start list, select After Previous.In the Size list, in the Custom box, enter 20%, and then press ENTER. In the Speed list, select Medium.Click Add Effect, point to Motion Paths, and then click Right. Under Modify: Right, do the following:In the Start list, select With Previous.In the Speed list, select Medium.In the Custom Animation task pane, select the ninth animation effect (right motion path for the third picture). On the slide, point to the endpoint (red arrow) of the selected motion path until the cursor becomes a two-headed arrow. Drag the endpoint to the intersection of the drawing guides in the upper right area of the slide (0.83 horizontal top and 2.83 vertical right).To reproduce the animated text effects on this slide, do the following:On the Insert tab, in the Text group, click TextBox. On the slide, drag to draw a text box.Enter text in the text box, and then select the text. On the Home tab, in the Font group, select Candarafrom the Font list, select24from the Font Size list, click the arrow next to Font Color, and then under Theme Colors click White, Background 1 (first row, first option from the left).On the Home tab, in the Paragraph group, click Center.On the slide, select the text box.On the Home tab, in the Clipboard group, click the arrow under Paste, and then click Duplicate. Repeat this process once more for a total of three text boxes.Click in the duplicate text boxes, and then edit the text. Select the first text box, and then drag it on the slide so that it is centered on the left vertical drawing guide at 2.83 and below the horizontal drawing guide at 0.00.Select the second text box, and then drag it on the slide so that it is centered on the vertical drawing guide at 0.00 and below the horizontal drawing guide at 0.00.Select the third text box, and then drag it on the slide so that it is centered on the right vertical drawing guide at 2.83 and below the horizontal drawing guide at 0.00.On the slide, select the first (left)text box.In the CustomAnimation task pane, do the following:Click Add Effect, point to Entrance, and then click MoreEffects. In the Add Entrance Effect dialog box, under Moderate, click Descend, and then click OK. Under Modify: Descend, in theStart list, select With Previous.Under Modify: Descend, in the Speed list, select Fast.Also in the CustomAnimation task pane, click the arrow to the right of the 10th animation effect (descend effect for the first text box), and then click Timing. In the Descend dialog box, on the Timing tab, in the Delay box, enter 2, and then click OK.On the slide, select the second (center) text box. In the CustomAnimation task pane, do the following:Click Add Effect, point to Entrance, and then click MoreEffects. In the Add Entrance Effect dialog box, under Moderate, click Descend, and then click OK. Under Modify: Descend, in theStart list, select With Previous.Under Modify: Descend, in the Speed list, select Fast.Also in the CustomAnimation task pane, click the arrow to the right of the 10th animation effect (descend effect for the first text box), and then click Timing. In the Descend dialog box, on the Timing tab, in the Delay box, enter 3, and then click OK.On the slide, select the third (right) text box. In the CustomAnimation task pane, do the following:Click Add Effect, point to Entrance, and then click MoreEffects. In the Add Entrance Effect dialog box, under Moderate, click Descend, and then click OK. Under Modify: Descend, in theStart list, select With Previous.Under Modify: Descend, in the Speed list, select Fast.Also in the CustomAnimation task pane, click the arrow to the right of the 10th animation effect (descend effect for the first text box), and then click Timing. In the Descend dialog box, on the Timing tab, in the Delay box, enter 4, and then click OK.To reproduce the background effects on this slide, do the following:On the Design tab, in the bottom right corner of the Background group, click the FormatBackground dialog box launcher. In the FormatBackground dialog box, in the left pane, click Fill. In the Fill pane, click Picture or text fill, and then under InsertFrom, click File. In the Insert Picture dialog box, select a picture and then click Insert.Also the FormatBackground dialog box, in the left pane, click Picture. In the Picture pane, click the button next to Recolor, and then under ColorModes click Grayscale (first option from the left).
- Custom animation effects: motion path text and change color(Intermediate)To reproduce the picture on this slide, do the following:On the Home tab, in theSlides group, click Layout, and then click Blank.On the Insert tab, in the Illustrations group, click Picture. In the Insert Picture dialog box, select a picture, and then click Insert.On the slide, select the picture. Under Picture Tools, on the Format tab, in the bottom right corner of the Size group, click the Size and Position dialog box launcher. In the Size and Position dialog box, on the Size tab, resize or crop the picture as needed so that under Size and rotate, the Height box is set to 3” and the Width box is set to 10”. Resize the picture under Size and rotate by entering values into the Height and Width boxes. Crop the picture under Crop from by entering values into the Left, Right, Top, and Bottom boxes. Select the picture. On the Home tab, in the Drawing group, click the arrow under Arrange, point to Align, and do the following:Click Align to Slide.Click AlignCenter.Click Align Top.To reproduce the text effects on this slide, do the following:On the Insert tab, in the Text group, click Text Box, and then on the slide, drag to draw the text box. Enter text in the text box and select the text. On the Home tab, in the Font group, do the following:In the Font list, select Century Gothic.In the Font Size box, enter 30. Click Bold.Click the arrow next to FontColor, click More Colors, and then in the Colors dialog box, on the Custom tab, enter values for Red: 80, Green: 129, Blue: 226.On the Home tab, in the Paragraph group, click Align Text Left to align the text left in the text box.Drag the text box below the picture, in the middle of the left side of the slide.To reproduce the animation effects for the first text box on this slide, do the following:On the Animations tab, in the Animations group, click Custom Animation.On the slide, select the text box. In the CustomAnimation task pane, do the following:Click AddEffect, point to Entrance, and then click More Effects.In the Add Entrance Effect dialog box, under Subtle, click Fade. Select the animation effect (fade effect for the first text box). Under Modify: Fade, do the following:In theStart list, selectWith Previous. In the Speed list, select Medium.On the slide, select the text box. In the CustomAnimation task pane, do the following:Click AddEffect, point to Motion Paths, and then click Right. Select the second animation effect (right motion path for the first text box). Under Modify: Right, do the following:In theStart list, selectWithPrevious.In the Speed list, select Medium.On the slide, select the text box. In the CustomAnimation task pane, do the following:Click AddEffect, point to Emphasis, and then click More Effects.In the Add Emphasis Effect dialog box, under Basic, click Change Font Color. Select the third animation effect (change font color effect for the first text box). Under Modify: Change Font Color, do the following:In theStart list, selectAfterPrevious.In the Font Color list, select White (first option from the left).In the Speed list, select Fast.On the slide, select the motion path for the text box. Point to the endpoint (red arrow) until the cursor becomes a two-headed arrow, press and hold SHIFT, and then drag the endpoint to lengthen the motion path about 4”. (Note: It will help to use the ruler to measure the path. On the View tab, in the Show/Hide group, select Ruler.) Right-click the motion path, and then click Reverse Path Direction. To reproduce the other animated text boxes on this slide, do the following:On the slide, select the text box. On the Home tab, in the Clipboard group, click the arrow under Paste, and then click Duplicate. Drag the second text box below and to the right of the first text box.Click in the second text box, and then edit the text. Select the text in the second text box. On the Home tab, in the Font group, do the following:In the Font Size list, select 24.Click Bold to unbold the text.Click Italic. On the slide, select the motion path for the second text box. Point to the starting point (green arrow) until the cursor becomes a two-headed arrow. Press and hold SHIFT, and then drag the starting point to the left of the second text box, until the length of the path is about 4”. Select the first text box. On the Home tab, in the Clipboard group, click the arrow under Paste, and then click Duplicate. On the slide, Drag the third text box until it is below and to the left of the second text box, and to the right of the first text box.Click in the third text box, and then edit the text.Select the text in the third text box. On the Home tab, in the Font group, in the Font Size list, select 24.In the Custom Animation task pane, select the sixth animation effect (change font color effect for the second text box). Under Modify: Change Font Color, in the Speed list, select Fast. On the slide, press and hold CTRL, and then select all three text boxes. In the CustomAnimation task pane, do the following:Click AddEffect, point to Exit, and then click More Effects.In the Add Exit Effect dialog box, under Moderate, click Stretchy. Select the 10th, 11th, and 12th animation effects (stretchy effects for the text boxes). Under Modify: Stretchy, do the following:In theStart list, selectWith Previous. In the Speed list, select Medium.Select the 10th animation effect (stretchy effect for the first text box), and then drag it until it is ninth in the list of effects. Select the 12th animation effect (stretchy effect for the third text box), and then under Modify: Exit, in the Start list, select After Previous.To reproduce the background effects on this slide, do the following: Right-click the slide background area, and then click Format Background. In the Format Background dialog box, click Fill in the left pane, select Gradient fill in the Fill pane, and then do the following:In the Type list, select Linear.Click the button next to Direction, and then click Linear Up (second row, second option from the left).Under Gradient stops, click Add or Remove until four stops appear in the drop-down list.Also under Gradient stops, customize the gradient stops that you added as follows:Select Stop 1 from the list, and then do the following:In the Stop position box, enter 0%.Click the button next to Color, and then under Theme Colors click Black, Text 1, Lighter 25% (fourth row, second option from the left).Select Stop 2 from the list, and then do the following: In the Stop position box, enter 20%.Click the button next to Color, and then under Theme Colors click Black, Text 1 (first row, second option from the left).Select Stop 3 from the list, and then do the following: In the Stop position box, enter 80%.Click the button next to Color, and then under Theme Colors click Black, Text 1 (first row, second option from the left).Select Stop 4 from the list, and then do the following: In the Stop position box, enter 100%.Click the button next to Color, and then under Theme Colors click Black, Text 1, Lighter 25% (fourth row, second option from the left).
- Custom animation effects: shrink transparent shapes(Intermediate)Tip: You will need to use drawing guides to reproduce the effects on this slide. To display and set the drawing guides, do the following:On the Home tab, in theSlides group, click Layout, and then click Blank.Right-click the slide background area, and then click Grid and Guides.In the Grid and Guides dialog box, do the following:Under Snap to, select Snap objects to grid.Under Gridsettings, in the Spacing box, enter 0.25.Under Guide settings, select Displaydrawingguideson screen.On the slide, press and hold CTRL, select the vertical guide, and then drag it left to the 2.00 position. (Note: One horizontal and one vertical guide will display on the slide at 0.00, the default position. As you drag the guides, the cursor will display the new position.) Press and hold CTRL, select the vertical guide, and then drag it left to the 2.00 position. Press and hold CTRL, select the horizontal guide, and then drag it up to the 2.00 position. Press and hold CTRL, select the horizontal guide, and then drag it down to the 1.25 position. Right-click the slide background area, and then click Grid and Guides.In the Grid and Guides dialog box, under Snap to, clear Snap objects to grid.To reproduce the animated shape effects on this slide, do the following:On the Home tab, in the Drawing group, click Shapes, and then under Rectangle click Rounded Diagonal Corner Rectangle (ninth option from the left). On the slide, drag to draw a rectangle.Select the rectangle. Under Drawing Tools, on the Format tab, in the Size group, do the following:In the Shape Height box, enter 8.1”. In the Shape Width box, enter 10.5”.Under the Drawing Tools, on the Format tab, in the Shapes Styles group, click the arrow next to Shape Outline, and then click No Outline.On the Home tab, in the Drawing group, click Arrange, point to Align, and then do the following:Click Align to Slide.Click Align Center.Click Align Middle.On the Animations tab, in the Animations group, click Custom Animation.On the slide, select the rectangle. In the CustomAnimation task pane, do the following:Click AddEffect, point to Emphasis, and then click More Effects. In the Add Emphasis Effect dialog box, under Basic, click Grow/Shrink.Select the animation effect (grow/shrink effect for the rectangle). Click the arrow next to the selected effect, and then click Effect Options. In the Grow/Shrink dialog box, do the following:On the Effect tab, in the Size list, in the Custom box, enter 37%, and then press ENTER. On the Timing tab, do the following:In theStart list, selectWith Previous. In the Speed box, enter 1.5 seconds.On the slide, select the rectangle. In the CustomAnimation task pane, do the following:Click AddEffect, point to Motion Paths,and then click Left. Select the second animation effect (left motion path for the rectangle). Click the arrow next to the selected effect, and then click Timing. In the Left dialog box, on the Timing tab, do the following:In theStart list, selectWith Previous. In the Delay box, enter 0.7.In the Speed box, enter 0.8 seconds.On the slide, select the motion path. Point to the endpoint (red arrow) until the cursor becomes a two-headed arrow, and then drag the endpoint to the intersection of the 2.00 top horizontal and the 2.00 left vertical drawing guides. Select the rectangle. On the Home tab, in the Clipboard group, click the arrow under Paste, and then click Duplicate.Select the duplicate rectangle. On the Home tab, in the Drawing group, click Arrange, point to Align, and then do the following:Click Align Center.Click Align Middle.With the second rectangle still selected, under Drawing Tools, on the Format tab, in the bottom right corner of the Shape Styles group, click the Format Shape dialog box launcher. In the Format Shape dialog box, click Fill in the left pane, select Solid fill in the Fill pane, and then do the following: Click the button next to Color, and then under Theme Colors click White, Background 1 (first row, first option from the left).In the Transparency box, enter 50%.In the Custom Animation task pane, select the fourth animation effect (motion path for the second rectangle). On the slide, point to the endpoint (red arrow) until the cursor becomes a two-headed arrow, and then drag the endpoint to the intersection of the 1.25 bottom horizontal and the 2.00 left vertical drawing guides.To reproduce the animated text effects on this slide, do the following: On the Insert tab, in the Text group, click Text Box, and then on the slide, drag to draw the text box. Enter text in the text box, and then select the text. On the Home tab, in the Font group, do the following:In the Font list, select Gill Sans MT.In the Font Size box, enter 26.On the Home tab, in the Paragraph group, click Center to center the text in the text box.On the slide, drag the text box until it is centered at the intersection of the 2.00 top horizontal and the 2.00 left vertical drawing guides. On the Animations tab, in the Animations group, click Custom Animation.With the text box still selected, in the Custom Animation task pane, do the following:Click AddEffect, point to Entrance, and then click More Effects. In the Add Entrance Effect dialog box, under Subtle, click Fade.Select the fifth animation effect (fade effect for the first text box). Under Modify: Fade, do the following:In the Start list, select After Previous.In the Speed list, select Medium.On the slide, select the text box. On the Home tab, in the Clipboard group, click the arrow under Paste, and then click Duplicate.Click in the second, duplicate text box, and then edit the text. Select the text in the second text box. On the Home tab, in the Font group, click the arrow next to Font Color, and then click Black, Text 1 (first row, second option from the left).On the slide, drag the second text box until it is centered at the intersection of the 1.25 bottom horizontal and the 2.00 left vertical drawing guides.With the second text box still selected, in the Custom Animation task pane, select the sixth animation effect (fade effect for the second text box). Click the arrow next to the selected effect, and then click Timing. In the Fade dialog box, on the Timing tab, in the Delay box, enter 1. Right-click off the slide, and then click Grid and Guides. In the Grid and Guides dialog box, under Guide settings, clear Display drawing guides on screen. To modify the color of the objects on the slide, do the following:In the Selection and Visibility pane, select the first rectangle you created on the slide. Under the DrawingTools, on the Format tab, in the bottom right corner in the Shapes Styles group, click the Format Shape dialog box launcher. In the Format Shape dialog box, click Fill in the left pane, select Solid fill in the Fill pane, and then do the following:Click the button next to Colors, and then under Theme Colors click Black, Text 1 (first row, second option from the left). In the Transparency box, enter 50%.On the slide, select the text in the first text box. On the Home tab, in the Font group, click the arrow next to Font Color,and then under Theme Colors click White, Background 1 (first row, first option from the left).On the slide, select the text in the second text box. On the Home tab, in the Font group, click the arrow next to Font Color,and then under Theme Colors click Black, Text 1, Lighter 15% (fifth row, second option from the left). To reproduce the background effects on this slide, do the following: On the Design tab, in the bottom right corner of the Background group, click the Format Background dialog box launcher.In the Format Background dialog box, click Fill in the left pane, select Picture or texture fill in the Fill pane, and then under Insert from, click File.In the Insert Picture dialog box, select a picture, and then click Insert.
- Custom animation effects: shrink picture circle with text(Intermediate)To reproduce the picture effects on this slide, do the following:On the Home tab, in theSlides group, click Layout, and then click Blank.On the Insert tab, in the Illustrations group, click Picture. In the InsertPicture dialog box, select a picture, and then click Insert.On the slide, select the picture. Under PictureTools, on the Format tab, in the PictureStyles group, click PictureShape, and then under BasicShapes click Oval (first row, first option from the left).Select the picture-filled oval. Under Picture Tools, on the Format tab, in the bottom right corner of the Size group, click the Size and Position dialog box launcher. In the Size and Position dialog box, on the Size tab, resize or crop the picture as needed so that under Size and rotate, the Height box is set to 6” and the Width box is set to 6”. Resize the picture under Size and rotate by entering values into the Height and Width boxes. Crop the picture under Crop from by entering values into the Left, Right, Top, and Bottom boxes. Under PictureTools, on the Format tab, in the PictureStyles group, click PictureEffects, point to Glow, and then under GlowVariations click Accent color 1, 18 pt glow (fourth row, first option from the left).Under PictureTools, on the Format tab, in the PictureStyles group, click PictureEffects, point to Glow, point to More Glow Colors, and then under ThemeColors click White, Background 1 (first row, first option from the left).On the Home tab, in the Drawing group, click the Format Shape dialog box launcher. In the Format Picture dialog box, click Shadow in the left pane. In the Shadow pane, click the button next to Presets, under Inner click InsideDiagonalBottomLeft (third row, first option from the left), and then do the following:In the Transparency box, enter 50%.In the Blur box, enter 8 pt.In the Angle box, enter 135°.In the Distance box, enter 8 pt.On the Insert tab, in the Text group, click TextBox. On the slide, drag to draw a text box.Enter text, and then select the text. On the Home tab, in the Font group, do the following:In the Font list, select Candara.In the FontSize box, enter 30.Click the arrow next to FontColor, and then click Black, Text 1, Lighter 25% (fourth row, second option from the left).On the Home tab, in the Paragraph group, click AlignTextLeft.On the slide, select the text box. Under DrawingTools, on the Format tab, in the WordArt Styles group, click TextEffects, point to Reflection, and then under ReflectionVariations click TightReflection, touching (first row, first option from the left).Drag the text box onto the right half of the slide.With the text box still selected, on the Home tab, in the Drawing group, click Arrange, and then do the following:Point to Align, and then click Align to Slide.Point to Align, and then click Align Right.Point to Align, and then click Align Middle.Click Send to Back. To reproduce the animation effects on this slide, do the following:On the Animations tab, in the Animations group, click CustomAnimation. On the slide, select the picture. In CustomAnimation task pane, do the following:Click Add Effect, point to Entrance, and then click More Effects. In the Add Entrance Effect dialog box, under Basic, click Wheel.Select the animation effect (wheel effect for the picture). Under Modify: Wheel,do the following:In the Start list, select WithPrevious.In the Spokes list, select 1 Spoke.In the Speed list, select Medium. On the slide, select the picture. In CustomAnimation task pane, do the following:Click Add Effect, point to Entrance, and then click More Effects. In the Add Entrance Effect dialog box, under Subtle, click FadedZoom.Select the second animation effect (faded zoom effect for the picture). Under Modify: FadedZoom,do the following:In the Start list, select WithPrevious.In the Speed list, select Medium. On the slide, select the picture. In CustomAnimation task pane, do the following:Click Add Effect, point to Emphasis, and then click More Effects. In the Add Emphasis Effect dialog box, under Basic, click Grow/Shrink.Select the third animation effect (grow/shrink effect for the picture). Click the arrow to the right of the selected effect, and then click EffectOptions. In the Grow/Shrink dialog box, do the following:On the Effect tab, under Settings, do the following:In the Size list, in the Custom box, enter 95%, and then press ENTER.Select SmoothStart.Select SmoothEnd.Select Auto-reverse.On the Timing tab, do the following: In the Start list, select AfterPrevious. In the Speed box, enter 0.3 seconds. On the slide, select the picture. In CustomAnimation task pane, do the following:Click Add Effect, point to Emphasis, and then click More Effects. In the Add Emphasis Effect dialog box, under Basic, click Grow/Shrink.Select the fourth animation effect (grow/shrink effect for the picture). Under Grow/Shrink, do the following:In the Start list, select AfterPrevious.In the Size list, select Smaller.In the Speed list, select Medium. On the slide, select the picture. In CustomAnimation task pane, do the following:ClickAddEffect, point to MotionPaths, and then click Left.Select the fifth animation effect (left motion path for the picture). Under Modify: Left,do the following:In the Start list, select WithPrevious.In the Speed list, select Medium.On the slide, select the text box. In the CustomAnimation task pane, do the following:Click Add Effect, point to Entrance, and then click More Effects. In the Add Entrance Effect dialog box, under Subtle, select Fade.Select the sixth animation effect (fade effect for the text box). Click the arrow to the right of the selected effect, and then click Timing. In the Fade dialog box, on the Timing tab, do the following:In the Start list, select WithPrevious.In the Delay box, enter 1.5.In the Speed list, select 1 seconds (Fast).On the slide, select the text box. In CustomAnimation task pane, do the following:ClickAddEffect, point to MotionPaths, and then click Left.Select the seventh animation effect (left motion path for the text box). Under Modify: Left,do the following:In the Start list, select WithPrevious.In the Speed list, select Fast.On the slide, right–click the selected motion path for the text box, and then clickReversePathDirection. To reproduce the rectangle on this slide, do the following: On the Home tab, in theDrawing group, clickShapes, and then under Rectangles click Rectangle (first option from the left). On the slide, drag to draw a rectangle.Select the rectangle.Under DrawingTools, on the Format tab, in the Size group, do the following:In the ShapeHeight box, enter 1.54”.In theShapeWidth box, enter 10”.Under DrawingTools, on theFormat tab, in the ShapeStyles group, click the arrow next to ShapeOutline, and then click NoOutline.Under DrawingTools, on the Format tab, in the bottom right corner of the ShapeStyles group, click the FormatShape dialog box launcher. In the Format Shape dialog box, clickFill in the left pane, selectGradientfill in the Fill pane, and then do the following:In the Type list, select Linear.Click the button next to Direction, and then click Linear Right (first row, fourth option from the left). Under Gradient stops, click Add or Remove until two stops appear in the drop-down list.Also under Gradient stops, customize the gradient stops that you added as follows:Select Stop 1 from the list, and then do the following:In the Stop position box, enter 0%.Click the button next to Color, and then under Theme Colors click White, Background 1 (first row, first option from the left).In the Transparency box, enter 88%.Select Stop 2 from the list, and then do the following: In the Stop position box, enter 100%.Click the button next to Color, and then under Theme Colors click White, Background 1 (first row, first option from the left).In the Transparency box, enter 43%.On the Home tab, in the Drawinggroup, click Arrange, and then do the following:Point to Align, and then click Align to Slide. Point to Align, and then clickAlignMiddle.Point to Align, and then clickAlignCenter.Click Send to Back. To reproduce the background effects on this slide, do the following:Right-click the slide background area, and then click Format Background. In the Format Background dialog box, click Fill in the left pane, select Gradient fill in the Fill pane, and then do the following:In the Type list, select Radial.Click the button next to Direction, and then click From Center (third option from the left).Under Gradient stops, click Add or Remove until two stops appear in the drop-down list.Also under Gradient stops, customize the gradient stops that you added as follows:Select Stop 1 from the list, and then do the following:In the Stop position box, enter 0%.Click the button next to Color, and then under Theme Colors click White, Background 1 (first row, first option from the left).Select Stop 2 from the list, and then do the following: In the Stop position box, enter 100%.Click the button next to Color, and then under Theme Colors click Black, Text 1, Lighter 50% (second row, second option from the left).
- Custom animation effects: title fade-in on path and text fade by letter(Intermediate)Tip: For the effects on this slide, use a picture that measures 7.5” high (the height of the slide) and 2.61” wide.To reproduce the shape effects on this slide, do the following:On the Home tab, in theDrawing group, clickShapes, and then under Rectangles click Rectangle (first option from the left). On the slide, drag to draw a rectangle.Select the rectangle. Under DrawingTools, on the Format tab, in the Size group, do the following: In the ShapeHeight box, enter 3.17”.In the ShapeWidth box, enter 9.5”.Drag the rectangle slightly above the middle of the slide. Select the rectangle. On the Home tab, in the Drawing group, click Arrange, point to Align, and then do the following:Click Align to Slide.Click Align Left.Under DrawingTools, on theFormat tab, in the ShapeStyles group, click the next to ShapeOutline, and then click NoOutline.Under DrawingTools, on the Format tab, in the bottom right corner of the ShapeStyles group, click the FormatShape dialog box launcher. In the FormatShape dialog box, click Fill in the left pane, select Gradient fill in the Fill pane, and then do the following:In the Type list, select Linear.Click the button next to Direction, and then click Linear Right (first row, fourth option from the left). Under Gradient stops, click Add or Remove until two stops appear in the drop-down list.Also under Gradient stops, customize the gradient stops that you added as follows:Select Stop 1 from the list, and then do the following:In the Stop position box, enter 0%.Click the button next to Color, and then under Theme Colors click Orange, Accent 6, Darker 50% (fifth row, 10th option from the left).Select Stop 2 from the list, and then do the following: In the Stop position box, enter 100%.Click the button next to Color, and then under Theme Colors click Orange, Accent 6, Darker 25% (fourth row, 10th option from the left).To reproduce the “heading” text box on this slide, do the following:On the Insert tab, in the Text group, select TextBox. On the slide, drag to draw a text box.Enter the heading text, and then select text. On the Home tab, in the Font group, do the following:In the Font list, select Calibri.In the FontSize box, enter 38.Click Bold.Click the arrow next to FontColor, and then under ThemeColors click Orange, Accent 6, Darker 25% (fourth row, 10th option from the left).On the Home tab, in the Paragraph group, click AlignTextLeft.Drag the text box just above the rectangle, in the right half of the slide. To reproduce the second text box on this slide, do the following:On the Insert tab, in the Text group, click TextBox. On the slide, drag to draw a text box.Enter three lines of text with paragraph breaks, and then select the text. On the Home tab, in the Font group, do the following:In the Font list, select Calibri.In the FontSize list, select 28.Click Bold.Click the arrow next to FontColor, and then under ThemeColors click White, Background 1 (first row, first option from the left).On the Home tab, in the Paragraph group, click AlignTextLeft.Drag the second text box onto the rectangle, below the “heading” text box. To reproduce the full-color picture on this slide, do the following:On the Home tab, in theSlides group, click Layout, and then click Blank.On the Insert tab, in the Illustrations group, clickPicture. In the InsertPicture dialog box, select the 7.5” x 2.61” picture, and then click Insert.On the slide, select the picture. Under Picture Tools, on the Format tab, in the bottom right corner of the Size group, click the Size and Position dialog box launcher. In the Size and Position dialog box, on the Size tab, under Crop from,in the Bottom box, enter 2.43”. (Note: Under Size and rotate, the Height should now be 5.08”.)On the slide, select the picture. UnderPicture Tools, on the Format tab, in the Picture Styles group, click Picture Effects, point to Glow, and then under Glow Variations click Accent color 1, 5 pt glow (first row, first option from the left).Also under PictureTools, on the Format tab, in the PictureStyles group, click PictureEffects, point to Glow, point to MoreGlowColors, and then under ThemeColors click White, Background 1 (first row, first option from the left).Drag the full-color picture on top of the rectangle, to the left of the text boxes. On the Home tab, in the Drawing group, click Arrange, point to Align, and then do the following:Click Align to Slide.Click Align Top. To reproduce the second picture on this slide, do the following:On the Insert tab, in the Illustrations group, click Picture. In the InsertPicture dialog box, select the same 7.5” x 2.61” picture, and then click Insert. On the slide, select the picture. Under Picture Tools, on the Format tab, in the bottom right corner of the Size group, click the Size and Position dialog box launcher. In the Size and Position dialog box, on the Size tab, under Crop from,in the Top box, enter 5.08”. (Note: Under Size and rotate, the Height should now be 2.43”.)On the slide, select the second, smaller picture. Under PictureTools, on the Format tab, in the PictureStyles group, click the FormatShape dialog box launcher. In the FormatPicture dialog box, click Picture in the left pane, and in the Picture pane do the following:In the Brightness box, enter 70%.In the Contrast box, enter -70%.On the slide, drag the smaller picture until it is directly underneath the larger full-color picture.Select the smaller picture. On the Home tab, in the Drawing group, click Arrange, point to Align, and then do the following:Click Align to Slide.Click Align Bottom. Press and hold CTRL, and then select both pictures. On the Home tab, in the Drawing group, click Arrange, point to Align, and then do the following:Click Align Selected Objects.Click Align Center. To reproduce the animation effects on this slide, do the following:On the Animations tab, in the Animations group, click CustomAnimation. On the slide, select the “heading” text box. In the CustomAnimation task pane, do the following:Click AddEffect, point to Entrance, and then click MoreEffects. In the AddEntranceEffect dialog box, under Subtle, click Fade.Select the animation effect (fade effect for the “heading” text box). Click the arrow to the right of the selected text box, and then click Timing. In the Fade dialog box, on the Timing tab, do the following:In the Start list, select WithPrevious.In the Delay box, enter 1.5.In the Speed list, select 2 seconds (Medium).On the slide, select the “heading” text box. In the CustomAnimation task pane, do the following:ClickAddEffect, point to MotionPaths, and then click Left.Select the second animation effect (left motion path for the “heading” text box). Under Modify: Left,do the following:In the Start list, select WithPrevious.In the Speed list, select Medium. On the slide, right-click the left motion path and click ReversePathDirection. With the motion path still selected,point to the starting point (green arrow) of the motion path until the cursor becomes a two-headed arrow. Press and hold SHIFT, and then drag the starting pointabout 1.5” off the left edge of the slide. (Note: It may help to display the ruler. On the View tab, in the Show/Hide group, select Ruler. If your lines of text are longer than in the example above, you may need to further increase the length of the motion path. )On the slide, select the second text box. In the CustomAnimation task pane, do the following:Click AddEffect, point to Entrance, and then click MoreEffects. In the AddEntranceEffect dialog box, under Subtle, click Fade.Select the third animation effect (fade effect for the second text box). Click the arrow to the right of the selected effect, and then click Effect Options. In the Fade dialog box, do the following:On the Effect tab, do the following:In the Animate text list, select By Letter.In the % delay between letters box, enter 5.On the Timing tab, do the following:In the Start list, select AfterPrevious.In the Speed list, select 0.5 seconds (VeryFast).On the TextAnimation tab, in the Grouptext list, select By 1st Level Paragraphs.To reproduce the background on this slide, do the following:Right-click the slide background area, and then click Format Background. In the Format Background dialog box, click Fill in the left pane, select Gradient fill in the Fill pane, and then do the following:In the Type list, select Radial.Click the button next to Direction, and then click From Center (third option from the left).Under Gradient stops, click Add or Remove until three stops appear in the drop-down list.Also under Gradient stops, customize the gradient stops that you added as follows:Select Stop 1 from the list, and then do the following:In the Stop position box, enter 0%.Click the button next to Color, and then under Theme Colors click White, Background 1 (first row, first option from the left).Select Stop 2 from the list, and then do the following: In the Stop position box, enter 40%.Click the button next to Color, and then under Theme Colors click White, Background 1 (first row, first option from the left).Select Stop 3 from the list, and then do the following: In the Stop position box, enter 100%.Click the button next to Color, click More Colors, and then in the Colors dialog box, on the Custom tab, enter values for Red: 232, Green: 227, and Blue: 216.
- Custom animation effects: spinning clip art with text(Intermediate)To reproduce the clip art on this slide, do the following:On the Home tab, in theSlides group, click Layout, and then click Blank.On the Insert tab, in the Illustrations group, click Clip Art.In the Clip Art pane, in the Search for box, enter j0435540. In the Search in list, select Everywhere, and then click Go. Select the clip art file in the pane to insert it into the slide. (Note: If you choose another clip art file, the clip art must be in the Windows Metafile format [.wmf].)On the slide, select the clip art. Under Drawing Tools, on the Format tab, in the Size group, do the following:In the Shape Height box, enter 5.83”.In the Shape Width box, enter 8.12”.On the Home tab, in the Drawing group, click Arrange, and then click Ungroup.In the Microsoft Office PowerPoint dialog box, click Yes. On the slide, select the converted clip art. On the Home tab, in the Editing group, click Select, and then click Selection Pane. In the Selection and Visibility pane, select the top-level group. On the Home tab, in the Drawing group, click Arrange, and then click Ungroup. Also in the Selection and Visibility pane, select the Autoshape object, and then press DELETE. Press CTRL+A to select all of the objects on the slide. On the Home tab, in the Drawing group, click Arrange, and then click Group.Select the group. On the Home tab, in the Drawing group, click Shape Effects, point to Preset, and then under Presets click Preset 8 (second row, fourth option from the left). With the group still selected, under DrawingTools, on the Format tab, in the bottom right corner of the Size group, click the Size and Position dialog box launcher, and do the following:On the Size tab, in the Height box, enter 6.27”.On the Size tab, in the Width box, enter 6.27”.On the Position tab, in the Horizontal box, enter 3.89”. On the Position tab, in the Vertical box, enter 1.55”To reproduce the text on this slide, do the following:On the Insert tab, in the Text group, click TextBox.Drag to draw a text box on the slide.In the text box, enter text and select it. On the Home tab, in the Font group do the following:In the Font list, select Candara.In the FontSize box, enter 32 pt.In the FontColor list, under StandardColors select Orange (third option from the left). Click Italic. Select the text box on the slide, and then under DrawingTools, on the Format tab, in the Size group, do the following:In the ShapeHeight box, enter 7.29”.In the ShapeWidth box, enter 7.29”.Under DrawingTools, on the Format tab, in the WordArtStyles group, click TextEffects, point to Transform, and under FollowPath select ArchUp (first option from the left).To wrap the text upside down, at the bottom of the text box, drag the pink adjustment diamond from the center left position in the text box to the lower right corner of the text box. With the text box still selected, under DrawingTools, on the Format tab, in the bottom right corner of the Size group, click the Size and Position dialog box launcher, and then on the Position tab do the following:In the Horizontal box, enter 3.38”. In the Vertical box, enter 1.04”.To reproduce the animation effects on this slide, do the following:On the Animation tab, in the Animations group, click CustomAnimation.Select the circle clip art on the slide, and then in the CustomAnimation task pane, do the following:Click AddEffect, point to Emphasis effect and select MoreEffects. In the AddEmphasisEffect dialog box, under Basic select Spin, and then click OK.Click the arrow to the right of the spin emphasis effect, select Effect Options,and do the following:On the Effect tab, under Settings, in the Amount list, select QuarterSpin.On the Effect tab, under Settings, in the Amount list, select Counterclockwise.On the Timing tab, in the Start list, select WithPrevious.On the Timing tab, in the Speed box enter4.0 seconds.Click OK.On the slide, select the text box, and then in the CustomAnimation task pane, do the following:Click the AddEffect, point to Entrance and select MoreEffects. In the AddEntranceEffect dialog box, under Subtle select Fade, and then click OK.Select the fade entrance effect (second effect), and under Modify: Fade do the following:In the Start list, select WithPrevious.In the Speed list, select Slow. With the text box still selected, click AddEffect, point to Emphasis and select MoreEffects. In the AddEmphasisEffect dialog box, under Basic select Spin, and then click OK.Select the spin emphasis effect (third effect), and under Modify: Spin do the following:In the Start list, select WithPrevious.In the Amount list, select HalfSpin.In the Speed list select Slow. With the text box still selected, click AddEffect, point to Emphasis and select MoreEffects. In the AddEmphasisEffect dialog box, under Basic select Spin, and then click OK.Click the arrow to the right of the spin emphasis effect (fourth effect), select Effect Options,and do the following:On the Effect tab, under Settings, in the Amount list, in the Custom box enter 30°, and then press ENTER.On the Effect tab, under Settings, in the Amount list, select Counterclockwise.On the Timing tab, in the Start list, select WithPrevious.On the Timing tab, in the Delay box enter 3.0 seconds.On the Timing tab, in the Speed box enter1 seconds (Fast).Click OK.To reproduce the background on this slide, do the following:Right-click the slide background area, and then click Format Background. In the Format Background dialog box, click Fill in the left pane, select Gradient fill in the Fill pane, and then do the following:In the Type list, select Linear.In the Direction, list click Linear Down (first row, second option from the left)Under Gradient stops, click Add or Remove until two stops appear in the drop-down list.Also under Gradient stops, customize the gradient stops as follows:Select Stop 1 from the list, and then do the following:In the Stop position box, enter 0%.Click the button next to Color, and then under Theme Colors click Black, Text 1 (first row, second option from the left). Select Stop 2 from the list, and then do the following: In the Stop position box, enter 100%.Click the button next to Color, and then under Theme Colors clickBlack, Text 1, Lighter 50% (second row, second option from the left).
- Rounded corner rectangle tabs with inset pictures(Advanced)To reproduce the top rectangle (olive-green, “label one”) with text effects on this slide, do the following:On the Home tab, in theSlides group, click Layout, and then click Blank.On the Home tab, in the Drawing group, click Shapes, and then under Rectangles, click Rounded Diagonal Corner Rectangle(ninth option from the left). On the slide, drag to draw a rectangle.On the Home tab, in the bottom right corner of the Drawing group, click the Format Shape dialog box launcher. In the Format Shape dialog box, click Fill in the left pane, select Gradient fill in the right pane, and then do the following:In the Type list, select Linear.Click the button next to Direction, and then click Linear Down (first row, second option from the left).Under Gradient stops, click Add or Remove until two stops appear in the drop-down list.Also under Gradient stops, customize the gradient stops that you added as follows:Select Stop 1 from the list, and then do the following:In the Stop position box, enter32%.Click the button next to Color, and then under Theme Colorsclick White, Background 1 (first row, first option from the left).Select Stop 2 from the list, and then do the following:In the Stop position box, enter100%.Click the button next to Color, and then under Theme Colorsclick Olive Green, Accent 3, Lighter 60%(third row, seventh option from the left).Also in the Format Shape dialog box, click Line Color in the left pane, select Gradient line in the right pane, and then do the following:In the Type list, select Linear.Click the button next to Direction, and then click Linear Up (second row, second option from the left). Under Gradient stops, click Add or Remove until two stops appear in the drop-down list.Also under Gradient stops, customize the gradient stops that you added as follows:Select Stop 1 from the list, and then do the following:In the Stop position box, enter0%.Click the button next to Color, and then under Theme Colorsclick White, Background 1 (first row, first option from the left).Select Stop 2 from the list, and then do the following:In the Stop position box, enter100%.Click the button next to Color, and then under Theme Colorsclick White, Background 1, Darker 25%(fourth row, first option from the left).Also in the Format Shape dialog box, click Line Style in the left pane. In the Line Style pane, in the Width box, enter 1 pt. On the Home tab, in the Drawing group, click Shape Effects, point to Glow, and then do the following:Under Glow Variations, select any option in the first row (5 pt glow options). Point to More Glow Colors, and then under Theme Colors click White, Background 1, Darker 25% (fourth row, first option from the left). On the slide, right-click the rectangle and then click Edit Text. Enter text in the text box and select the text. On the Home tab, in the Font group, select Gill Sans MTfrom the Font list and then select 24 from the Font Size list.On the Home tab, in the Paragraph group, click Align Text Left to align the text left within the rectangle.Under Drawing Tools, on the Format tab, in the WordArt Styles group, click the arrow next toText Fill, click More Fill Colors, and then in the Colors dialog box, on the Custom tab, enter values for Red: 127, Green: 127, and Blue: 127.Select the rectangle. On the Home tab, in the bottom-right corner of the Drawing group, click the Format Shapes dialog box launcher. In the Format Shapes dialog box, click Text Box in the left pane. In the right pane, under Internal margin, enter 1” in the Left box to increase the left margin in the rectangle to accommodate the embossed picture. Under Drawing Tools, on the Format tab, in the Size group, do the following:In the Shape Height box, enter 0.92”.In the Shape Width box, enter 4.5”.To reproduce the olive-green embossed picture for the top rectangle on this slide, do the following:On the Home tab, in the Drawing group, click Shapes, and then under Rectangles, click Rounded Diagonal Corner Rectangle(ninth option from the left). On the slide, drag to draw a rectangle.On the Home tab, in the bottom right corner of the Drawing group, click the Format Shape dialog box launcher. In the Format Shape dialog box, click Fill in the left pane, select Picture or texture fill, and then under Insert from click File. In the Insert Picture dialog box, select a picture and then click Insert. Also in the Format Shape dialog box, click Line Color in the left pane. In the Line Color pane, select No line. Also in the Format Shape dialog box, click Picture in the left pane, click the button next to Recolor, and then under Light Variations click Accent color 3 Light (fourth option from the left).Also in the Format Shape dialog box, click Shadow in the left pane, and then do the following in the right pane:Click the button next to Preset, and then under Inner click Inside Diagonal Top Left (first row, first option from the left).In the Transparency box, enter 65%. Under Picture Tools, on the Format tab, in the bottom right corner of the Size group, click the Size and Position dialog box launcher. In the Size and Position dialog box, on the Size tab, do the following:UnderScale, select the Lock aspect ratio check box.Under Size and rotate, in the Height box, enter 0.75”. (Under Size and rotate, in the Width box, 0.75” will appear automatically.)Drag the picture onto the left side of the rectangle. Press and hold CTRL and select the picture and the rectangle. On the Home tab, in the Drawing group, click Arrange, point to Align, and then click Align Middle. To reproduce the other shapes on this slide, do the following:Press and hold CTRL and select the picture and the rectangle.On the Home tab, in the Drawing group, click Arrange, and then click Group.On the Home tab, in the Clipboard group, click the arrow under Paste, and then click Duplicate. Repeat the process until there is a total of four groups of shapes.Drag the groups so that they are distributed vertically on the slide. Press and hold CTRL and select all four groups.On the Home tab, in the Drawing group, click Arrange, and then do the following:Point to Align, and then click Align Center. Point to Align, and then clickDistribute Vertically. Click Ungroup. To change the color and text for the duplicate rectangles (second, third, and fourth from the top), do the following:Select the rectangle that you would like to recolor.Under Drawing Tools, on the Format tab, in the Shape Styles group, click the arrow next toShape Fill, point to Gradient, and then click More Gradients.In the Format Shape dialog box, click Fill in the left pane, selectGradient fill in the right pane, and then do the following:For the second rectangle from the top, under Gradient stops, select Stop 2 from the drop-down list, click the button next to Color, and then under Theme Colors click Orange, Accent 6, Lighter 60% (third row, tenth option from the left). For the third rectangle from the top, under Gradient stops, select Stop 2 from the drop-down list, click the button next to Color, and then under Theme Colors click Aqua, Accent 5, Lighter 60% (third row, ninth option from the left).For the fourth rectangle from the top, under Gradient stops, select Stop 2 from the drop-down list, click the button next to Color, and then under Theme Colors click Blue, Accent 1, Lighter 60% (third row, fifth option from the left).To change the text on the duplicate rectangles, click in each text box and edit the text. To change the picture on the duplicate rectangles (second, third, and fourth from the top), do the following:Right-click the second picture from the top, and then click Format Picture. In the Format Picture dialog box, click Fill in the left pane, and then underInsert from click File. In the Insert Picture dialog box, select a picture, and then click Insert.Repeat the process for the third and fourth rectangles from the top. To change the color for the duplicate pictures (second, third, and fourth from the top), do the following:Select the picture that you would like to recolor.Under Picture Tools, on the Format tab, in the Adjust group, click the arrow next toRecolor, and then do the following:For the second picture from the top, under Light Variations, clickAccent color 6 Light (seventh option from the left).For the third picture from the top, under Light Variations, clickAccent color 5 Light (sixth option from the left).For the fourth picture from the top, under Light Variations, clickAccent color 1 Light (second option from the left).To reproduce the background on this slide, do the following:Right-click the slide background area, and then clickFormat Background.In the Format Background dialog box, click Fill in the left pane, select Gradient fill in the right pane, and then do the following:In the Type list, select Radial.Click the button next to Direction, and then click From Center (third option from the left).Under Gradient stops, click Add or Remove until two stops appear in the drop-down list.Also under Gradient stops, customize the gradient stops that you added as follows:Select Stop 1 from the list, and then do the following:In the Stop position box, enter0%.Click the button next to Color, and then under Theme Colorsclick White, Background 1 (first row, first option from the left).Select Stop 2 from the list, and then do the following:In the Stop position box, enter100%.Click the button next to Color, and then under Theme Colorsclick White, Background 1, Darker 15% (third row, first option from the left).
- Paragraph or quotation text with perspective(Advanced)To reproduce the effects on this slide, do the following:On the Home tab, in theSlides group, click Layout, and then click Blank.On the Insert tab, in the Text group, click Text Box, and then on the slide, drag to draw the text box.Enter text in the text box, select the text, and then on the Home tab, in the Font group, select Candarafrom the Font list, select 44 from the Font Size list, click Italic, click the arrow next to Font Color, and then under Theme Colors click Dark Blue, Text 2, Lighter 80% (second row, fourth option from the left).On the Home tab, in the Paragraph group, click AlignTextLeft to align the text left in the text box.Select the text box. Under Drawing Tools, on the Format tab, in the WordArt Styles group, click Text Effects, point to 3-D Rotation, and then under Perspective click Perspective Left (first row, second option from the left). Also under Drawing Tools, on the Format tab, in the WordArt Styles group, click Text Effects, point to 3-D Rotation, and then click 3-DRotationOptions. In theFormat Text Effects dialog box, click 3-D Rotation in the left pane, and then in the right pane do the following:In the X box, enter 40°.In the Perspective box, enter 60°.On the Home tab, in the Drawing group, click Shapes, and then under Rectangles click Rectangle (first option from the left). On the slide, drag to draw a rectangle. Select the rectangle. Under Drawing Tools, on the Format tab, in the Size group, do the following:In the Shape Height box, enter 2.5”.In the Shape Width box, enter 2”.On the Home tab, in the bottom right corner of the Drawing group, click the Format Shape dialog box launcher. In the Format Shape dialog box, click Fill in the left pane, select Gradient fill in the right pane, and then do the following: In the Type list, select Linear.Click the button next to Direction, and then click Linear Down (first row, second option from the left).In the Angle box, enter 90°.Under Gradient stops, click Add or Remove until three stops appear in the drop-down list.Also under Gradient stops, customize the gradient stops that you added as follows:Select Stop 1 from the list, and then do the following:In the Stop position box, enter 0%.Click the button next to Color, and then under Theme Colors click DarkBlue, Text2 (first row, fourth option from the left).Select Stop 2 from the list, and then do the following:In the Stop position box, enter 50%.Click the button next to Color, click More Colors, and then in the Colors dialog box, on the Custom tab, enter values for Red: 58, Green: 107, Blue: 165.Select Stop 3 from the list, and then do the following:In the Stop position box, enter 0%.Click the button next to Color, and then click Dark Blue, Text 2, Darker 25% (fifth row, fourth option from the left). Also in the Format Shape dialog box, click Line Color in the left pane, and then select No line in the Line Color pane. Also in the Format Shape dialog box, click Shadow in the left pane, and then do the following in the Shadow pane:Click the button next to Presets, and then under Perspective click PerspectiveDiagonalUpperLeft (first row, first option from the left). In the Transparency box, enter 80%.In the Blur box, enter 6 pt.Also in the Format Shape dialog box, click 3-DFormat in the left pane, and then do the following in the 3-DFormatpane:Under Bevel, click the button next to Top, and then under Bevel click Relaxed Inset (first row, second option from the left). Next to Top, in the Width box, enter 6 pt, and in the Height box, enter 6 pt. Under Surface, click the button next to Material, and then under Standard click Warm Matte (second option from the left). Click the button next to Lighting, and then under Neutral click ThreePoint (first row, first option from the left).On the Insert tab, in the Illustrations group, click Clip Art. In the Clip Art pane, in the Search for box, enterj0397180. In the Search in list, select Everywhere, and then click Go. Select the clip art file and drag it onto the slide. (Note: If you choose another clip art file, the clip art must be in the Windows Metafile format [.wmf].)On the slide, select the clip art. On the Home tab, in the Drawing group, click Arrange, and then click Ungroup. In the Microsoft Office PowerPoint dialog box, click Yes. On the slide, select the converted clip art. On the Home tab, in the Editing group, click Select, and then click Selection Pane. In the Selection and Visibility pane, select the top-level group. On the Home tab, in the Drawing group, click Arrange, and then click Ungroup. Also in the Selection and Visibility pane, select the Autoshape object, and then press DELETE. Also in the Selection and Visibility pane, select each object and drag it to one side of the slide, until the pale gold silhouette freeform shape is visible. (Note: The silhouette shape is directly on top of the dark brown rectangle in the back.) Delete all of the other freeform shapes except for the silhouette by selecting them in the Selection and Visibility pane and then pressing DELETE. On the slide, select the silhouette shape. Under Drawing Tools, on the Format tab, in the Size group, do the following:In the Shape Height box, enter 2.25”.In the Shape Width box, enter 1.8”.On the Home tab, in the bottom right corner of the Drawing group, click the Format Shape dialog box launcher. In the Format Shape dialog box, click Fill in the left pane, select Solid fill in the right pane, and then do the following:Click the button next to Color, and then under Theme Colors click Black, Text 1 (first row, second option from the left).In the Transparency box, enter 40%.On the slide, drag the silhouette on top of the blue rectangle. Select the silhouette shape. Press the UP ARROW and DOWN ARROW keys to position the silhouette so that the bottom edge is just above the rectangle bevel edge. Press and hold SHIFT and select the silhouette shape and the rectangle. On the Home tab, in the Drawing group, click Arrange, and then do the following:Point to Align, and then click Align Selected Objects. Point to Align, and then click Align Center.Click Group.Select the group. On the Home tab, in the Drawing group, click Shape Effects, point to 3-D Rotation, and then under Perspective click Perspective Right (first row, third option from the left). Drag the group and text box to position on the slide as needed. To reproduce the background on this slide, do the following: Right-click the slide background area, and then click Format Background. In the Format Background dialog box, click Fill in the left pane, select Gradient fill in the right pane, and then do the following:In the Type list, select Linear.Click the button next to Direction, and then click Linear Diagonal (first row, firstoption from the left).In the Angle box, enter 225°.Under Gradient stops, click Add or Remove until two stops appear in the drop-down list.Also under Gradient stops, customize the gradient stops that you added as follows:Select Stop 1 from the list, and then do the following:In the Stop position box, enter 48%.Click the button next to Color, and then under Theme Colors click Black, Text 1, Lighter 5% (sixth row, second option from the left). Select Stop 2 from the list, and then do the following:In the Stop position box, enter 94%.Click the button next to Color, and then under Theme Colors click DarkBlue, Text 2, Lighter 40% (fourth row, fourth option from the left).
- Custom animation effects: picture pan in window with text fade-in and fade-out(Advanced)Tip: For best results, select a high-resolution, vertically oriented picture, where the picture height is larger than the slide height. The picture in the example above is 15” high and 10” wide. (Normal slide dimensions are 7.5” high and 10” wide.)To reproduce the picture effects on this slide, do the following:On the Home tab, in the Slides group, click Layout, and then clickBlank. On the Insert tab, in the Illustrations group, click Picture. In the Insert Picture dialog box, select a picture, and then click Insert.Select the picture. Under Picture Tools, on the Format tab, in the bottom right corner of the Size group, click the Size and Position dialog box launcher. In the Size and Position dialog box, on the Size tab, resize or crop the picture as needed so that under Size and rotate, the Height box is set to 15” and the Width box is set to 10”. Resize the picture under Size and rotate by entering values into the Height and Width boxes. Crop the picture under Crop from by entering values into the Left, Right, Top, and Bottom boxes. On the Home tab, in the Drawing group, click Arrange,point to Align,and then do the following:Click Align to Slide.Click Align Top.Click Align Center. The remainder of picture will extend beyond the bottom edge of the slide area. You may need to zoom out to view your slide. To zoom out, on the View tab, in the Zoom group, click Zoom. In the Zoom dialog box, select 33%.To reproduce the shape effects on this slide, do the following:On the Home tab, in the Drawing group, click Shapes, and then under Rectangles click RoundedRectangle (second option from the left). On the slide, drag to draw a rounded rectangle.Select the rounded rectangle. Under DrawingTools, on the Format tab, in the Size group, do the following:In the Shape Height box, enter 2.5”.In the Shape Width box, enter 8”.Under DrawingTools, on the Format tab, in the Shape Styles group, do the following:Click the arrow next to Shape Fill, and then click No Fill.Click the arrow next to Shape Outline, and then under Theme Colors click White, Background 1 (first row, first option from the left).Under DrawingTools, on the Format tab, in the bottom right corner of the Shape Styles group, click the Format Shape dialog box launcher. In the Format Shape dialog box, in the left pane, click Line Style. In the Line Style pane, in the Width box, enter 10 pt.Also in the Format Shape dialog box, in the left pane, click 3-D Format, and then do the following in the 3-D Format pane:Under Bevel, click the button next to Top, and then under Bevel click Circle (first row, first option from the left).Under Surface, click the button next to Material, and then under Standard click Warm Matte (second option from the left). Click the button next to Lighting, and then under Cool click Freezing (second option from the left).On the Home tab, in the Drawing group, click Arrange,point to Align,and then do the following:Click Align to Slide.Click Align Middle.Click Align Center.On the Home tab, in the Drawing group, click Shapes, and then under Rectangles click Rectangle (first option from the left). On the slide, drag to draw a rectangle.Select the rectangle. Under DrawingTools, on the Format tab, in the Size group, do the following:In the Shape Height box, enter 2.51”.In the Shape Width box, enter 10”.Under DrawingTools, on the Format tab, in the Shape Styles group, click the arrow next to Shape Outline, and then click No Outline.Under DrawingTools, on the Format tab, in the Shape Styles group, click the arrow next to Shape Fill,point to Gradient,and then click More Gradients. In the Format Shape dialog box, click Fill in the left pane, select Gradientfill in the Fill pane, and then do the following:In the Type list, select Linear.Click the button next to Direction, and then click Linear Down (first row, second option from the left).Under Gradient stops, click Add or Remove until two stops appear in the drop-down list.Also under Gradient stops, customize the gradient stops as follows:Select Stop 1 from the list, and then do the following:In the Stop position box, enter 0%.Click the button next to Color, and then under Theme Colors click Black, Text 1(first row, second option from the left).Select Stop 2 from the list, and then do the following: In the Stop position box, enter 100%.Click the button next to Color, and then under Theme Colors click Black, Text 1, Lighter 25% (fourth row, second option from the left).On the Home tab, in the Drawing group, click Arrange,point to Align,and then do the following:Click Align to Slide. Click Align Top.Click Align Center.Select the rectangle. On the Home tab, in the Clipboard group, click the arrow under Paste, and then click Duplicate.Select the duplicate rectangle. On the Home tab, in the Drawing group, click the arrow next to Shape Fill, point to Gradient, and then click More Gradients. In the Format Shape dialog box, click Fill in the left pane, select Gradient fill in the Fill pane, and then do the following:In the Type list, select Linear. Click the button next to Direction, and then click Linear Down (first row, second option from the left). Under Gradient stops, click Add or Remove until two stops appear in the drop-down list.Also under Gradient stops, customize the stops as follows:Select Stop 1 from the list, and then do the following:In the Stop position box, enter 0%.Click the button next to Color, and then under Theme Colors click Black, Text 1, Lighter 25%(fourth row, second option from the left).Select Stop 2 from the list, and then do the following: In the Stop position box, enter 100%.Click the button next to Color, and then under Theme Colors click Black, Text 1 (first row, second option from the left).On the Home tab, in the Drawing group, click Arrange,point to Align,and then do the following:Click Align to Slide. Click Align Bottom.Click Align Center.On the Home tab, in the Drawing group, click Shapes, and then under Rectangles click Rectangle (first option from the left). On the slide, drag to draw a rectangle.Select the rectangle. Under DrawingTools, on the Format tab, in the Size group, do the following:In the Shape Height box, enter 2.55”.In the Shape Width box, enter 1.06”.Under DrawingTools, on the Format tab, in the bottom right corner of the Shape Styles group, click the Format Shape dialog box launcher. In the Format Shape dialog box, in the left pane, click Line Color. In the Line Color pane, select No line.Also in the Format Shape dialog box, in the left pane, click Fill. In the Fill pane,select Solidfill, click the button next to Color, and then under Theme Colors click Black, Text 1, Lighter 25%(fourth row, second option from the left).On the Home tab, in the Drawing group, click Arrange,point to Align,and then do the following: Click Align to Slide.Click Align Right. Click Align Middle.Select the rectangle. On the Home tab, in the Clipboard group, click the arrow under Paste, and then click Duplicate.Select the duplicate rectangle. On the Home tab, in the Drawing group, click Arrange,point to Align,and then do the following:Click Align to Slide.Click AlignLeft.Click Align Middle.On the Home tab, in the Editing group, click Select, and then click SelectionPane. In the Selection and Visibility pane, select the rounded rectangle.On the Home tab, in the Drawing group, click Arrange,and then click Bring to Front.In the Selection and Visibility pane, press and hold CTRL, and then select the rounded rectangle and four rectangles. On the Home tab, in the Drawing group, click Arrange,and then click Group.To reproduce the text effects on this slide, do the following:On the Insert tab, in the Text group, click TextBox. On the slide, drag to draw a text box.Enter text in the text box, and then select the text. On the Home tab, in the Font group, select Calibri from the Font list, enter 26 in the Font Size box, click the arrow next to Font Color, and then under Theme Colors click White, Background 1 (first row, first option from the left).Drag the text box to the lower left corner of the slide, under the rounded rectangle. To reproduce the animation effects for the picture on this slide, do the following:On the Animations tab, in the Animations group, click CustomAnimation.In the Selection and Visibility pane, select the picture, and then do the following in the CustomAnimation task pane:Click Add Effect, point to Entrance, and then click MoreEffects. In the Add Entrance Effect dialog box,under Subtle, click Fade, and then click OK.Under Modify: Fade, in the Start list, select With Previous.Under Modify: Fade, in the Speed list, select Medium.Click Add Effect, point to Motion Paths, and then click Up.Under Modify: Up, in the Start list, select With Previous.Also in the Custom Animation task pane, click the arrow to the right of the second animation effect (up motion path for the picture), and then click Timing. In the Up dialog box, on the Timing tab, in the Speed box, enter 20 seconds, and then click OK.On the slide, select the Up motion path, and then do the following: Press and hold SHIFT, and then drag the end point (red arrow) of the motion path to the top edge of the slide.Press and hold Shift, and then drag the starting point (green arrow) of the motion path to the bottom edge of the slide.To reproduce the animation effects for the text on this slide, do the following:On the slide, select the text box. In the CustomAnimation task pane, click Add Effect, point to Entrance, and then click MoreEffects. In the Add Entrance Effect dialog box,under Subtle, click Fade, and then click OK. Under Modify: Fade, do the following:In the Start list, select With Previous.In the Speed list, select Very Fast.Click the arrow to the right of the third animation effect (fade entrance effect for the text box), and then click Timing. In the Fade dialog box, on the Timing tab, in the Delay box, enter 3.0, and then click OK.In the CustomAnimation task pane, click Add Effect, point to Exit, and then click MoreEffects. In the Add Entrance Effect dialog box,under Subtle, click Fade, and then click OK. Under Modify: Fade, do the following:In the Start list, select With Previous.In the Speed list, select Very Fast.Click the arrow to the right of the fourth animation effect (fade exit effect for the text box), and then click Timing. In the Fade dialog box, on the Timing tab, in the Delay box, enter 8.0, and then click OK.In the Selection and Visibility pane, select the text box. On the Home tab, in the Clipboard group, click the arrow under Paste, and then click Duplicate.On the slide, click in the second text box and edit the text. In the Custom Animation task pane, do the following:Select the fifth animation effect (fade entrance effect for the second text box). Click the arrow to the right of the effect, and then click Timing. In the Fade dialog box, on the Timing tab, in the Delay box, enter 8.5, and then click OK.Select the sixth animation effect (fade exit effect for the second text box). Click the arrow to the right of the effect, and then click Timing. In the Fade dialog box, on the Timing tab, in the Delay box, enter 13.0, and then click OK.In the Selection and Visibility pane, select the second text box. On the Home tab, in the Clipboard group, click the arrow under Paste, and then clickDuplicate.On the slide, click in the third text box and edit the text. In the Custom Animation task pane, do the following:Select the seventh animation effect (fade entrance effect for the third text box). Click the arrow to the right of the effect, and then click Timing. In the Fade dialog box, on the Timing tab, in the Delay box, enter 13.5, and then click OK.Select the eighth animation effect (fade exit effect for the third text box). Click the arrow to the right of the effect, and then click Timing. In the Fade dialog box, on the Timing tab, in the Delay box, enter 19.5, and then click OK.In the Selection and Visibility pane, press and hold CTRL, and then select the three text boxes. On the Home tab, in the Drawing group, click Arrange, point to Align, and then do the following:Click AlignSelected Objects.Click AlignMiddle.Click AlignCenter.With all three text boxes still selected, drag the text boxes to the lower left corner of the rounded rectangle.To reproduce the animation effects for the shapes on this slide, do the following:In the Selection and Visibility pane, select the group of shapes that contains the rounded rectangle and four rectangles. In the CustomAnimation task pane, do the following:Click AddEffect, point to Exit, and then click MoreEffects.In the Add Exit Effect dialog box, underModerate,click Stretchy, and then click OK.Under Modify: Stretchy, in the Start list, select After Previous.Under Modify: Stretchy, in the Speed list, select Medium.
- Custom animation effects: grow and shrink picture(Advanced)Tip:This slide includes three small pictures and one large version of the top small picture. The small pictures are 1.88” high and 2.5” wide. The large picture is 7.5” high and 10” wide (the dimensions of the slide). Before following the procedures below, size each of the three pictures you will insert into the slide to 7.5” high by 10” wide. You will also need to use drawing guides to position your pictures on the slide. To display and set the drawing guides, do the following:On the Home tab, in the Slides group, click Layout, and then clickBlank. Right-click the slide background area, and then click Grid and Guides.In the Grid and Guides dialog box, underGuidesettings, select Display drawing guides on screen. (Note: One horizontal and one vertical guide will display on the slide at 0.00, the default position. As you drag the guides, the cursor will display the new position.) On the slide, do the following:Press and hold CTRL, select the horizontal guide, and then drag it up to the 2.17 position.Press and hold CTRL, select the horizontal guide, and then drag it down to the 2.17 position.Press and hold CTRL, select the vertical guide, and then drag it right to the 3.50 position.Press and hold CTRL, select the vertical guide, and then drag it left to the 2.50 position.To reproduce the shape effects on this slide, do the following:On the Home tab, in the Drawing group, click Shapes, and then under Rectangles click Snip Diagonal Corner Rectangle (fifth option from the left).On the Home tab, in the Drawing group, click the arrow next to Shape Outline, and then click No Outline.On the Home tab, in the Drawing group, click the arrow next to Shape Fill, point to Gradient, and then click MoreGradients. In the Format Shape dialog box, in the left pane, click Fill, select Gradient fill in the Fill pane, and then do the following:In the Type list, select Linear.Click the button next to Direction, and then click Linear Right(first row, fourth option from the left). Under Gradient stops, click Add or Remove until two stops appear in the drop-down list.Also under Gradient stops, customize the gradient stops as follows:Select Stop 1 from the list, and then do the following:In the Stop position box, enter 0%.Click the button next to Color, and then under Theme Colors click Black, Text 1 (first row, second option from the left). In the Transparency box, enter 51%.Select Stop 2 from the list, and then do the following: In the Stop position box, enter 100%.Click the button next to Color, and then under Theme Colors click Black, Text 1 (first row, second option from the left). In the Transparency box, enter 85%.Under Drawing Tools, on the Format tab, in the Size group, do the following:In the Shape Height box, enter 1.5”.In the Shape Width box, enter 8.42”.Select the rectangle. On the Home tab, in the Clipboard group, click the arrow under Paste, and then click Duplicate. Repeat this process one more time for a total of three rectangles.Drag the first rectangle and center it vertically on the top horizontal drawing guide (2.17).Drag the second rectangle and center it vertically on the middle horizontal drawing guide (0.00).Drag the third rectangle and center it vertically on the bottom horizontal drawing guide (2.17).Press and hold CTRL, and then select all three rectangles. On the Home tab, in the Drawing group, click Arrange, point to Align, and then do the following:Click Alignto Slide.Click Align Center.To reproduce the picture effects on this slide, do the following:On the Insert tab, in the Illustrations group, click Picture. In the Insert Picture dialog box, select a picture and then click Insert.On the slide, select the picture.UnderPicture Tools, on the Format tab, in the bottom right corner of the Size group, click the Size and Position dialog box launcher. In the Size and Position dialog box, on the Size tab, under Scale, clear Lock aspect ratio, and then under Size and rotate, do the following:In the Height box, enter 1.88”. In the Width box, enter 2.5”.UnderPicture Tools, on the Format tab, in the Picture Styles group, click the arrow next to Picture Border, and then do the following:Under Theme Colors click Dark Blue, Text 2, Darker 25% (fifth row, fourth option from the left). Point to Weight, and then click 1 ½ pt.On the slide, drag the picture until it is centered at the intersection of the top horizontal drawing guide (2.17) and the left vertical drawing guide (2.50).Select the picture. On the Home tab, in the Clipboard group, click the arrow under Paste, and then click Duplicate. Right-click the second picture, and then select ChangePicture. In the Insert Picture dialog box, select a picture and then click Insert.On the slide, drag the second picture until it is centered at the intersection of the center horizontal drawing guide (0.00) and the left vertical drawing guide (2.50).Select the second picture. On the Home tab, in the Clipboard group, click the arrow under Paste, and then click Duplicate. Right-click the third picture, and then select ChangePicture. In the Insert Picture dialog box, select a picture and then click Insert.On the slide, drag the third picture until it is centered at the intersection of the bottom horizontal drawing guide (2.17) and the left vertical drawing guide (2.50).To reproduce the text effects on this slide, do the following:On the Insert tab, in the Text group, click TextBox. On the slide, drag to draw a text box.Enter text for the first picture caption in the text box, and then select the text. On the Home tab, in the Font group, select Calibri from the Font list, select 18 from the Font Size list, click the arrow next to Font Color, and then under Theme Colors click White, Background 1 (first row, first option from the left).Select the text box, and then drag the it to the right of the first picture, above the top horizontal drawing guide (2.17). Select the text box. On the Home tab, in the Clipboard group, click the arrow under Paste, and then click Duplicate. Click in the second text box, and then enter text for the second picture caption.Select the second text box, and then drag the it to the right of the second picture, above the center horizontal drawing guide (0.00). Select the second text box. On the Home tab, in the Clipboard group, click the arrow under Paste, and then click Duplicate. Click in the third text box, and then enter text for the third picture caption.Select the third text box, and then drag the it to the right of the third picture, above the bottom horizontal drawing guide (2.17).To reproduce the animation effects on this slide, do the following:On the Insert tab, in the Illustrations group, click Picture. In the Insert Picture dialog box, select the 7.5” x 10” version of the picture that fills the top small rectangle on the slide, and then click Insert. On the Animations tab, in the Animations group, click CustomAnimation.On the slide, select the new large picture.In the Custom Animation task pane, do the following:Click Add Effect, point to Exit, and then click MoreEffects. In the Add Exit Effect dialog box, under Basic, click Disappear,and then click OK. Under Modify: Disappear, in the Start list, select After Previous.Click Add Effect, point to Emphasis, and then click MoreEffects. In the Add Emphasis Effect dialog box, under Basic, click Grow/Shrink,and then click OK. Under Modify: Grow/Shrink, do the following:In the Start list, select After Previous. In the Size list, in the Custom box, enter 25%, and then press ENTER.Also in the Custom Animation task pane, click the arrow to the right of the second animation effect (grow/shrink effect), and then click Timing. In the Grow/Shrink dialog box, on the Timing tab, in the Speed box, enter 0.01 seconds.With the large picture still selected on the slide, do the following in theCustom Animation task pane:Click Add Effect, point to Entrance, and then click MoreEffects. In the Add Entrance Effect dialog box, under Basic, click Appear, and then click OK. Under Modify: Appear, in the Start list, select On Click.Click Add Effect, point to Emphasis, and then click MoreEffects. In the Add Emphasis Effect dialog box, under Basic, click Grow/Shrink,and then click OK. Under Modify: Grow/Shrink, do the following:In the Start list, select With Previous. In the Size list, in the Custom box, enter 400%, and then press ENTER.In the Speed list, select Medium. Click Add Effect, point to Motion Paths, and then click Up. Under Modify: Up, do the following:In the Start list, select With Previous.In the Speed list, select Medium.On the slide, selectthe upmotion path. Point to the endpoint (red arrow) until the cursor becomes a two-headed arrow. Drag the endpoint to the intersection of the top horizontal drawing guide (2.17) and the left vertical drawing guide (2.50), at the center of the first small picture. Right-click the up motion path, and then click Reverse Path Direction. In the CustomAnimation task pane, select the fifth animation effect (up motion path). Under Modify: Up, in the Path list, select Locked.On the slide, select the large picture. In the Custom Animation task pane, do the following:Click Add Effect, point to Emphasis, and then click MoreEffects. In the Add Emphasis Effect dialog box, under Basic, click Grow/Shrink,and then click OK. Under Modify: Grow/Shrink, do the following:In the Start list, select On Click. In the Size list, in the Custom box, enter 25%, and then press ENTER.In the Speed list, select Medium. Click Add Effect, point to Motion Paths, and then click Up. Under Modify: Up, do the following:In the Start list, select With Previous.In the Speed list, select Medium.On the slide, select the second up motion path. Point to the endpoint (red arrow) until the cursor becomes a two-headed arrow. Drag the endpoint to the intersection of the top horizontal drawing guide (2.17) and the left vertical drawing guide (2.50), at the center of the first small picture. In the CustomAnimation task pane, select the seventh animation effect (second up motion path). Under Modify: Up, in the Path list, select Locked.On the slide, select the large picture. In the Custom Animation task pane, do the following:Click Add Effect, point to Exit, and thenclick MoreEffects. In the Add Exit Effect dialog box, under Basic, click Disappear, and then click OK.Under Modify: Disappear, in the Start list, select After Previous.On the slide, select the large picture. Press the LEFT ARROW key to position the picture off the left edge of the slide.Right-click the slide background area, and then click Grid and Guides. In the Grid and Guides dialog box, under Guide settings, clear Display drawing guides on screen, and then click OK. To reproduce the background effects on this slide, do the following:On the Design tab, in the bottom right corner of the Background group, click theFormat Background dialog box launcher. In the Format Background dialog box, click Fill in the left pane, select Gradient fill in the Fill pane, and then do the following:In the Type list, select Linear.In the Direction list, click Linear Up (second row, second option from the left).Under Gradient stops, click Add or Remove until three stops appear in the drop-down list.Also under Gradient stops, customize the gradient stops as follows:Select Stop 1 from the list, and then do the following:In the Stop position box, enter 0%.Click the button next to Color, and then under Theme Colors click Dark Blue, Text 2, Darker 50% (sixth row, fourth option from the left). Select Stop 2 from the list, and then do the following: In the Stop position box, enter 50%.Click the button next to Color, and then under Theme Colors click Dark Blue, Text 2, Lighter 40%(fourth row, fourth option from the left). Select Stop 3 from the list, and then do the following: In the Stop position box, enter 100%.Click the button next to Color, and then under Theme Colors click Dark Blue, Text 2, Darker 25% (fifth row, fourth option from the left).
- Custom animation effects: buttons grow and turn on path(Advanced)To reproduce the curved shape on this slide, do the following:On the Home tab, in the Slides group, click Layout, and then click Blank.On the Home tab, in the Drawing group, click Shapes, and then under Lines click Freeform (11th option from the left).On the slide, do the following to draw the freeform line:Click the first point on the upper left corner of the slide. Click the second point on the bottom edge of the slide, slightly to the left of the middle. Click the third point on the lower left corner of the slide. Double-click the fourth and final point on the first point, on the upper left corner of the slide.Right-click the freeform shape, and then click Edit Points. Right-click the diagonal line, and then click Curved Segment. (Note: Your segment may not look as curved as in the example above.)Select the freeform shape. On the Home tab, in the Drawing group, click the arrow next to Shape Fill, and then under Theme Colors click White, Background 1 (first row, first option from the left).On the Home tab, in the Drawing group, click the arrow next to Shape Outline, and then click No Outline.To reproduce the background effects on this slide, do the following:Right-click the slide background area, and then click Format Background. In the Format Background dialog box, click Fill in the left pane, select Gradient fill in the Fill pane, and then do the following:In the Type list, select Linear.Click the button next to Direction, and then click Linear Diagonal(second row, third option from the left).Under Gradient stops, click Add or Remove until two stops appear in the drop-down list.Also under Gradient stops, customize the gradient stops that you added as follows:Select Stop 1 from the list, and then do the following:In the Stop position box, enter 0%.Click the button next to Color, and then under Theme Colors click White, Background 1 (first row, first option from the left).Select Stop 2 from the list, and then do the following: In the Stop position box, enter 100%.Click the button next to Color, click More Colors, and then in the Colors dialog box, on the Custom tab, enter values for Red: 230, Green: 230, Blue: 230.To reproduce the picture and text effects on this slide, do the following:On the Insert tab, in the Illustrations group, click Picture. In the Insert Picture dialog box, select a picture, and then click Insert.On the slide, select the picture. Under Picture Tools, on the Format tab, in the Picture Styles group, click Picture Shape, and then under Basic Shapes click Oval (first option from the left).With the picture still selected, under Picture Tools, on the Format tab, in the bottom right corner of the Size group, click the Size and Position dialog box launcher. In the Size and Position dialog box, on the Size tab, resize or crop the picture as needed so that under Size and rotate, the Height box is set to 1.2” and the Width box is set to 1.2”. Resize the picture under Size and rotate by entering values into the Height and Width boxes. Crop the picture under Crop from by entering values into the Left, Right, Top, and Bottom boxes. Under Picture Tools, on the Format tab, in the Picture Styles group, click the arrow next to Picture Effects, point to Bevel, and then under Bevel click Circle (first row, first option from the left).Under Picture Tools, on the Format tab, in the Picture Styles group, click Picture Effects, point to Bevel, and then click 3-D Options. In the Format Picture dialog box, click 3-D Format in the left pane, and then do the following in the 3-D Format pane, under Surface:Click the button next to Material, and then under Standard click Metal (fourth option from the left). Click the button next to Lighting, and then under Neutral click Contrasting (second row, second option from the left). In the Angle box, enter 25°.Also in the Format Picture dialog box, click Shadow in the left pane. In the Shadow pane, click the button next to Presets, under Outer click Offset Diagonal Bottom Left (first row, third option from the left), and then do the following:In the Transparency box, enter 77%.In the Size box, enter 100%.In the Blur box, enter 10 pt.In the Angle box, enter 141°.In the Distance box, enter 10 pt.On the slide, drag the picture onto the curve, near the top. On the Insert tab, in the Text group, click Text Box. On the slide, drag to draw the text box.Enter text in the text box and select it. On the Home tab, in the Font group, do the following:In the Font list, select Corbel.In the Font Size box, enter 22.Click the arrow next to Font Color,and then under Theme Colors click White, Background 1, Darker 50% (sixth row, first option from the left).On the Home tab, in the Paragraph group, click Align Text Left to align the text left in the text box.On the slide, drag the text box to the right of the picture. To reproduce the animation effects on this slide, do the following:It will help to zoom out in order to view the area off the slide. On the View tab, in the Zoom group, click Zoom. In the Zoom dialog box, select 33%.On the Animations tab, in the Animations group, click Custom Animation.On the slide, select the picture. In the CustomAnimation task pane, do the following:Click AddEffect, point to Entrance, and then clickMoreEffects. In the AddEntrance Effect dialog box, under Moderate, click Grow & Turn.Select the animation effect (grow & turn effect for the picture). Under Modify: Grow & Turn, do the following:In theStart list, selectWith Previous.In the Speed list, select Fast. On the slide, select the picture. In the CustomAnimation task pane, click AddEffect, point to Motion Paths, point to Draw Custom Path, and then click Curve.On the slide, do the following to create the custom motion path:Click the first point in the center of the picture. Click the second point in the middle of the curve. Double-click the third point off the bottom edge of the slide. In the CustomAnimation task pane, select the second animation effect (motion path for the picture), and then under Modify: Custom Path, do the following:In theStart list, selectWith Previous.In the Speedlist, select Fast.On the slide, right-click the motion path and then click Reverse Path Direction.On the slide, select the text box. In the CustomAnimation task pane, do the following:Click AddEffect, point to Entrance, and then clickMoreEffects. In the AddEntrance Effect dialog box, under Subtle, click Fade.Select the third animation effect (fade effect for the text box). Under Modify: Fade, do the following:In theStart list, selectAfter Previous.In the Speed list, select Fast. To reproduce the other animated pictures and text boxes on this slide, do the following:On the Home tab, in the Editing group, click Select, and then click Selection Pane. On the slide, press and hold CTRL and then select the picture and the text box. On the Home tab, in the Clipboard group, click the arrow under Paste, and then click Duplicate.In the Selection and Visibility pane, select the duplicate picture and text box. On the slide, drag them onto the curve below the first group. In the Custom Animation task pane, select the fifth animation effect (motion path for the second picture). On the slide, point to the starting point (green arrow) until the cursor becomes a two-headed arrow. Drag the starting point below the bottom edge of the slide, to the same position as the starting point for the first motion path. (Note: The endpoint of the second motion path should still be in the middle of the second picture.)On the slide, right-clickthe second picture and then click ChangePicture. In the Insert Picture dialog box, select a picture, and then click Insert. With the picture still selected, under Picture Tools, on the Format tab, in the bottom right corner of the Size group, click the Size and Position dialog box launcher. In the Size and Position dialog box, on the Size tab, resize or crop the picture as needed so that under Size and rotate, the Height box is set to 1.2” and the Width box is set to 1.2”. Resize the picture under Size and rotate by entering values into the Height and Width boxes. Crop the picture under Crop from by entering values into the Left, Right, Top, and Bottom boxes. Click in the text box and edit the text.Repeat steps 1-7 two more times to reproduce the third and fourth pictures and text boxes with animation effects.
- Custom animation effects: countdown(Advanced)Tip: For the effects on this slide, use a large picture that measures 7.5” high and 10” wide (the dimensions of the slide). To reproduce the animated picture effects on this slide, do the following:On the Home tab, in theSlides group, click Layout, and then click Blank.On the Insert tab, in the Illustrations group, click Picture. In the Insert Picture dialog box, select the 7.5” x 10” picture, and then click Insert.On the slide, select the picture. Under Picture Tools, on the Format tab, in the bottom right corner of the Size group, click the Size and Position dialog box launcher. In the Size and Position dialog box, on the Size tab, under Crop from, in the Right box, enter 5.33”. (Note: Under Size and rotate, the Height should now be 7.5” and the Width should now be 5”.)On the Home tab, in the Drawing group, click Arrange, point to Align, and then do the following:Click Align to Slide.Click Align Left.Click Align Middle.On the Insert tab, in the Illustrations group, click Picture. In the Insert Picture dialog box, select the same 7.5” x 10” picture, and then click Insert.On the slide, select the second picture. Under Picture Tools, on the Format tab, in the bottom right corner of the Size group, click the Size and Position dialog box launcher. In the Size and Position dialog box, on the Size tab, under Crop from, in the Left box, enter 5.33”. (Note: Under Size and rotate, the Height should be 7.5” and the Width should now be 5”.)On the Home tab, in the Drawing group, click Arrange, point to Align, and then do the following:Click Align to Slide.Click Align Right.Click Align Middle.On the Home tab, in the Drawing group, click Shapes, and then under Rectangle click Rectangle (first option from the left). On the slide, drag to draw a rectangle. Select the rectangle. On the Home tab, in the Drawing group, click Arrange, point to Align, and then do the following:Click Align to Slide.Click Align Right.Click Align Middle. With the rectangle still selected, on the Home tab, in the bottom right corner of the Drawing group, click the Format Shape dialog box launcher. In the Format Shape dialog box, click Fill in the left pane. In the Fill pane, select Solid fill, and then do the following:Click the button next to Color, and then under Theme Colors click White, Background 1 (first row, first option from the left).In the Transparency box, enter 10%.On the Animations tab, in the Animations group, click Custom Animation.On the slide, select the left picture. In the Custom Animation task pane, do the following:Click Add Effect, point toEntrance, and then click More Effects. In the Add Entrance Effect dialog box, under Basic, click Peek In. Select the animation effect (peek-in effect for the left picture). Under Modify: Peek In, do the following:In the Start list, select With Previous.In the Direction list, select From Right.In the Speed list, select Medium. On the slide, select the second (right) picture. In the Custom Animation task pane, do the following:Click Add Effect, point toEntrance, and then click More Effects. In the Add Entrance Effect dialog box, under Basic, click Peek In. Select the second animation effect (peek-in effect for the right picture). Under Modify: Peek In, do the following:In the Start list, select With Previous.In the Direction list, select From Left.In the Speed list, select Medium. To reproduce the first animated text effects on this slide, do the following:On the Insert tab, in the Text group, click Text Box. On the slide, drag to draw a text box. Enter Time for a short break in the text box. Select the text. On the Home tab, in the Font group, do the following:In the Font list, select TW Cen MT.In the Font Size list, select 40. Click Bold. Click the arrow next to Font Color, and then under Theme Colors click White, Background 1 (first row, first option from the left). On the Home tab, in the Paragraph group, click Align Text Right to align the text right in the text box.On the text box, drag the adjustment handles to adjust the size of the text box so that the text wraps onto two lines, as in the example above. Drag the text box onto the lower half of the slide, to the left of the middle.On the slide, select the text box. In the Custom Animation task pane, do the following:Click Add Effect, point toEntrance, and then click More Effects. In the Add Entrance Effect dialog box, under Moderate, click Ascend. Select the third animation effect (ascend effect for the first text box). Click the arrow to the right of the selected effect, and then click Timing. In the Ascend dialog box, do the following:In the Start list, select With Previous.In the Delay box, enter 1.In the Speed list, select 1 seconds (Fast).To reproduce the other animated text effects on this slide, do the following:On the Insert tab, in the Text group, click Text Box. On the slide, drag to draw a text box. Enter : in the second text box. Select the text in the second text box. On the Home tab, in the Font group, do the following:In the Font list, select TW Cen MT.In the Font Size list, select 90. Click Bold. Click the arrow next to Font Color, and then under Theme Colors click Black, Text 1 (first row, second option from the left). On the Home tab, in the Paragraph group, click Align Text Left to align the colon left in the second text box. Drag the second text box into the upper half of the slide, to the right of the middle.On the slide, select the second text box. In the Custom Animation task pane, do the following:Click Add Effect, point toEntrance, and then click More Effects. In the Add Entrance Effect dialog box, under Moderate, click Descend. Select the fourth animation effect (descend effect for the second text box). Under Modify: Descend, do the following:In the Start list, select With Previous.In the Speed list, select Fast.On the slide, select the second text box. On the Home tab, in the Clipboard group, click the arrow under Paste, and then click Duplicate. Click in the third text box, delete the colon, and then enter 10.Drag the 10 text box on top of the second text box, until the number is positioned to the right of the colon.On the Home tab, in the Editing group, click Select, and then click Selection Pane. In the Selection and Visibility pane, select the 10 text box. In the Custom Animation task pane, do the following:Click Add Effect, point toExit, and then click More Effects. In the Add Exit Effect dialog box, under Basic, click Disappear. Select the sixth animation effect (disappear effect for the second text box). Click the arrow to the right of the selected effect, and then click Timing. In the Disappear dialog box, on the Timing tab, do the following:In the Start list, select After Previous.In the Delay box, enter 1.In the Selection and Visibility pane, select the 10 text box. On the Home tab, in the Clipboard group, click the arrow under Paste, and then click Duplicate. Click in the fourth text box, delete 10, and then enter 09 (the content of the previous text box, minus one second).In the Selection and Visibility pane, select the 09 text box. On the slide, drag the selected text box on top of the other text boxes.In the Custom Animation task pane, do the following:Select the seventh animation effect (descend effect for the 09 text box). Click Change, point to Entrance, and then click More Effects. In the Change Entrance Effect dialog box, under Basic, click Appear. Select the seventh animation effect (appear effect for the 09 text box). Click the arrow to the right of the selected effect, and then click Timing. In the Appear dialog box, on the Timing tab, in the Delay box, enter 1.In the Selection and Visibility pane, select the 09 text box. On the Home tab, in the Clipboard group, click the arrow under Paste, and then click Duplicate. On the slide, click in the duplicate text box, delete 09, and enter 08 (the content of the previous text box, minus one second).In the Selection and Visibility pane, select the 08 text box. On the slide, drag the selected text box on top of the other text boxes. On the slide, continue to duplicate, edit, and drag the text boxes as in steps 16-18, entering a number in each new text box that is one second less than the previous text box, until there is a total of 11 numbered text boxes. (Note: The final text box will contain 00). In the Custom Animation task pane, select the last animation effect (disappear effect for the 00 text box), and then click Remove.
- Custom animation effects: recolored picture with full-color section and motion path(Advanced)To reproduce the picture effects on this slide, do the following:On the Home tab, in the Slides group, click Layout and then click Blank. On the Insert tab, in the Illustrations group, click Picture. In the Insert Picture dialog box, select a picture, and then click Insert. Select the picture. Under Picture Tools, on the Format tab, in the bottom right corner of the Size group, click the Size and Position dialog box launcher. In the Size and Position dialog box, on the Size tab, resize or crop the picture as needed so that under Size and rotate, the Height box is set to 3.58” and the Width box is set to 8”. Resize the picture under Size and rotate by entering values into the Height and Width boxes. Crop the picture under Crop from by entering values into the Left, Right, Top, and Bottom boxes. Under Picture Tools, on the Format tab, in the Adjust group, click Recolor, and then under Dark Variations click Text color 2 Dark (first option from the left). Under Picture Tools, on the Format tab, in the Picture Styles group, click Picture Effects, point to Shadow, and then under Inner click Inside Diagonal Top Left (first row, first option from the left).Drag the picture so that it is positioned above the middle of the slide. On the Home tab, in the Clipboard group, click the arrow next to Paste, and then click Duplicate.Press and hold CTRL and select both pictures on the slide. On the Home tab, in the Drawing group, click Arrange, point to Align, and then do the following:Click Align to Slide.Click Align Center. Click Align Selected Objects. Click Align Middle. Click the slide background area to cancel the selection of both pictures. Select the duplicate (top) picture. Under Picture Tools, on the Format tab, in the bottom right corner of the Size group, click the Size and Position dialog box launcher. In the Size and Position dialog box, on the Size tab, under Crop from,enter valuesinto the Left andRight boxes so that under Size and rotate, and the Width box is set to 2.33”. (Note: For best results, crop the duplicate picture to tightly focus on a single element in the original picture.)Under Picture Tools, on the Format tab, in the Adjust group, click Recolor, and then under No Recolor click No Recolor. On the Home tab, in the Drawing group, click Shapes, and then under Rectangles click Rectangle (first option from the left). On the slide, drag to draw a rectangle. Select the rectangle. Under Drawing Tools, on the Format tab, in the Size group, do the following:In the Shape Height box, enter 7.5”.In the Shape Width box, enter 2.33”.Under Drawing Tools, on the Format tab, in the Shape Styles group, click the arrow next to Shape Fill, point to Gradient, and then click More Gradients. In the Format Shape dialog box, click Fill in the left pane, select Gradient fill in the Fill pane, and then do the following:In the Type list, select Linear.Click the button next to Direction, and then click Linear Down (first row, second option from the left).Under Gradient stops, click Add or Remove until two stops appear in the drop-down list.Also under Gradient stops, customize the gradient stops that you added as follows:Select Stop 1 from the list, and then do the following:In the Stop position box, enter 0%.Click the button next to Color, then under Theme Colors click White, Background 1 (first row, first option from the left).In the Transparency box, enter 55%.Select Stop 2 from the list, and then do the following: In the Stop position box, enter 100%.Click the button next to Color, and then under Theme Colors click White, Background 1 (first row, first option from the left).In the Transparency box, enter 100%.On the slide, drag the rectangle to cover the duplicate picture. Select the rectangle. On the Home tab, in the Drawing group, click Arrange, and then do the following:Point to Align, and then click Align to Slide.Point to Align, and then click Align Middle. Click Send Backward. On the Home tab, in the Drawing group, click Shapes, and then under Rectangles click Rectangle (first option from the left). On the slide, drag to draw another rectangle. Select the rectangle. Under Drawing Tools, on the Format tab, in the Size group, do the following:In the Shape Height box, enter 4”.In the Shape Width box, enter 2.67”.Under Drawing Tools, on the Format tab, in the Shape Styles group, click the arrow next to Shape Fill, point to Gradient, and then click More Gradients. In the Format Shape dialog box, click Fill in the left pane. In the Fill pane, select No fill. Also in the Format Shape dialog box, click Line Color in the left pane, select Solid line in the Line Color pane, and then do the following:Click the button next to Color, and then under Theme Colors click White, Background 1 (first row, first option from the left). In the Transparency box, enter 70%.Also in the Format Shape dialog box, click Line Style in the left pane, and then do the following in the Line Style pane:In the Width box, enter 0.75 pt. Click the button next to Dash type, and then click Square Dot (third option from the top).Drag the dotted rectangle on top of the small, full-color picture. Press and hold SHIFT and select the dotted rectangle, the small picture, and the large picture on the slide. On the Home tab, in the Drawing group, click Arrange, point to Align, and then do the following:Click Align Selected Objects. Click Align Middle. On the Insert tab, in the Text group, click Text Box, and then on the slide, drag to draw the text box.Enter text in the text box, select the text, and then on the Home tab, in the Font group, select Gill Sans MT Condensedfrom the Font list, select 24 from the Font Size list, click the button next to Font Color, and then under Theme Colors click White, Background 1 (first row, first option from the left).On the Home tab, in the Paragraph group, click Center to center the text within the text box.On the slide, drag the text box below the dotted rectangle.To reproduce the background effects on this slide, do the following:Right-click the slide background area, and then click Format Background. In the Format Background dialog box, click Fill in the left pane, and then select Solid fill in the Fill pane. Also in the Fill pane, click the button next to Color, and then under Theme Colors click Black, Text 1, Lighter 15% (fifth row, second option from the left).To reproduce the animation effects on this slide, do the following:To view the area beyond the slide, on the View tab, click Zoom, and then in the Zoom dialog box, in the Percent box, enter 70%. (Note: Make sure that Fit is not selected in the Zoom dialog box.)On the Animations tab, in the Animations group, click Custom Animation. On the slide, select the dotted rectangle. In the Custom Animation task pane, click Add Effect, point to Motion Paths, point to Draw Custom Path, and then click Freeform. Press and hold SHIFT to conform the path to a straight, horizontal line, and then do the following on the slide:Click the center of the dotted rectangle to create the first motion-path point.Click approximately ½” beyond the right edge of the rectangle to create the second motion-path point. Double-click approximately 2” beyond the left edge of the slide to create the third and final motion-path point. On the slide, right-click the freeform motion path, and then click Reverse Path Direction. On the slide, select the freeform motion path. In the Custom Animation task pane, under Modify: Custom Path, in the Start list, select With Previous. On the slide, select the gradient-filled rectangle. In the Custom Animation task pane, do the following:Click Add Effect, point to Entrance, and then click More Effects. In the Add Entrance Effect dialog box, under Subtle, click Fade, and then click OK. Under Modify: Fade, in the Start list, select With Previous.Under Modify: Fade, in the Speed list, select Very Fast.Click Add Effect, point to Motion Paths, and then click Down.Under Modify: Down, in the Start list, select With Previous. Under Modify: Down, in the Speed list, select Medium. On the slide, right-click the down motion path and click ReversePathDirection.On the slide, select the smaller, full-color picture. In the Custom Animation task pane, do the following:Click Add Effect, point to Entrance, and then click More Effects. In the Add Entrance Effect dialog box, under Subtle, click Fade, and then click OK. Under Modify: Fade, in the Start list, select With Previous.Under Modify: Fade, in the Speed list, select Very Fast.Right-click the picture fade effect in the pane, and then click Timing. In the Fade dialog box, on the Timing tab, in the Delay box, enter 1.5.On the slide, select the text box. In the Custom Animation task pane, do the following:Click Add Effect, point to Entrance, and then click More Effects. In the Add Entrance Effect dialog box, under Moderate, click Descend, and then click OK. Under Modify: Descend, in the Start list, select With Previous. Under Modify:Descend, in the Speed list, select Fast.
- For reproduction steps for this slide, refer to the PowerPoint template titled “Static text effects for PowerPoint slides” (STATIC_TEXT.potx), slide number 17.