SlideShare une entreprise Scribd logo
1  sur  31
Télécharger pour lire hors ligne
Dragonfly Production Blog
3rd February 2016
Before today, I was struggling to get the animation for my Dragonfly started because of a couple
of problems that occurred along the way. One of the main problems happened when I was
trying to copy a certain Dragonfly pose to a different frame on the time slider. Each time it was
copied, the animation broke. My teacher explained to me that this was because the controllers
which created the animation were not always keyed on all 3 axes. This caused Maya to
interpolate its position between the frames and therefore break the animation. This was easily
fixed by selecting all of the controllers and pressing “S” on each of the poses which keyed the
animation on all axes.
I also wanted to mirror my animation from one side of the model to the other just like I do when
I’m sculpting. However, this also proved to be a problem as the only way I could do this was to
copy and paste the x, y and z positions and invert the number where necessary on each
controller. This proved to be very time consuming. When I asked to fix this, my teacher
suggested I shouldn’t go about the animation in this way as it would flow a lot better if both sides
of the animation don’t look exactly the same. Therefore I’m now moving each controller by eye
to match the Dragonflies movements.
Once these problems were sorted, I found a good reference video which helped me to work out
a lot of the different ways a Dragonfly flies. Here’s the video:
https://youtu.be/YUfYiQSWJAg?list=PLc75wkLpun8GUZkYyXxra4qoAkxwJIbi0. I then spent the
next couple of hours trying to create a taking off cycle from this video. By the end of the day, I
had created all of the different poses needed but each pose didn’t seem to blend very well with
the next.
6th February 2016
Today, I spent time trying to create a hover cycle with my Dragonfly. I used the same reference
video as I did for the taking off cycle. However, not long after I started looking at it, I had an idea
where I could use the YouTube video and place the window below the Maya Window and make
the Maya window translucent so I could better match the footage with my Dragonfly. However,
as I only had access to my Mac this weekend, the software needed to get this working came up
with errors which weren’t easy for me to fix. Therefore, I will look into this tool more thoroughly
once I’m back in Southampton and have access to a PC.
A couple days ago, I heard one of my teachers mention the Trax editor and its uses. It all
sounded very useful and this caused me to watch this tutorial this evening to learn more about
it: https://www.youtube.com/watch?v=6B1rLoJZa0k. What the trax editor does is it allows you to
save different animation cycles and blend them together seamlessly as well as easily changing
the length of each cycle.
10th February 2016
On this day, Glen my teacher taught me about motion trails in Maya. What these motion trails
do is to create a visual helper on the screen so that the animation of each controller can be
seen in 3D from a spline. This is especially helpful if the animation looks ‘robotic’ which my take
off animation did. I spent all day fixing this robotic look with the splines and by the end of the
day, the wing animation looked more fluid. This is an image of how a motion trail looks like:
11th February 2016
Today, I received my Asus PC back from repair as it’s had a black screen for about a month.
Therefore, all of today was spent installing all of the appropriate programs needed to use my
computer again as the hard drive was formatted. Programs downloaded include Autodesk,
Adobe and Pixologic software.
In addition, both Rhys and I spent a long time finding some more good reference images which
matched the habitat the Dragonfly will be flying through. The main two shots we needed to find
were one of an alpine autumn forest and a close up of the lake.
12th February 2016
Today was spent using the same principles for the take-off animation to create the hover cycle
for my Dragonfly in Maya. I used a reference video to help me work out where the wings were
located. To make the animation more accurate, I noticed the video was playing in 24 frames per
second so I decided to match my animation speed with the video. This helped me a lot but
required some calculations to work out which frame should be animated.
I also helped Rhys find some good downloadable trees to use in his scene created by
Evermotion by asking a classmate where to find some good downloadable trees.
13th February 2016
On this day, I continued animating the hover cycle for the Dragonfly. After spending about 6
hours working on it, I found out that I was animating some of the wings on the wings on the
wrong side of the body. This meant that most of the animation will have to be changed.
To avoid this problem in the future, I learnt how to colour code masks in Adobe Premiere so that
I could follow the wings for the
whole animation cycle.
I also helped Rhys increase the size of his terrain in both depth and width to help accommodate
for more trees. This was done by Exporting the terrain from 3ds Max and importing it into
ZBrush. The terrain was then converted to DynaMesh which allows me to easily scale the
terrain without having to worry about polygons. Once it was completed, it was reimported into
3ds Max where Rhys could further edit the polygons to get the terrain looking like how he
wanted to.
16th February 2016
Today, I spent a lot of time trying to fix the first frames for the rotoscope to be in the positions
they needed to be originally. This was done using Premiere for video referencing the Dragonfly
on each frame and working out what frame corresponds to the animations in Maya.
The number on the left corresponds to the
time shown on the video in Premiere in 24
frames per second.
This number was then converted to the
appropriate keyframe in Maya.
This technique is called rotoscoping
19th February 2016
On this day, the hover animation was completed using motion trail tools and interpretation as to
how the wings would fly. The Dragonflies legs were also folded as all Dragonflies legs are
‘tucked in’ when flying to reduce wind drag.
20th February 2016
Today was spent smoothing out the take-off animation using the motion trail tools in Maya.
I’ve also noticed that when animating, reference images shouldn’t be looked at as thoroughly as
when you’re modelling and sculpting a character. This is because the human eye is better at
judging an animation itself rather than continuously looking back and forth at video footage and
see if they’re similar. However, the video footage is good when it comes to working out the
speed of the animation which is why the rotoscoping is needed on the wings.
21st February 2016
As the take-off animation was the first animation I’d attempted to do, the animation wasn’t
rotoscoped and therefore the timing of some of the frames will need to be fixed. However an
attempt to select multiple keyframes on many controllers and moving them caused Maya to
crash.
Unfortunately, this also meant that the work done on smoothing out the back wings was lost and
so I had to smooth those out again. I’ve now also managed to work out how to turn on autosave
in Maya as it wasn’t on by default. This will hopefully mean I won’t lose any more work.
25th February 2016
As both the Hover and Taking off Animations
were complete, I decided to attempt to finish
animating my landing. After about 5 hours, I
managed to finish rotoscoping the wings.
However, I noticed that the legs were not
tucked in as they were in my previous save
files. This caused me to research how to do
import and export animations between files. I
came across this video which was very helpful:
https://www.youtube.com/watch?v=3FyhaxNf9
QY. It explained how to create ATOM template
files as wells as ATOM exports. The first couple
attempts were unsuccessful for unknown
reasons but I finally managed to transfer this
data into the scene. This was very helpful as I
could now match the legs untucking to the
video.
The image to the right shows some of the
rotoscoping work I had to do in order to match
the animation.
27th February 2016
The last couple of days have been spent fixing the motion trails of the wings so that they’re
smooth during flight. If this was not done, the whole animation would have looked robotic. I also
went back into my Take-Off Animation file as I saw the wings were jerking and bending too
much depending on the frame. Overall, it’s taken about 8 hours to fix these animations.
Once they were completed, I created a separate file with the Dragonfly in its base pose without
any animation. I then created a character set for the Dragonfly which has also been created in
all 3 of my animations. This allows me to transfer each animation from these files into the trax
editor and put them into one scene. As they’re all there, I’m also able to speed up and slow
down the movement of the wings as well as increasing the number of loops the hover cycle can
complete.
Later on in the day, I decided to fix the skin weights on the face as moving the legs caused the
face to get all messed up. This process meant clicking on each joint and painting out every
vertex which shouldn’t be affected by the legs movement.
11th March 2016
In order to check the compatibility of the same environment in Maya and 3DS Max, I decided to
import the high poly 3DS Max environment into Maya and reduce the polygon count so I was
able to interactively move through the scene. This was done by selecting each species of tree
and using polygon decimation tools like pro-optimizer. As I only needed to use the environment
as reference points in Maya, some layers of each tree could also be deleted as the position of
each tree was the main thing that mattered.
After importing all low poly meshes into a new scene in Maya, I worked out that the whole
environment was a lot larger than the one I had originally imported a long time ago. This was an
issue because the Dragonfly already has animation data of it moving around the scene in Maya
and it would be extremely difficult to scale this positional data to accommodate the difference in
size in 3DS Max.
After a while of thinking, I decided it would be a lot simpler to scale the environment to the
dragonfly’s size. This was done by simply importing the terrain from 3DS Max and scaling it
down to the size I had in Maya. Luckily, the actual position of the terrain was the same and the
number the environment needed to be scaled down to was an integer. By going through this
process, I worked out that the environment is 42% smaller in Maya then it is in Max.
The next challenge was to work out how to scale the different assets in the scene to the same
size and position as the terrain. Logically, this wouldn’t be an issue as you’d expect if you select
all the objects in the scene and scale them, they’d all be in the same position with a different
scale. However, as each object was being scaled on its local axes, they were in all different
positons in space. After a bit of trial and error, I worked out if I select the whole environment
except for the terrain I’d be able to assign all of the objects in the scene to be children of the
parent terrain. This allowed me to scale the environment properly and continue animating on the
new and improved environment.
15th March 2016
After doing some basic animation with the camera and Dragonfly we wanted to test out
approximately how long the animation would be. From the beginning to the pine trees, the
animation took 1 minute 40 seconds following the Dragonflies movements. This is about the
halfway point of the animation.
20th
March 2016
The last 5 days were spent refining the Dragonflies animation through the scene in order to get
a representation of what my script originally had planned. In order to show off the environment a
bit more, I decided it would be a good idea for the Dragonfly to fly up and through a pine tree.
This process meant I had to import the high poly pine tree into Maya so that I could be sure it
wasn’t flying through any leaves or branches.
22nd March 2016
This day was spent making sure all the computers in JM018 had all the files and programs
necessary to begin our render over Easter. Here is an image I took of the computers when my
process of getting the right software and files on each computer was nearly complete
23rd March 2016
This was one of our hardest days in our team project as we were limited for time in being able to
use these computers before Easter Break starts. The main problem we had was adding grass to
our environment. This was because carbon scatter from eon software kept crashing due to the
amount of polygons involved. The grass added about 750 million polygons to our environment
and therefore made it hard to edit the grass once it was added. The next challenge was to
convert all of my work in Maya and get it all working in 3DS Max. We realised beforehand that
the 3DS MAX environment was 42% larger than the Maya environment. Therefore, I scaled
down the 3DS Max environment to cater for the animation of both the dragonfly and cameras I
had created in Maya. The next challenge was to find all of the materials used in the scene and
put them all into one folder. This would help clear any issues with materials missing when the
file is placed on each of the computers. This got me to locate about 500 separate materials all
found in different folders and make a copy of them and add them into the Environment Materials
folder on the Google Drive. I also found that if everything was in one file, the program would
almost always crash. Therefore, I decided to split the file into 3 separate ones. The main file had
all of the environment including all of the trees, plants, water and terrain. The next file only had
the grass in it and the final file consisted of all of the animation of my Dragonfly including all of
the cameras. These files were all combined into a main file using the power of Xref in 3DS Max.
This tools is very useful as it allows you to plug in all of the geometry without the need to edit it.
Once this was all done, both Rhys and I went to Uni to start synchronising the new file to all of
the Uni computers in JM018. I then started researching about render channels to make sure we
have as many different layers as we need before we start rendering the whole animation. This
would be helpful to fix any problems found in the renders post processing in programs like after
effects and nuke in case we don’t have time to render a revised version of our scene. We
started working at 8AM and finished at 11:30PM with the whole room rendering out what we
needed.
29th March 2016
This day has been spent managing all of the renders being done at Uni. As they’re all being
rendered in .exr format, the file size of each image is large and has therefore exhausted the 15
GB of space I have free on the Dragonfly Google Drive.
As computer number 5 at university doesn’t have 3DS Max Installed, I’ve used this computer to
put all of the files in one location.
In turn, I’ve got another Cloud Drive from Western Digital which has 4 TB of unused storage but
no way to synchronise files like the Google Drive can.
Therefore, once all of the renders have been finished, the entirety of the folder can be uploaded
to this device.
The image below shows a visual representation of what’s supposed to happen.
Unfortunately, this didn’t work out as computer ran out of hard drive space after around 112 GB
of images. This means that these 112 GB will need to be uploaded first before any more
changes can be made.
30th March 2016
Today, I worked out that if I payed a small sum to Google, I’d be able to purchase 1TB of
storage on the google drive and therefore skip one whole step in the file management process. I
also worked out that as my Western Digital Cloud Drive is in a location where the maximum
download speed is 20 Mbps, the time it would take to transfer files many Gigabytes in size
would take many weeks. As the internet speed in University averages around 400 Mbps and the
google drive servers are located in Google’s headquarters, the time taken for large file transfers
is miniscule in comparison. As soon as this was done, overnight, the amount of storage used on
this cloud drive went from 15GB to 500GB.
These are some of the notes made during that day:
The number indicates the computer being
used
Each tick indicates another render being
completed and the number next to the
ticket tells me how many hours that
computer has left to render
Computer number 5 couldn’t be used as
3DS Max wasn’t installed on the computer
and I had no authorization to install it
myself
Computer 13 came up with an odd error
where the render went completely brown.
This can be seen in the image below.
Computer 15 had a full hard disk and
therefore couldn’t render
Both Computer 1 and 9 had an
input/output error
Computer 23 refused to render as it
apparently had less RAM than the others
and couldn’t handle our large environment
Here is a snapshot of how some of the computers looked like while rendering on that day:
This is a low quality preview of one frame of my animation
31st March 2016
Today I checked to see if all of the renders were still going and if there were any more errors I
encountered. One of the main errors I found was that the brighter grass was flickering. I
originally thought this was due to a render error which is sometimes fixed by increasing the
render settings. However, at night time, after much thought, I realised it may be because the
grass is duplicated somehow. This theory proved to be true as the Dragonfly Xreffed into the
main scene had 3 patches of bright grass as well as the main environment file. Therefore,
deleting these patches of grass on one of the files stopped this error from occurring.
The next error, I thought I’d try and solve was the issue on computer 15 with a full hard drive. To
fix this, I emptied the recycled bin, compressed the whole hard drive, searched the C drive for
the largest files available and deleted any unnecessary files. This allowed me to use this
computer for some renders. After doing this, I realised this issue may be why there is an
input/output error on some of the computers while it’s rendering. This proved to be true as when
I did the same thing on these computers, this error stopped occurring.
The next computer I wanted to fix was computer 13 with that brown render. I originally thought
this error was due to something wrong in my file but when I rendered these frames on a different
computer, it all seemed to work. I then tried rendering some different frames on this computer
but this only resulted in the same problem except with blue streaks in the render instead of
brown
This is how that render looked like:
There seemed to be an error with computer 12 as you can see from this video:
https://youtu.be/ldFoorD1gQo . However, the computer seemed to calm down and work.
In the end, I managed to get all of the computers rendering except for computer 5 with no 3ds
max, computer 13 with render errors and computer 23 with memory errors.
These are some of the notes I made on that day:
The first
numbers
indicate each
computer.
Each tick means
another render is
finished.
The red writing
to the right tells
me how many
hours each
computer has to
render.
Finally, if there’s
text, it’s telling
me which
camera is being
used to render
out these shots.
The main thing
I’ve found helpful
with writing
down these
numbers is that
helps get me to
organize which
computers are
free to render
and which
computers are
taking too long
to render part of
a sequence.
This can be
seen with the
pine tree camera as it originally had 173 hours left to render which seemed like too much.
Therefore, I cancelled that render and split the remaining frames on that camera on all of the
free computers. Therefore, instead of having to wait a week for this to finish, I only have to wait
a day.
1st April 2016
Today was spent continuing to manage the renders at university. By the evening, 8 of the
computers had finished rendering. As Computer number 14 had 404 hours left to render its 250
frames, I decided to cancel this render and split the frames equally between the now 9
computers free. Logically, this would mean that this section of renders would be 9 times faster
which averages out for this render to finish in around 45 hours’ time.
5th April 2016
By this day, all of the rendering had finished and all the files were stored on the google drive. As
I was still in Torquay, I couldn’t view the full animation as the internet was too slow to download
1.1 TB of EXR images. However, I could still move the files away from the synchronised folder
onto a combined folder on the google drive. This meant that none of my files were filling up the
computers at Uni.
As neither Rhys nor I had any way of viewing the files, we decided to take a break until we got
back after Easter.
10th April 2016
Although the internet was slow, while this was all happening, Rhys was slowly downloading all
the files onto his 2TB hard drive as a backup. By leaving the computer on all night every night
since the beginning of the rendering process, this finished on the 10th of April.
This was also the day I drove back to Southampton. I arrived at Uni at 3PM to turn off all of the
rendered computers to make way for students having lessons on that Monday. I took an image
of how the room looked like on the day I got back:
14th April 2016
Over this last week, both Rhys and I were trying to sort out the mess of files that came with our
renders. The reason why it was so messy was because we had split the renders into separate
folders per computer to save on file space as well as having files split between the OneDrive,
the Western Digital Cloud and Google Drive. Additionally, there were also file conflicts which
meant it created a lot of duplicates. The final problem was that the naming convention from
some of the renders weren't the same meaning that any post-production program wouldn’t
recognize the whole thing as an image sequence.
To solve all these problems, we used Rhys’s PC to move everything onto his 2TB Hard Drive.
This meant that we could create a separate folder away from the cloud drives to sort out all the
files. We originally were using the file explorer to delete any duplicate files manually by checking
the file size of each image. This was a gargantuan task because there were 14 different render
channels each with 5000 frames in them. This meant that we were manually checking 70,000
files for just one camera of many.
I researched how to speed up this process and found that Adobe Bridge is very good at file
handling and could also batch rename files selected. This dramatically increased the speed of
sorting out these files and by the end of the week, we had a folder which looked like this for
every camera shot:
Once this was done, the files
could then be imported into
After Effects. Doing this
allowed me to see if there
definitely were any missing
frames in my animation.
Luckily all of the cameras had
everything needed except for
the Main Camera which was
missing 196 frames.
I decided to Render out these EXR
images in After Effects in order to see
how the animation looked like in real
time. Unfortunately, we found out that
the lake water wasn’t moving and the
whole animation was flickering like
crazy. Here is a link to how it looked
like: https://youtu.be/X6BpexcFELw. This was a shame as this meant we’d either have to hand
in a broken animation or re-render everything again.
15th April 2016
On this day, we both came to the conclusion that we wanted to render the whole animation
again as we didn’t want to hand in uncompleted work. Therefore we started the day off with
Rhys researching how to fix the Vray water moving and me testing out different render settings
so we could avoid flickering. By about 4PM we realised that the issue was that the global
illumination setting was too low and therefore we were getting anomalies in the lighting.
I therefore decided to do test renders in 320*240 pixels with the global illumination setting being
increased. Unfortunately, having the setting on medium, medium animation and high all still
produced artefacts but having the setting on high animation seemed to remove these light
artefacts. This was a shame as this would significantly increase our render times. This is how
the failed flicker tests looked like: https://youtu.be/M6FjGgSi_oA
Setting the irradiance map to Multiframe Incremental and the Light Cache to Fly Through also
seemed to help reduce any artefacts.
In the late afternoon, we went to the uni’s technician to ask him which rooms in the uni had 3DS
Max as we knew that the renders would take a long time and we would need as many
computers as we could get our hands on if we wanted to finish the renders on time. He told
exactly which rooms had 3DS Max at Uni and so the both of us started to go and log onto as
many computers as we could.
This is a table of the available rooms with 3DS Max at University.
Room Number Number of Computers
JM 007 40
JM 018 24
JM 028 5
JM 033 5
CC 020 10
RM Games Academy 40
RM 607 25
As my Google Drive was filled up with all of my old renders, we decided to download both
Google Drive for the 3DS Max files and One Drive where all the files could be saved onto once
rendered. To do this, we needed special permission from the technicians to download software
onto the computers needed which was granted. It took about 4 hours to get the right software on
all the computers and start the rendering process. We also needed to ask permission from the
teachers in those rooms to see if we could use the computers over the weekend. All of the
rooms were okay except for CC020 which had quite a few students working in the room.
Unfortunately, as soon as we had installed all of the right software in RM 607 and RM GA, we
did another test to see how it would render. Unfortunately, the render crashed which wasn’t a
good sign but we still were hoping that some of the computers in these rooms would be
beneficial to us. This building closed at 9PM which meant we couldn’t test any more renders in
this room today. Luckily though, by the end of the day, we had renders going in JM 007 and JM
018.
16th April 2016
On the Saturday, the first thing we wanted to do was go into the RM building and see if we could
get renders to work. Unfortunately, according to the guards, we needed written permission to be
able to access these rooms which we didn’t have.
However, the JM building was less strict and we could get access to the rooms we had put
renders into. From what I remember, on the Friday night, we added 15 frames per computer. As
there was a games jam on that day, we couldn’t get access to the whole room in JM 007 so we
only put on our renders on 21 of the computers rather than the 40 computers available.
Everything seemed to be going okay on that day but the renders were taking a lot longer than
expected.
17th April 2016
The games jam was still continuing on this day which meant we couldn’t put on any more
renders. However, the security guards were a lot kinder on the Sunday as we explained to them
we had permission from the tech specialists to use the rooms in the RM building. Unfortunately,
when we went over there, all of the renders had crashed on the computers. The reason why
they had crashed was because they only had 8GB of RAM and the computers couldn’t handle
all of the data we were putting into it. This is the link to the video of us working on the computers
in RM 607 https://youtu.be/l-pgCejzRkA and this is another video of us working on the
computers in RM GA https://youtu.be/Mm5zobaEvPA.
Over time, using this room looked promising as most of the computers were starting the light
cache. This is how it looked like during this process: https://youtu.be/NFDfHF8R85A
As we were checking the room in the JM building, we went back to the RM building to double
check our computers, all of the computers had crashed. This is how RM 607 looked like
https://youtu.be/W_fSSyLYPHs and this is how RM Games Academy looked like
https://youtu.be/VIAY0F6qjo8
18th April 2016
Today, we were hoping that all our renders would have finished so that students can use the
computers during the daytime. However, this wasn’t the case and most of them were still on in
JM 007. This meant that we had to cancel the renders and work out which frames had been
done and which frames hadn’t been done. This process was very time consuming.
Here are the
frames we
assigned to each
computer in their
respective
rooms:
On top of all this, one drive also notified us that it limits the number of computers able to use my
1TB of cloud storage. This meant that I had to cancel all of my accounts in the RM building
which took ages to set up in order to sort out the computers in JM 007.
19th April 2016
On this day, we thought that this process was taking way too long and we had to try and find a
shortcut which would help us. Therefore, we decided to try and get backburner to work at
university to help better manage our renders. In the morning, we went to JM033 and we
managed to catch Adam Comiskey as Ian the technician told us that he was the most
experienced person in network rendering. He explained to us how it worked and how to set it
up. This is the basics of it:
● The Network Manager controls which computers are assigned to which frames.
● The Server connects to the network manager
● The Monitor gives you information on which frames have been done and any errors
encountered.
Unfortunately, when Adam Comiskey was setting up a test scene, backburner was
unresponsive and didn’t work. All of the teachers we asked who had experience with
backburner before were very sceptical that it would work at University due to security issues.
However, I left both the server and manager just in case Ian might have some ideas. When we
came to Ian with the problem, after a while of troubleshooting, he managed to work out it was
because the server needed to manually add the IPv4 address of the manager so that they could
communicate with each other. Once this was sorted, the test scene which was set up worked
which was a huge relief to the both of us.
This meant that we could set up a new render with all the frames that were missing from
previous attempts and put this onto the network manager. Regrettably, a lot of the first 450
frames were rendered in the wrong camera view which meant they also had to be re-rendered.
As I knew I was leaving to Karate in the evening, I gave Rhys a list of things to do to set up the
network manager in both JM 007 and JM 018. Here is what I wrote for him to do:
Once I got back at 10PM to check how far he’d come, most of it had been done and all that was
left to do was to finish adding multiple computers to the network manager.
20th April 2016
We arrived at university at 7:00 in the morning and we saw that all the computers which were
still rendering the original 15 frames which was set on the Friday had finished which meant
these computers could be used for backburner as well.
As we were sorting out the computers in JM 007, Adam Barton came into the room.. As it was
all working overnight, I had a theory that the renders should be able to still be going during the
day as any renders cancelled would go straight back onto the manager and reassigned to a new
computer. I explained this to Adam and he was fine with us using the room during the daytime.
As the day passed, my theory was correct which meant that we were able to use the machines
during the day throughout the week as well as during the night. This was very helpful to us as
we could finish our renders at a faster rate giving us more time to sort out our document and
any other work needing to be finished.
21st April 2016
Before classes began, we checked if all the renders were still working during the daytime and
they all seemed to have no issues and so once we’d checked all the rooms with our renders, we
put on a notice on every classroom door with our renders to make sure students were aware
they could cancel our render if no computers were free. This was very important as none of the
students had any experience with backburner and they’re all aware how long it takes to render
something out.
Once we were happy with how everything was going, we decided to take a bit of a break and go
to the gym and have some lunch. However, once we got back Adam Barton wasn’t too happy
with us as apparently once our renders were logged off, some of the students had issues using
the computers. We were surprised about this as all files were moved into the cloud every
morning and evening freeing up the storage of the computers and any RAM or CPU power used
would be freed up as soon as the render got cancelled.
As we were setting up another batch of renders during the evening, Ian the technician came in
to try and diagnose why there was an issue in the first place. What he found out was that
loading the file took up so much RAM, it was also using something called paging files which
uses the hard disk as more storage for the RAM. Apparently this causes damage to the hard
drives over time as they have a limited write life and once the page files have been assigned,
this storage space can’t be used for the computer. Regrettably, this meant that our renders
needed to be cancelled indefinitely unless we find a solution of reducing the storage needed to
load the file as its rendering. This was a huge blow for us as it potentially meant that there was
no chance of us finishing our renders.
22nd April 2016
With renewed determination, both Rhys and I came in early in the morning on the Friday in
hopes of finding a solution to getting our renders working again. These are the issues we
wanted to sort out:
● Texture Sizes
● Polygon Count
● File Size
Before we started to research how to optimize the scene, we wanted to make sure all the
frames we had already done in both the google drive and the OneDrive were safely in one
place. To do this, all 1.1 Tb of data from our old render was backed up on Rhys’s PC so I
therefore deleted all of this data from the google drive so that we had a fresh place to store
everything we needed on the cloud.
Rhys researched how to reduce the polygon count of the grass by working out where the grass
couldn’t be seen by the camera. This was a painstaking manual process of trying to reduce 750
million polygons of grass.
I decided to research how professional optimize their scenes and I came across this website
which was very helpful to me: http://www.evermotion.org/tutorials/show/9296/3ds-max-working-
with-big-scenes
This was an architectural visualisation with tips and tricks on how to optimize a large scene.
● In the end, I worked out one of the texture files was being read by a Photoshop file when
it could have been by a JPEG. The difference was 600MB to 10 MB with no difference in
quality.
● Vray Proxies was another thing I thought would help a lot in reducing the file size but I
never managed to get it to work properly before during my tests.
However, looking at this video multiple times https://youtu.be/piqQkhMbCAU , I managed to get
it working in our scene but it would still mean I’d have to select every single piece of geometry
separately to get them to be VRay proxies. To try and find a way around this, I did some
research and found this very interesting plugin called Instances to VRay Proxy which in a
nutshell converts all instances of each object to proxy objects.
This tool was so helpful it reduced our scene from 800 million polygons all the way down to 60
million polygons. The grass in itself was reduced from 750 million polygons to 668 thousand
polygons. This all works because the proxy produces a .vrmesh file which essentially is a file
with just that one object in it. Once this was all done, we asked Ian the technician to have a look
at our scene whilst its rendering and thankfully, on all 16GB machines, it was using 95% of the
RAM which meant there were no issues with page files. This cleared us from the issue of the
day before and he gave us the go ahead to use the machines at university again to our delight
23rd April 2016
We tested out JM018 on the Friday evening to see how long the renders will take to finish but
unfortunately the time per frame was still around 4 hours. What did make difference was that
none of the computers we had rendered were giving out any page faults as it was using a lot
less RAM than what it was originally all because of these proxy objects.
As it was still taking this long per frame, it was important to us that we put renders on as many
computers as we could so that we could finish our rendering on time. By the end of this day, we
had 78 computers setup and rendering.
24th April 2016
Most of this day was just spent managing our renders and checking how many frames had been
done and fixing any errors on the network manager. These issues tended to be file location
errors or false IP Addresses.
25th April 2016
We arrived at university at around 6:30 in the morning on this day as we wanted to get in as
early as possible to switch off all the renders for the students to use when classes started at 9.
The reason why it always took so long every morning to synchronise the files was because
Google Drive has a tendency to crash when multiple computers are uploading different files at
the same time. By 9:00, we’d just about finished checking on all the computers.
The number of renders completed for this weekend was around about 1000 which was very
good going considering each frame took about 4 hours to complete.
26th April 2016
In addition to checking all of the computers we had left for the week, we decided to see if we
could further speed up the rendering process by researching some more on different options.
These were:
● GPU rendering with VRay
● Distributed rendering with VRay
● Cloud Rendering with render farms (ZYNC and Rebus Farm)
The first thing we wanted to try was cloud rendering as we knew this would be the fastest
option. https://www.zyncrender.com/ was the first one we registered to as they were offering
300 pounds worth of rendering free which was the best option we could find. The second best
option we found was https://gb.rebusfarm.net/en/ which was another well-known render farm
service. Both of these accommodated for 3DS Max and VRay which were what we needed. As
we registered for these services at university, network restrictions prevented us from uploading
our work. Therefore, we decided to put this on hold and explore another avenue.
The next thing we tested out was GPU rendering as from what we’ve heard, it’s a lot faster than
CPU rendering but this process if fairly new so it’s not as well recognized and debugged as the
traditional route. The other issue with GPU rendering is that it doesn’t use RAM but it uses
VRAM instead. Currently, most graphics card have only 1-2 GB of RAM which isn’t much
considering our scene uses up almost all 16GB of RAM when rendering on the CPU. We
decided to test it out anyway to see what would happen and it seemed to render one frame with
lots of noise in about 5 minutes compared to the 3-4 hours per frame on the CPU. This seemed
promising but then each time we tried, it seemed to get stuck and not complete the render. All
this avenue seems promising in the future, the technology hasn’t caught up enough for us to be
able to efficiently use it for our renders.
The final thing we decided to test out was Distributed Rendering. This process works almost
exactly the same as Backburner but instead of assigning each computer to a different frame,
they all get assigned different ‘buckets’ on the same rendered image. This would be very helpful
us because then we won’t lose any significant time as people log off some of our renders on the
computers during the daytime. As each person logs onto a computer with a render on, we lose
time ranging from a couple of minutes to 4 hours but if distributed rendering is on, all we’d lose
is a bit of computing power.
Here’s a video of distributed rendering working with each number being a different render slave:
https://youtu.be/XPXiITMpHGE
Unfortunately, this process didn’t work out for us either as the computers at uni weren’t set up to
use distributed rendering. According to what I’ve found out on this link
http://vray.info/topics/t0111.asp, you get 10 render slave licenses per workstation license.
Therefore if this was set up, we wouldn’t have had to worry about our renders as we’d have
more than enough computers to render our animation.
27th April 2016
As usual, today was spent managing all of the renders going on in the day and setting the ones
which were cancelled overnight.
However, over night, I had an idea on how to improve the animation of the wing as it’s flying
through the scene. The idea was to create a very simple animation with an up down motion and
speed this up so that it can be properly be seen in the viewport.
This dragonfly will be rendered separately from the scene and then composited back into the
main renders. By doing this process, hopefully motion blur on the wings will help to make it look
more realistic and therefore improve upon the animation.
However issues were encountered during the creation process:
● While trying to get this working in Maya, the file itself seemed to be corrupt in some way
which stopped me from being able to save the new animation.
● The animation clip could be saved but when loaded into the main scene, none of the
rotational data seemed to be there.
● The final issue we encountered was if the animation was sped up too much, some of the
keyframes were lost as there were multiple keyframes between the frames.
In the end, I managed to save the work I had done to it hoping that these problems will get fixed
in the near future.
At night, we both put on the renders with the computers which were free.
28th April 2016
Today was spent trying to optimize different camera shots to help improve the speed of the
renders. This was done by selecting everything in the scene that the camera could see, invert
the selection and delete everything else.
This proved to be very helpful in the rendering times as now it only seems to take an average of
1 hour per frame rather than 3 hours.
All of the renders were managed as usual with the network manager to sort them all out and all
the files were uploaded to the Google Drive.
29th April 2016
This morning, I proposed an idea to Glen on how to fix the animation of the wings. The idea
was:
● Use the baked animation of the Dragonfly in Max and remove all of the keyframes for the
wings and create a new cycle.
However, looking at the wings again, I created a motion trail which allowed me to see where the
old animation cycled. This was very helpful as there was a slight pause in the animation
between each wing cycle which I didn’t
want. This is how it looked when I was
working on it:
By doing this, I could isolate the part of the
wing animation which I needed to use, and
duplicate it across all of the animation
where the dragonfly is flying across the
environment.
The next challenge was to add motion blur
to the wings as I had failed to get this
working in Vray. In mental ray and in scanline,
adding motion blur is fairly simple as there’s a
setting in the object properties panel to add motion
blur as well as in the renderer settings.
Once this was done and I was happy with the
animation I had created, I decided to do some test
renders to see how it would turn out. Here is a
video of what it looked like with motion blur:
https://youtu.be/wv7VGJXFFLo
After that, I decided to do a full HD render and put
that into Photoshop with my final image. This allowed me to see how much I’d be able to fix by
applying this process to my animation.
30th April 2016
As it’s the weekend again, I went into university and made sure I was using as many computers
as possible to render from. This in the end came to 34 computers as the rest were being used
by other students. I then decided that another key section of my renders should be added to the
queue as upon my calculations, most of the frames should be finished rendering by Monday
evening. The part I wanted to render was between frames 1650-1900 as this is the part where
the Dragonfly flies between a branch and different sections of a tree.
Here’s an updated video of where I’m at the moment: https://youtu.be/xWw2MzpYpFk
1st May 2016
Today I decided to not go into university as most of the computers rendering should hopefully
be left on as not many people go into university on the weekends. To my surprise, the original
1900 frames added a couple weeks back had finished rendering and the other two tasks
assigned were well on their way to completion. I therefore decided to put on a task for the forest
camera which is the only camera which hasn’t started to render yet. This scene however was
optimized at the beginning of the week which meant each frame took approximately 1 hour to
render rather than 3.
2nd May 2016
In the afternoon of bank holiday Monday, all of the frames for the tasks were completed and all
of the computers were sitting idle. I also noticed that my computers had also finished rendering
the Lake Camera which was a pleasant surprise. As Rhys was at home this weekend, I decided
to check his computer too and saw that Pine Tree Camera was nowhere near done in
completing its task. I then decided it would be more beneficial to cancel that render and put on
the remaining frames on the computers at university.
According to my calculations, Rhys’s computer had done 86 frames in a week and with the 31
computers left idle at Uni the remaining 114 frames should be completed within about 4 hours.
These were done in the evening and so, we decided to quickly check what we had so we could
put on another render for the missing frames in the evening of that day.
3rd May 2016
In the morning, we both went to Uni and saw all the frames we had assigned to be finished. This
meant that we thought we had finished with all the frames for the animation but the only way to
check this was to download all of our files onto a local hard drive where we could make sure we
had all we needed.
While we were checking, Rhys noticed that some of the camera shots had different lighting to
the rest of our scene which was odd.
We left this for the moment as we had to render all of the rest of the missing frames from the
main camera which we knew was working.
4th May 2016
After we went in early in the morning and checked on all the renders and synchronized all the
files, we wanted to make sure we knew what the issue was with the other camera shots. What I
did to try and diagnose this problem was open the reed camera file which was working and
compare it with the pine tree camera file. What I found was that while I was optimizing the
scenes to try and improve on render time, I had accidentally deleted the VRay Sun which lit up
all of our scene. Thankfully, this was an easy fix as all I had to do was merge the VRay Sun
from a working file into the broken files and the test renders all seemed to work.
Here is a comparison of 2 frames under these different lighting conditions:
As all of the other renders had finished in the evening so I put on the fixed camera shots in the
network manager.
5th May 2016
By the morning of the 5th of May, all of the fixed camera shots had completed so all that was left
to do was to find a computer at university with enough storage to hold 300 GB of images so we
can continue our work from the rough cut. We found one and waited about 4 hours for the files
to synchronise onto that computer’s hard drive.
While we were checking one of our renders, one of the students needed help with one of his
renders as he’d only used mental ray before and he wanted his renders to look more realistic.
We therefore helped him set up VRay and create some water for him. The left render is Mental
Ray and the right one is Vray. This helped solidify our knowledge of Vray and realistic water.
6th May 2016
On this day, we came in later than usual as we had no renders to check and we needed a bit of
a break. The first thing we did when we came in was check the raw footage in Premiere to make
sure we had everything we need. This included:
Camera Frame Numbers
Zoom Camera 0-450
Main Camera (450-1193) (1261-1501) (1600-1900) (2501-4900)
Forest Camera 1150-1350
Pine Tree Camera 3000-3230
Swoop Camera 3260-3300
Reed Camera 3500-3580
Lake Camera 3998-4010
Wing Motion Blur 900-4100
Once all the footage was checked and played, we noticed that the original footage we’d
rendered 3 weeks ago had issues in it. This was mainly due to us not having the network
manager working at the time causing us to try and workaround a mess of renders which I think
meant we sometimes didn’t open the exact same file meaning some of the renders were slightly
different. This is how that section looked: https://youtu.be/06efmBl4uTw
As it was coming up to the weekend, we decided to grab the chance to re-render those 450
frames and so we managed to get access to 50 computers to render from.
Another issue we had was lining up the wing motion blur footage with the right frames of the
main camera animation. Lining it up to the raw footage was simple as none of it was cut so we
placed that layer on frame 900 which lined up to frame 900 on the main camera. However, as
the footage already had a rough cut and a beauty cut, there were issues lining these up. This
was because:
● Adobe Premiere recognized the footage as 25 frames per second when it was rendered
out at 30 frames per second.
● Lining it up by eye was extremely difficult as we had to get the exact frame where they
lined up.
● The number of different layers in the file was a mess so it was hard to see what you
were doing.
To fix this, the first thing I did was delete any layers we didn’t need including the rough cut. This
left us with 5 video layers and 1 audio layer lined up like this:
Video 5 Uncut Motion Blur Camera
Video 4 Uncut Main Camera
Video3 Workstation where footage was cut up
Video 2 Motion Blur Cut
Video 1 Beauty Cut
Audio 1 Music
This made it easier to work out what we were doing. Now this was sorted, we spent about an
hour trying to work out how to implement our Motion Blur footage to our Beauty Cut. What I
came up with was that the sequence was playing at 30 frames per second when the footage
was interpreted at 25 frames per second. This caused the timeline to change and not align to
the frames we rendered on. However, changing the sequence settings to 25 frames per second
fixed this problem.
The next issue was trying to align the motion blur wings to the beauty cut. Nothing I tried
seemed to work but then I had the idea of using blue tack on the screen to give me reference
points on where exactly parts of the geometry were located. This process seemed to work and I
decided to record how this process works: https://youtu.be/lPEaNkd-pZQ
7th May 2016
Today was spent managing our final renders which are now just over 50% done in about a day
which means that hopefully sometime tomorrow afternoon, the rendering should be truly
finished.
We then spent our time fine tuning our rough cut by reducing the opacity of the motion blurred
wings and finding some sound effects to be added as well as working out how to remove our old
dragonfly from the motion blurred animation.
8th May 2016
Today, all of the renders we put on the Friday had completed and so we decided to synchronise
all of the computers with the files and log off all of the computers. However, the security guards
had issues going into the computer room at CC020 which meant that the files rendered there
can’t be uploaded until Monday morning.
The Lake Camera also had issues as although the lighting was now working, there was no
Dragonfly present. This wasn’t too big of an issue as there are only 13 frames to render and so I
fixed this issue and put on a new render in JM018.
As I was fixing all of this, Rhys was researching on how to get this work from Premiere into After
Effects in order to do some colour grading. He worked out that the simplest would be to just
render out the Beauty Cut from Premiere and import it into the file we had in After Effects.
We also did some colour grading in After Effects to help improve on our renders and focus the
viewer's attention to what’s important. Here’s how it came out: https://youtu.be/QrKqxykSsQE.
The next thing we decided to do was test out how it looked with pixel motion blur. What this
does is adds a slight motion blur to anything that’s moving in the camera view. This helps to
stop the viewer get disorientated on what’s happening on the screen. Here’s how that version
turned out: https://youtu.be/S-vdA9p2334
We then went back into Premiere and tested out some sound effects to the footage to make it
more interesting. The parts we focused on this day was getting a good opening piece of music
as well as giving sound to the beat of dragonfly wings.
9th May 2016
This morning, Rhys went into university to synchronise our final files. As he was doing this, I
was moving the files uploaded into their respective folders onto the google drive for the last
time. We now had all the files we needed to work from home and decided to spend the rest of
the day editing the footage. This is what we came up with: https://youtu.be/xujpUwQiFus
10th May 2016
Once completed, we showed this to our Tutor who was pleasantly surprised how far we had
come. He had a couple of minor fixes to the video which we added making the video look a lot
more dreamy. Here is our final cut: https://youtu.be/vNMN4TBeFfY

Contenu connexe

En vedette

Uploadviafilezilla
UploadviafilezillaUploadviafilezilla
UploadviafilezillaVIa Jrl
 
Grass-roots Disruption @ EuroComm 2013
Grass-roots Disruption @ EuroComm 2013Grass-roots Disruption @ EuroComm 2013
Grass-roots Disruption @ EuroComm 2013Celine Schillinger
 
Pev 1C BASIC1
Pev 1C BASIC1Pev 1C BASIC1
Pev 1C BASIC1clanmort
 
Who are you tasha sanders
Who are you tasha sandersWho are you tasha sanders
Who are you tasha sanderstsanders123
 

En vedette (8)

Uploadviafilezilla
UploadviafilezillaUploadviafilezilla
Uploadviafilezilla
 
Grass-roots Disruption @ EuroComm 2013
Grass-roots Disruption @ EuroComm 2013Grass-roots Disruption @ EuroComm 2013
Grass-roots Disruption @ EuroComm 2013
 
Pev 1C BASIC1
Pev 1C BASIC1Pev 1C BASIC1
Pev 1C BASIC1
 
Phaithu
PhaithuPhaithu
Phaithu
 
Incredible india
Incredible indiaIncredible india
Incredible india
 
Els determinants
Els determinantsEls determinants
Els determinants
 
Who are you tasha sanders
Who are you tasha sandersWho are you tasha sanders
Who are you tasha sanders
 
E gov2013
E gov2013E gov2013
E gov2013
 

Similaire à Dragonfly Animation Blog: Keyframes, Motion Trails & Rotoscoping

Mouth Movement Experiment 1
Mouth Movement Experiment 1Mouth Movement Experiment 1
Mouth Movement Experiment 1AmyWatson69
 
Pl 123 (repaired)
Pl 123 (repaired)Pl 123 (repaired)
Pl 123 (repaired)danhops888
 
New Media Technologies
New Media TechnologiesNew Media Technologies
New Media Technologiesmpcookechs
 
Production Log
Production LogProduction Log
Production Logdanhops888
 
Media evaluation 4
Media evaluation 4Media evaluation 4
Media evaluation 4mollymay92
 
Media evaluation 4
Media evaluation 4Media evaluation 4
Media evaluation 4mollymay92
 
Fmp production reflection part 3
Fmp production reflection part 3Fmp production reflection part 3
Fmp production reflection part 3sean cawood
 
3. fmp production experiments(3)
3. fmp production experiments(3)3. fmp production experiments(3)
3. fmp production experiments(3)Media Studies
 
Technology used throughout producing ancillary products
Technology used throughout producing ancillary productsTechnology used throughout producing ancillary products
Technology used throughout producing ancillary productsjessnally
 
Evaluation question 4
Evaluation question 4Evaluation question 4
Evaluation question 4Declan
 
Fmp2 production reflection
Fmp2 production reflectionFmp2 production reflection
Fmp2 production reflectionbronparsons
 

Similaire à Dragonfly Animation Blog: Keyframes, Motion Trails & Rotoscoping (20)

Mouth Movement Experiment 1
Mouth Movement Experiment 1Mouth Movement Experiment 1
Mouth Movement Experiment 1
 
HA7 Production Log
HA7 Production LogHA7 Production Log
HA7 Production Log
 
Pl 123 (repaired)
Pl 123 (repaired)Pl 123 (repaired)
Pl 123 (repaired)
 
New Media Technologies
New Media TechnologiesNew Media Technologies
New Media Technologies
 
Production Diary.pptx
Production Diary.pptxProduction Diary.pptx
Production Diary.pptx
 
Media a2 eval
Media a2 evalMedia a2 eval
Media a2 eval
 
Media a2 eval
Media a2 evalMedia a2 eval
Media a2 eval
 
Production Log
Production LogProduction Log
Production Log
 
Media evaluation 4
Media evaluation 4Media evaluation 4
Media evaluation 4
 
Media evaluation 4
Media evaluation 4Media evaluation 4
Media evaluation 4
 
Media a2 eval
Media a2 evalMedia a2 eval
Media a2 eval
 
Fmp production reflection part 3
Fmp production reflection part 3Fmp production reflection part 3
Fmp production reflection part 3
 
3. fmp production experiments(3)
3. fmp production experiments(3)3. fmp production experiments(3)
3. fmp production experiments(3)
 
Production Diary.pptx
Production Diary.pptxProduction Diary.pptx
Production Diary.pptx
 
Media a2 eval
Media a2 evalMedia a2 eval
Media a2 eval
 
Technology used throughout producing ancillary products
Technology used throughout producing ancillary productsTechnology used throughout producing ancillary products
Technology used throughout producing ancillary products
 
FMP Experiment
FMP ExperimentFMP Experiment
FMP Experiment
 
Evaluation question 4
Evaluation question 4Evaluation question 4
Evaluation question 4
 
question 6
question 6question 6
question 6
 
Fmp2 production reflection
Fmp2 production reflectionFmp2 production reflection
Fmp2 production reflection
 

Plus de Fredrik Simons

AVR London Letter of Reccomendation
AVR London Letter of ReccomendationAVR London Letter of Reccomendation
AVR London Letter of ReccomendationFredrik Simons
 
Dragonfly Pre-Production Document
Dragonfly Pre-Production DocumentDragonfly Pre-Production Document
Dragonfly Pre-Production DocumentFredrik Simons
 
Polycount Tower Desert Cabin Blog
Polycount Tower Desert Cabin BlogPolycount Tower Desert Cabin Blog
Polycount Tower Desert Cabin BlogFredrik Simons
 
Harry Potter Logo Photomanipulation
Harry Potter Logo PhotomanipulationHarry Potter Logo Photomanipulation
Harry Potter Logo PhotomanipulationFredrik Simons
 

Plus de Fredrik Simons (6)

AVR London Letter of Reccomendation
AVR London Letter of ReccomendationAVR London Letter of Reccomendation
AVR London Letter of Reccomendation
 
Dragonfly Pre-Production Document
Dragonfly Pre-Production DocumentDragonfly Pre-Production Document
Dragonfly Pre-Production Document
 
Polycount Tower Desert Cabin Blog
Polycount Tower Desert Cabin BlogPolycount Tower Desert Cabin Blog
Polycount Tower Desert Cabin Blog
 
Title Layout
Title LayoutTitle Layout
Title Layout
 
Harry Potter Logo Photomanipulation
Harry Potter Logo PhotomanipulationHarry Potter Logo Photomanipulation
Harry Potter Logo Photomanipulation
 
Drawing 1 Module
Drawing 1 ModuleDrawing 1 Module
Drawing 1 Module
 

Dernier

Cheap Rate Call girls Kalkaji 9205541914 shot 1500 night
Cheap Rate Call girls Kalkaji 9205541914 shot 1500 nightCheap Rate Call girls Kalkaji 9205541914 shot 1500 night
Cheap Rate Call girls Kalkaji 9205541914 shot 1500 nightDelhi Call girls
 
VIP Call Girls Service Kukatpally Hyderabad Call +91-8250192130
VIP Call Girls Service Kukatpally Hyderabad Call +91-8250192130VIP Call Girls Service Kukatpally Hyderabad Call +91-8250192130
VIP Call Girls Service Kukatpally Hyderabad Call +91-8250192130Suhani Kapoor
 
VVIP Pune Call Girls Hadapsar (7001035870) Pune Escorts Nearby with Complete ...
VVIP Pune Call Girls Hadapsar (7001035870) Pune Escorts Nearby with Complete ...VVIP Pune Call Girls Hadapsar (7001035870) Pune Escorts Nearby with Complete ...
VVIP Pune Call Girls Hadapsar (7001035870) Pune Escorts Nearby with Complete ...Call Girls in Nagpur High Profile
 
VIP Call Girls Service Mehdipatnam Hyderabad Call +91-8250192130
VIP Call Girls Service Mehdipatnam Hyderabad Call +91-8250192130VIP Call Girls Service Mehdipatnam Hyderabad Call +91-8250192130
VIP Call Girls Service Mehdipatnam Hyderabad Call +91-8250192130Suhani Kapoor
 
VIP Russian Call Girls in Saharanpur Deepika 8250192130 Independent Escort Se...
VIP Russian Call Girls in Saharanpur Deepika 8250192130 Independent Escort Se...VIP Russian Call Girls in Saharanpur Deepika 8250192130 Independent Escort Se...
VIP Russian Call Girls in Saharanpur Deepika 8250192130 Independent Escort Se...Suhani Kapoor
 
Cosumer Willingness to Pay for Sustainable Bricks
Cosumer Willingness to Pay for Sustainable BricksCosumer Willingness to Pay for Sustainable Bricks
Cosumer Willingness to Pay for Sustainable Bricksabhishekparmar618
 
Cheap Rate ➥8448380779 ▻Call Girls In Iffco Chowk Gurgaon
Cheap Rate ➥8448380779 ▻Call Girls In Iffco Chowk GurgaonCheap Rate ➥8448380779 ▻Call Girls In Iffco Chowk Gurgaon
Cheap Rate ➥8448380779 ▻Call Girls In Iffco Chowk GurgaonDelhi Call girls
 
Abu Dhabi Call Girls O58993O4O2 Call Girls in Abu Dhabi`
Abu Dhabi Call Girls O58993O4O2 Call Girls in Abu Dhabi`Abu Dhabi Call Girls O58993O4O2 Call Girls in Abu Dhabi`
Abu Dhabi Call Girls O58993O4O2 Call Girls in Abu Dhabi`dajasot375
 
Call Girls in Kalkaji Delhi 8264348440 call girls ❤️
Call Girls in Kalkaji Delhi 8264348440 call girls ❤️Call Girls in Kalkaji Delhi 8264348440 call girls ❤️
Call Girls in Kalkaji Delhi 8264348440 call girls ❤️soniya singh
 
PODSCAPE - Brochure 2023_ prefab homes in Bangalore India
PODSCAPE - Brochure 2023_ prefab homes in Bangalore IndiaPODSCAPE - Brochure 2023_ prefab homes in Bangalore India
PODSCAPE - Brochure 2023_ prefab homes in Bangalore IndiaYathish29
 
The history of music videos a level presentation
The history of music videos a level presentationThe history of music videos a level presentation
The history of music videos a level presentationamedia6
 
VIP College Call Girls Gorakhpur Bhavna 8250192130 Independent Escort Service...
VIP College Call Girls Gorakhpur Bhavna 8250192130 Independent Escort Service...VIP College Call Girls Gorakhpur Bhavna 8250192130 Independent Escort Service...
VIP College Call Girls Gorakhpur Bhavna 8250192130 Independent Escort Service...Suhani Kapoor
 
A level Digipak development Presentation
A level Digipak development PresentationA level Digipak development Presentation
A level Digipak development Presentationamedia6
 
Design Portfolio - 2024 - William Vickery
Design Portfolio - 2024 - William VickeryDesign Portfolio - 2024 - William Vickery
Design Portfolio - 2024 - William VickeryWilliamVickery6
 
CALL ON ➥8923113531 🔝Call Girls Aminabad Lucknow best Night Fun service
CALL ON ➥8923113531 🔝Call Girls Aminabad Lucknow best Night Fun serviceCALL ON ➥8923113531 🔝Call Girls Aminabad Lucknow best Night Fun service
CALL ON ➥8923113531 🔝Call Girls Aminabad Lucknow best Night Fun serviceanilsa9823
 
The_Canvas_of_Creative_Mastery_Newsletter_April_2024_Version.pdf
The_Canvas_of_Creative_Mastery_Newsletter_April_2024_Version.pdfThe_Canvas_of_Creative_Mastery_Newsletter_April_2024_Version.pdf
The_Canvas_of_Creative_Mastery_Newsletter_April_2024_Version.pdfAmirYakdi
 
Recommendable # 971589162217 # philippine Young Call Girls in Dubai By Marina...
Recommendable # 971589162217 # philippine Young Call Girls in Dubai By Marina...Recommendable # 971589162217 # philippine Young Call Girls in Dubai By Marina...
Recommendable # 971589162217 # philippine Young Call Girls in Dubai By Marina...home
 

Dernier (20)

Cheap Rate Call girls Kalkaji 9205541914 shot 1500 night
Cheap Rate Call girls Kalkaji 9205541914 shot 1500 nightCheap Rate Call girls Kalkaji 9205541914 shot 1500 night
Cheap Rate Call girls Kalkaji 9205541914 shot 1500 night
 
VIP Call Girls Service Kukatpally Hyderabad Call +91-8250192130
VIP Call Girls Service Kukatpally Hyderabad Call +91-8250192130VIP Call Girls Service Kukatpally Hyderabad Call +91-8250192130
VIP Call Girls Service Kukatpally Hyderabad Call +91-8250192130
 
VVIP Pune Call Girls Hadapsar (7001035870) Pune Escorts Nearby with Complete ...
VVIP Pune Call Girls Hadapsar (7001035870) Pune Escorts Nearby with Complete ...VVIP Pune Call Girls Hadapsar (7001035870) Pune Escorts Nearby with Complete ...
VVIP Pune Call Girls Hadapsar (7001035870) Pune Escorts Nearby with Complete ...
 
VIP Call Girls Service Mehdipatnam Hyderabad Call +91-8250192130
VIP Call Girls Service Mehdipatnam Hyderabad Call +91-8250192130VIP Call Girls Service Mehdipatnam Hyderabad Call +91-8250192130
VIP Call Girls Service Mehdipatnam Hyderabad Call +91-8250192130
 
VIP Russian Call Girls in Saharanpur Deepika 8250192130 Independent Escort Se...
VIP Russian Call Girls in Saharanpur Deepika 8250192130 Independent Escort Se...VIP Russian Call Girls in Saharanpur Deepika 8250192130 Independent Escort Se...
VIP Russian Call Girls in Saharanpur Deepika 8250192130 Independent Escort Se...
 
Cosumer Willingness to Pay for Sustainable Bricks
Cosumer Willingness to Pay for Sustainable BricksCosumer Willingness to Pay for Sustainable Bricks
Cosumer Willingness to Pay for Sustainable Bricks
 
Cheap Rate ➥8448380779 ▻Call Girls In Iffco Chowk Gurgaon
Cheap Rate ➥8448380779 ▻Call Girls In Iffco Chowk GurgaonCheap Rate ➥8448380779 ▻Call Girls In Iffco Chowk Gurgaon
Cheap Rate ➥8448380779 ▻Call Girls In Iffco Chowk Gurgaon
 
Abu Dhabi Call Girls O58993O4O2 Call Girls in Abu Dhabi`
Abu Dhabi Call Girls O58993O4O2 Call Girls in Abu Dhabi`Abu Dhabi Call Girls O58993O4O2 Call Girls in Abu Dhabi`
Abu Dhabi Call Girls O58993O4O2 Call Girls in Abu Dhabi`
 
Call Girls in Kalkaji Delhi 8264348440 call girls ❤️
Call Girls in Kalkaji Delhi 8264348440 call girls ❤️Call Girls in Kalkaji Delhi 8264348440 call girls ❤️
Call Girls in Kalkaji Delhi 8264348440 call girls ❤️
 
PODSCAPE - Brochure 2023_ prefab homes in Bangalore India
PODSCAPE - Brochure 2023_ prefab homes in Bangalore IndiaPODSCAPE - Brochure 2023_ prefab homes in Bangalore India
PODSCAPE - Brochure 2023_ prefab homes in Bangalore India
 
The history of music videos a level presentation
The history of music videos a level presentationThe history of music videos a level presentation
The history of music videos a level presentation
 
young call girls in Pandav nagar 🔝 9953056974 🔝 Delhi escort Service
young call girls in Pandav nagar 🔝 9953056974 🔝 Delhi escort Serviceyoung call girls in Pandav nagar 🔝 9953056974 🔝 Delhi escort Service
young call girls in Pandav nagar 🔝 9953056974 🔝 Delhi escort Service
 
VIP College Call Girls Gorakhpur Bhavna 8250192130 Independent Escort Service...
VIP College Call Girls Gorakhpur Bhavna 8250192130 Independent Escort Service...VIP College Call Girls Gorakhpur Bhavna 8250192130 Independent Escort Service...
VIP College Call Girls Gorakhpur Bhavna 8250192130 Independent Escort Service...
 
A level Digipak development Presentation
A level Digipak development PresentationA level Digipak development Presentation
A level Digipak development Presentation
 
Design Portfolio - 2024 - William Vickery
Design Portfolio - 2024 - William VickeryDesign Portfolio - 2024 - William Vickery
Design Portfolio - 2024 - William Vickery
 
CALL ON ➥8923113531 🔝Call Girls Aminabad Lucknow best Night Fun service
CALL ON ➥8923113531 🔝Call Girls Aminabad Lucknow best Night Fun serviceCALL ON ➥8923113531 🔝Call Girls Aminabad Lucknow best Night Fun service
CALL ON ➥8923113531 🔝Call Girls Aminabad Lucknow best Night Fun service
 
Call Girls Service Mukherjee Nagar @9999965857 Delhi 🫦 No Advance VVIP 🍎 SER...
Call Girls Service Mukherjee Nagar @9999965857 Delhi 🫦 No Advance  VVIP 🍎 SER...Call Girls Service Mukherjee Nagar @9999965857 Delhi 🫦 No Advance  VVIP 🍎 SER...
Call Girls Service Mukherjee Nagar @9999965857 Delhi 🫦 No Advance VVIP 🍎 SER...
 
The_Canvas_of_Creative_Mastery_Newsletter_April_2024_Version.pdf
The_Canvas_of_Creative_Mastery_Newsletter_April_2024_Version.pdfThe_Canvas_of_Creative_Mastery_Newsletter_April_2024_Version.pdf
The_Canvas_of_Creative_Mastery_Newsletter_April_2024_Version.pdf
 
Recommendable # 971589162217 # philippine Young Call Girls in Dubai By Marina...
Recommendable # 971589162217 # philippine Young Call Girls in Dubai By Marina...Recommendable # 971589162217 # philippine Young Call Girls in Dubai By Marina...
Recommendable # 971589162217 # philippine Young Call Girls in Dubai By Marina...
 
escort service sasti (*~Call Girls in Prasad Nagar Metro❤️9953056974
escort service sasti (*~Call Girls in Prasad Nagar Metro❤️9953056974escort service sasti (*~Call Girls in Prasad Nagar Metro❤️9953056974
escort service sasti (*~Call Girls in Prasad Nagar Metro❤️9953056974
 

Dragonfly Animation Blog: Keyframes, Motion Trails & Rotoscoping

  • 1. Dragonfly Production Blog 3rd February 2016 Before today, I was struggling to get the animation for my Dragonfly started because of a couple of problems that occurred along the way. One of the main problems happened when I was trying to copy a certain Dragonfly pose to a different frame on the time slider. Each time it was copied, the animation broke. My teacher explained to me that this was because the controllers which created the animation were not always keyed on all 3 axes. This caused Maya to interpolate its position between the frames and therefore break the animation. This was easily fixed by selecting all of the controllers and pressing “S” on each of the poses which keyed the animation on all axes. I also wanted to mirror my animation from one side of the model to the other just like I do when I’m sculpting. However, this also proved to be a problem as the only way I could do this was to copy and paste the x, y and z positions and invert the number where necessary on each controller. This proved to be very time consuming. When I asked to fix this, my teacher suggested I shouldn’t go about the animation in this way as it would flow a lot better if both sides of the animation don’t look exactly the same. Therefore I’m now moving each controller by eye to match the Dragonflies movements. Once these problems were sorted, I found a good reference video which helped me to work out a lot of the different ways a Dragonfly flies. Here’s the video: https://youtu.be/YUfYiQSWJAg?list=PLc75wkLpun8GUZkYyXxra4qoAkxwJIbi0. I then spent the next couple of hours trying to create a taking off cycle from this video. By the end of the day, I had created all of the different poses needed but each pose didn’t seem to blend very well with the next. 6th February 2016 Today, I spent time trying to create a hover cycle with my Dragonfly. I used the same reference video as I did for the taking off cycle. However, not long after I started looking at it, I had an idea where I could use the YouTube video and place the window below the Maya Window and make the Maya window translucent so I could better match the footage with my Dragonfly. However, as I only had access to my Mac this weekend, the software needed to get this working came up with errors which weren’t easy for me to fix. Therefore, I will look into this tool more thoroughly once I’m back in Southampton and have access to a PC. A couple days ago, I heard one of my teachers mention the Trax editor and its uses. It all sounded very useful and this caused me to watch this tutorial this evening to learn more about it: https://www.youtube.com/watch?v=6B1rLoJZa0k. What the trax editor does is it allows you to save different animation cycles and blend them together seamlessly as well as easily changing the length of each cycle.
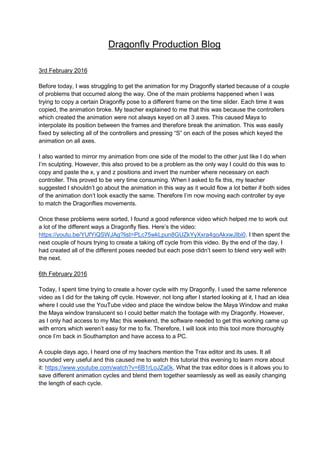
  • 2. 10th February 2016 On this day, Glen my teacher taught me about motion trails in Maya. What these motion trails do is to create a visual helper on the screen so that the animation of each controller can be seen in 3D from a spline. This is especially helpful if the animation looks ‘robotic’ which my take off animation did. I spent all day fixing this robotic look with the splines and by the end of the day, the wing animation looked more fluid. This is an image of how a motion trail looks like: 11th February 2016 Today, I received my Asus PC back from repair as it’s had a black screen for about a month. Therefore, all of today was spent installing all of the appropriate programs needed to use my computer again as the hard drive was formatted. Programs downloaded include Autodesk, Adobe and Pixologic software. In addition, both Rhys and I spent a long time finding some more good reference images which matched the habitat the Dragonfly will be flying through. The main two shots we needed to find were one of an alpine autumn forest and a close up of the lake.
  • 3. 12th February 2016 Today was spent using the same principles for the take-off animation to create the hover cycle for my Dragonfly in Maya. I used a reference video to help me work out where the wings were located. To make the animation more accurate, I noticed the video was playing in 24 frames per second so I decided to match my animation speed with the video. This helped me a lot but required some calculations to work out which frame should be animated. I also helped Rhys find some good downloadable trees to use in his scene created by Evermotion by asking a classmate where to find some good downloadable trees. 13th February 2016 On this day, I continued animating the hover cycle for the Dragonfly. After spending about 6 hours working on it, I found out that I was animating some of the wings on the wings on the wrong side of the body. This meant that most of the animation will have to be changed. To avoid this problem in the future, I learnt how to colour code masks in Adobe Premiere so that I could follow the wings for the whole animation cycle. I also helped Rhys increase the size of his terrain in both depth and width to help accommodate for more trees. This was done by Exporting the terrain from 3ds Max and importing it into ZBrush. The terrain was then converted to DynaMesh which allows me to easily scale the terrain without having to worry about polygons. Once it was completed, it was reimported into 3ds Max where Rhys could further edit the polygons to get the terrain looking like how he wanted to.
  • 4. 16th February 2016 Today, I spent a lot of time trying to fix the first frames for the rotoscope to be in the positions they needed to be originally. This was done using Premiere for video referencing the Dragonfly on each frame and working out what frame corresponds to the animations in Maya. The number on the left corresponds to the time shown on the video in Premiere in 24 frames per second. This number was then converted to the appropriate keyframe in Maya. This technique is called rotoscoping 19th February 2016 On this day, the hover animation was completed using motion trail tools and interpretation as to how the wings would fly. The Dragonflies legs were also folded as all Dragonflies legs are ‘tucked in’ when flying to reduce wind drag.
  • 5. 20th February 2016 Today was spent smoothing out the take-off animation using the motion trail tools in Maya. I’ve also noticed that when animating, reference images shouldn’t be looked at as thoroughly as when you’re modelling and sculpting a character. This is because the human eye is better at judging an animation itself rather than continuously looking back and forth at video footage and see if they’re similar. However, the video footage is good when it comes to working out the speed of the animation which is why the rotoscoping is needed on the wings. 21st February 2016 As the take-off animation was the first animation I’d attempted to do, the animation wasn’t rotoscoped and therefore the timing of some of the frames will need to be fixed. However an attempt to select multiple keyframes on many controllers and moving them caused Maya to crash. Unfortunately, this also meant that the work done on smoothing out the back wings was lost and so I had to smooth those out again. I’ve now also managed to work out how to turn on autosave in Maya as it wasn’t on by default. This will hopefully mean I won’t lose any more work. 25th February 2016 As both the Hover and Taking off Animations were complete, I decided to attempt to finish animating my landing. After about 5 hours, I managed to finish rotoscoping the wings. However, I noticed that the legs were not tucked in as they were in my previous save files. This caused me to research how to do import and export animations between files. I came across this video which was very helpful: https://www.youtube.com/watch?v=3FyhaxNf9 QY. It explained how to create ATOM template files as wells as ATOM exports. The first couple attempts were unsuccessful for unknown reasons but I finally managed to transfer this data into the scene. This was very helpful as I could now match the legs untucking to the video. The image to the right shows some of the rotoscoping work I had to do in order to match the animation.
  • 6. 27th February 2016 The last couple of days have been spent fixing the motion trails of the wings so that they’re smooth during flight. If this was not done, the whole animation would have looked robotic. I also went back into my Take-Off Animation file as I saw the wings were jerking and bending too much depending on the frame. Overall, it’s taken about 8 hours to fix these animations. Once they were completed, I created a separate file with the Dragonfly in its base pose without any animation. I then created a character set for the Dragonfly which has also been created in all 3 of my animations. This allows me to transfer each animation from these files into the trax editor and put them into one scene. As they’re all there, I’m also able to speed up and slow down the movement of the wings as well as increasing the number of loops the hover cycle can complete. Later on in the day, I decided to fix the skin weights on the face as moving the legs caused the face to get all messed up. This process meant clicking on each joint and painting out every vertex which shouldn’t be affected by the legs movement.
  • 7. 11th March 2016 In order to check the compatibility of the same environment in Maya and 3DS Max, I decided to import the high poly 3DS Max environment into Maya and reduce the polygon count so I was able to interactively move through the scene. This was done by selecting each species of tree and using polygon decimation tools like pro-optimizer. As I only needed to use the environment as reference points in Maya, some layers of each tree could also be deleted as the position of each tree was the main thing that mattered. After importing all low poly meshes into a new scene in Maya, I worked out that the whole environment was a lot larger than the one I had originally imported a long time ago. This was an issue because the Dragonfly already has animation data of it moving around the scene in Maya and it would be extremely difficult to scale this positional data to accommodate the difference in size in 3DS Max. After a while of thinking, I decided it would be a lot simpler to scale the environment to the dragonfly’s size. This was done by simply importing the terrain from 3DS Max and scaling it down to the size I had in Maya. Luckily, the actual position of the terrain was the same and the number the environment needed to be scaled down to was an integer. By going through this process, I worked out that the environment is 42% smaller in Maya then it is in Max. The next challenge was to work out how to scale the different assets in the scene to the same size and position as the terrain. Logically, this wouldn’t be an issue as you’d expect if you select all the objects in the scene and scale them, they’d all be in the same position with a different scale. However, as each object was being scaled on its local axes, they were in all different positons in space. After a bit of trial and error, I worked out if I select the whole environment except for the terrain I’d be able to assign all of the objects in the scene to be children of the parent terrain. This allowed me to scale the environment properly and continue animating on the new and improved environment. 15th March 2016 After doing some basic animation with the camera and Dragonfly we wanted to test out approximately how long the animation would be. From the beginning to the pine trees, the animation took 1 minute 40 seconds following the Dragonflies movements. This is about the halfway point of the animation. 20th March 2016 The last 5 days were spent refining the Dragonflies animation through the scene in order to get a representation of what my script originally had planned. In order to show off the environment a bit more, I decided it would be a good idea for the Dragonfly to fly up and through a pine tree. This process meant I had to import the high poly pine tree into Maya so that I could be sure it wasn’t flying through any leaves or branches.
  • 8. 22nd March 2016 This day was spent making sure all the computers in JM018 had all the files and programs necessary to begin our render over Easter. Here is an image I took of the computers when my process of getting the right software and files on each computer was nearly complete
  • 9. 23rd March 2016 This was one of our hardest days in our team project as we were limited for time in being able to use these computers before Easter Break starts. The main problem we had was adding grass to our environment. This was because carbon scatter from eon software kept crashing due to the amount of polygons involved. The grass added about 750 million polygons to our environment and therefore made it hard to edit the grass once it was added. The next challenge was to convert all of my work in Maya and get it all working in 3DS Max. We realised beforehand that the 3DS MAX environment was 42% larger than the Maya environment. Therefore, I scaled down the 3DS Max environment to cater for the animation of both the dragonfly and cameras I had created in Maya. The next challenge was to find all of the materials used in the scene and put them all into one folder. This would help clear any issues with materials missing when the file is placed on each of the computers. This got me to locate about 500 separate materials all found in different folders and make a copy of them and add them into the Environment Materials folder on the Google Drive. I also found that if everything was in one file, the program would almost always crash. Therefore, I decided to split the file into 3 separate ones. The main file had all of the environment including all of the trees, plants, water and terrain. The next file only had the grass in it and the final file consisted of all of the animation of my Dragonfly including all of the cameras. These files were all combined into a main file using the power of Xref in 3DS Max. This tools is very useful as it allows you to plug in all of the geometry without the need to edit it. Once this was all done, both Rhys and I went to Uni to start synchronising the new file to all of the Uni computers in JM018. I then started researching about render channels to make sure we have as many different layers as we need before we start rendering the whole animation. This would be helpful to fix any problems found in the renders post processing in programs like after effects and nuke in case we don’t have time to render a revised version of our scene. We started working at 8AM and finished at 11:30PM with the whole room rendering out what we needed.
  • 10. 29th March 2016 This day has been spent managing all of the renders being done at Uni. As they’re all being rendered in .exr format, the file size of each image is large and has therefore exhausted the 15 GB of space I have free on the Dragonfly Google Drive. As computer number 5 at university doesn’t have 3DS Max Installed, I’ve used this computer to put all of the files in one location. In turn, I’ve got another Cloud Drive from Western Digital which has 4 TB of unused storage but no way to synchronise files like the Google Drive can. Therefore, once all of the renders have been finished, the entirety of the folder can be uploaded to this device. The image below shows a visual representation of what’s supposed to happen. Unfortunately, this didn’t work out as computer ran out of hard drive space after around 112 GB of images. This means that these 112 GB will need to be uploaded first before any more changes can be made.
  • 11. 30th March 2016 Today, I worked out that if I payed a small sum to Google, I’d be able to purchase 1TB of storage on the google drive and therefore skip one whole step in the file management process. I also worked out that as my Western Digital Cloud Drive is in a location where the maximum download speed is 20 Mbps, the time it would take to transfer files many Gigabytes in size would take many weeks. As the internet speed in University averages around 400 Mbps and the google drive servers are located in Google’s headquarters, the time taken for large file transfers is miniscule in comparison. As soon as this was done, overnight, the amount of storage used on this cloud drive went from 15GB to 500GB. These are some of the notes made during that day: The number indicates the computer being used Each tick indicates another render being completed and the number next to the ticket tells me how many hours that computer has left to render Computer number 5 couldn’t be used as 3DS Max wasn’t installed on the computer and I had no authorization to install it myself Computer 13 came up with an odd error where the render went completely brown. This can be seen in the image below. Computer 15 had a full hard disk and therefore couldn’t render Both Computer 1 and 9 had an input/output error Computer 23 refused to render as it apparently had less RAM than the others and couldn’t handle our large environment
  • 12. Here is a snapshot of how some of the computers looked like while rendering on that day: This is a low quality preview of one frame of my animation
  • 13. 31st March 2016 Today I checked to see if all of the renders were still going and if there were any more errors I encountered. One of the main errors I found was that the brighter grass was flickering. I originally thought this was due to a render error which is sometimes fixed by increasing the render settings. However, at night time, after much thought, I realised it may be because the grass is duplicated somehow. This theory proved to be true as the Dragonfly Xreffed into the main scene had 3 patches of bright grass as well as the main environment file. Therefore, deleting these patches of grass on one of the files stopped this error from occurring. The next error, I thought I’d try and solve was the issue on computer 15 with a full hard drive. To fix this, I emptied the recycled bin, compressed the whole hard drive, searched the C drive for the largest files available and deleted any unnecessary files. This allowed me to use this computer for some renders. After doing this, I realised this issue may be why there is an input/output error on some of the computers while it’s rendering. This proved to be true as when I did the same thing on these computers, this error stopped occurring. The next computer I wanted to fix was computer 13 with that brown render. I originally thought this error was due to something wrong in my file but when I rendered these frames on a different computer, it all seemed to work. I then tried rendering some different frames on this computer but this only resulted in the same problem except with blue streaks in the render instead of brown This is how that render looked like: There seemed to be an error with computer 12 as you can see from this video: https://youtu.be/ldFoorD1gQo . However, the computer seemed to calm down and work. In the end, I managed to get all of the computers rendering except for computer 5 with no 3ds max, computer 13 with render errors and computer 23 with memory errors.
  • 14. These are some of the notes I made on that day: The first numbers indicate each computer. Each tick means another render is finished. The red writing to the right tells me how many hours each computer has to render. Finally, if there’s text, it’s telling me which camera is being used to render out these shots. The main thing I’ve found helpful with writing down these numbers is that helps get me to organize which computers are free to render and which computers are taking too long to render part of a sequence. This can be seen with the pine tree camera as it originally had 173 hours left to render which seemed like too much. Therefore, I cancelled that render and split the remaining frames on that camera on all of the free computers. Therefore, instead of having to wait a week for this to finish, I only have to wait a day.
  • 15. 1st April 2016 Today was spent continuing to manage the renders at university. By the evening, 8 of the computers had finished rendering. As Computer number 14 had 404 hours left to render its 250 frames, I decided to cancel this render and split the frames equally between the now 9 computers free. Logically, this would mean that this section of renders would be 9 times faster which averages out for this render to finish in around 45 hours’ time. 5th April 2016 By this day, all of the rendering had finished and all the files were stored on the google drive. As I was still in Torquay, I couldn’t view the full animation as the internet was too slow to download 1.1 TB of EXR images. However, I could still move the files away from the synchronised folder onto a combined folder on the google drive. This meant that none of my files were filling up the computers at Uni. As neither Rhys nor I had any way of viewing the files, we decided to take a break until we got back after Easter. 10th April 2016 Although the internet was slow, while this was all happening, Rhys was slowly downloading all the files onto his 2TB hard drive as a backup. By leaving the computer on all night every night since the beginning of the rendering process, this finished on the 10th of April. This was also the day I drove back to Southampton. I arrived at Uni at 3PM to turn off all of the rendered computers to make way for students having lessons on that Monday. I took an image of how the room looked like on the day I got back:
  • 16. 14th April 2016 Over this last week, both Rhys and I were trying to sort out the mess of files that came with our renders. The reason why it was so messy was because we had split the renders into separate folders per computer to save on file space as well as having files split between the OneDrive, the Western Digital Cloud and Google Drive. Additionally, there were also file conflicts which meant it created a lot of duplicates. The final problem was that the naming convention from some of the renders weren't the same meaning that any post-production program wouldn’t recognize the whole thing as an image sequence. To solve all these problems, we used Rhys’s PC to move everything onto his 2TB Hard Drive. This meant that we could create a separate folder away from the cloud drives to sort out all the files. We originally were using the file explorer to delete any duplicate files manually by checking the file size of each image. This was a gargantuan task because there were 14 different render channels each with 5000 frames in them. This meant that we were manually checking 70,000 files for just one camera of many. I researched how to speed up this process and found that Adobe Bridge is very good at file handling and could also batch rename files selected. This dramatically increased the speed of sorting out these files and by the end of the week, we had a folder which looked like this for every camera shot: Once this was done, the files could then be imported into After Effects. Doing this allowed me to see if there definitely were any missing frames in my animation. Luckily all of the cameras had everything needed except for the Main Camera which was missing 196 frames. I decided to Render out these EXR images in After Effects in order to see how the animation looked like in real time. Unfortunately, we found out that the lake water wasn’t moving and the whole animation was flickering like crazy. Here is a link to how it looked like: https://youtu.be/X6BpexcFELw. This was a shame as this meant we’d either have to hand in a broken animation or re-render everything again.
  • 17. 15th April 2016 On this day, we both came to the conclusion that we wanted to render the whole animation again as we didn’t want to hand in uncompleted work. Therefore we started the day off with Rhys researching how to fix the Vray water moving and me testing out different render settings so we could avoid flickering. By about 4PM we realised that the issue was that the global illumination setting was too low and therefore we were getting anomalies in the lighting. I therefore decided to do test renders in 320*240 pixels with the global illumination setting being increased. Unfortunately, having the setting on medium, medium animation and high all still produced artefacts but having the setting on high animation seemed to remove these light artefacts. This was a shame as this would significantly increase our render times. This is how the failed flicker tests looked like: https://youtu.be/M6FjGgSi_oA Setting the irradiance map to Multiframe Incremental and the Light Cache to Fly Through also seemed to help reduce any artefacts. In the late afternoon, we went to the uni’s technician to ask him which rooms in the uni had 3DS Max as we knew that the renders would take a long time and we would need as many computers as we could get our hands on if we wanted to finish the renders on time. He told exactly which rooms had 3DS Max at Uni and so the both of us started to go and log onto as many computers as we could. This is a table of the available rooms with 3DS Max at University. Room Number Number of Computers JM 007 40 JM 018 24 JM 028 5 JM 033 5 CC 020 10 RM Games Academy 40 RM 607 25 As my Google Drive was filled up with all of my old renders, we decided to download both Google Drive for the 3DS Max files and One Drive where all the files could be saved onto once rendered. To do this, we needed special permission from the technicians to download software onto the computers needed which was granted. It took about 4 hours to get the right software on all the computers and start the rendering process. We also needed to ask permission from the teachers in those rooms to see if we could use the computers over the weekend. All of the rooms were okay except for CC020 which had quite a few students working in the room.
  • 18. Unfortunately, as soon as we had installed all of the right software in RM 607 and RM GA, we did another test to see how it would render. Unfortunately, the render crashed which wasn’t a good sign but we still were hoping that some of the computers in these rooms would be beneficial to us. This building closed at 9PM which meant we couldn’t test any more renders in this room today. Luckily though, by the end of the day, we had renders going in JM 007 and JM 018. 16th April 2016 On the Saturday, the first thing we wanted to do was go into the RM building and see if we could get renders to work. Unfortunately, according to the guards, we needed written permission to be able to access these rooms which we didn’t have. However, the JM building was less strict and we could get access to the rooms we had put renders into. From what I remember, on the Friday night, we added 15 frames per computer. As there was a games jam on that day, we couldn’t get access to the whole room in JM 007 so we only put on our renders on 21 of the computers rather than the 40 computers available. Everything seemed to be going okay on that day but the renders were taking a lot longer than expected. 17th April 2016 The games jam was still continuing on this day which meant we couldn’t put on any more renders. However, the security guards were a lot kinder on the Sunday as we explained to them we had permission from the tech specialists to use the rooms in the RM building. Unfortunately, when we went over there, all of the renders had crashed on the computers. The reason why they had crashed was because they only had 8GB of RAM and the computers couldn’t handle all of the data we were putting into it. This is the link to the video of us working on the computers in RM 607 https://youtu.be/l-pgCejzRkA and this is another video of us working on the computers in RM GA https://youtu.be/Mm5zobaEvPA. Over time, using this room looked promising as most of the computers were starting the light cache. This is how it looked like during this process: https://youtu.be/NFDfHF8R85A As we were checking the room in the JM building, we went back to the RM building to double check our computers, all of the computers had crashed. This is how RM 607 looked like https://youtu.be/W_fSSyLYPHs and this is how RM Games Academy looked like https://youtu.be/VIAY0F6qjo8
  • 19. 18th April 2016 Today, we were hoping that all our renders would have finished so that students can use the computers during the daytime. However, this wasn’t the case and most of them were still on in JM 007. This meant that we had to cancel the renders and work out which frames had been done and which frames hadn’t been done. This process was very time consuming. Here are the frames we assigned to each computer in their respective rooms: On top of all this, one drive also notified us that it limits the number of computers able to use my 1TB of cloud storage. This meant that I had to cancel all of my accounts in the RM building which took ages to set up in order to sort out the computers in JM 007.
  • 20. 19th April 2016 On this day, we thought that this process was taking way too long and we had to try and find a shortcut which would help us. Therefore, we decided to try and get backburner to work at university to help better manage our renders. In the morning, we went to JM033 and we managed to catch Adam Comiskey as Ian the technician told us that he was the most experienced person in network rendering. He explained to us how it worked and how to set it up. This is the basics of it: ● The Network Manager controls which computers are assigned to which frames. ● The Server connects to the network manager ● The Monitor gives you information on which frames have been done and any errors encountered. Unfortunately, when Adam Comiskey was setting up a test scene, backburner was unresponsive and didn’t work. All of the teachers we asked who had experience with backburner before were very sceptical that it would work at University due to security issues. However, I left both the server and manager just in case Ian might have some ideas. When we came to Ian with the problem, after a while of troubleshooting, he managed to work out it was because the server needed to manually add the IPv4 address of the manager so that they could communicate with each other. Once this was sorted, the test scene which was set up worked which was a huge relief to the both of us. This meant that we could set up a new render with all the frames that were missing from previous attempts and put this onto the network manager. Regrettably, a lot of the first 450 frames were rendered in the wrong camera view which meant they also had to be re-rendered. As I knew I was leaving to Karate in the evening, I gave Rhys a list of things to do to set up the network manager in both JM 007 and JM 018. Here is what I wrote for him to do: Once I got back at 10PM to check how far he’d come, most of it had been done and all that was left to do was to finish adding multiple computers to the network manager.
  • 21. 20th April 2016 We arrived at university at 7:00 in the morning and we saw that all the computers which were still rendering the original 15 frames which was set on the Friday had finished which meant these computers could be used for backburner as well. As we were sorting out the computers in JM 007, Adam Barton came into the room.. As it was all working overnight, I had a theory that the renders should be able to still be going during the day as any renders cancelled would go straight back onto the manager and reassigned to a new computer. I explained this to Adam and he was fine with us using the room during the daytime. As the day passed, my theory was correct which meant that we were able to use the machines during the day throughout the week as well as during the night. This was very helpful to us as we could finish our renders at a faster rate giving us more time to sort out our document and any other work needing to be finished. 21st April 2016 Before classes began, we checked if all the renders were still working during the daytime and they all seemed to have no issues and so once we’d checked all the rooms with our renders, we put on a notice on every classroom door with our renders to make sure students were aware they could cancel our render if no computers were free. This was very important as none of the students had any experience with backburner and they’re all aware how long it takes to render something out. Once we were happy with how everything was going, we decided to take a bit of a break and go to the gym and have some lunch. However, once we got back Adam Barton wasn’t too happy with us as apparently once our renders were logged off, some of the students had issues using the computers. We were surprised about this as all files were moved into the cloud every morning and evening freeing up the storage of the computers and any RAM or CPU power used would be freed up as soon as the render got cancelled. As we were setting up another batch of renders during the evening, Ian the technician came in to try and diagnose why there was an issue in the first place. What he found out was that loading the file took up so much RAM, it was also using something called paging files which uses the hard disk as more storage for the RAM. Apparently this causes damage to the hard drives over time as they have a limited write life and once the page files have been assigned, this storage space can’t be used for the computer. Regrettably, this meant that our renders needed to be cancelled indefinitely unless we find a solution of reducing the storage needed to load the file as its rendering. This was a huge blow for us as it potentially meant that there was no chance of us finishing our renders.
  • 22. 22nd April 2016 With renewed determination, both Rhys and I came in early in the morning on the Friday in hopes of finding a solution to getting our renders working again. These are the issues we wanted to sort out: ● Texture Sizes ● Polygon Count ● File Size Before we started to research how to optimize the scene, we wanted to make sure all the frames we had already done in both the google drive and the OneDrive were safely in one place. To do this, all 1.1 Tb of data from our old render was backed up on Rhys’s PC so I therefore deleted all of this data from the google drive so that we had a fresh place to store everything we needed on the cloud. Rhys researched how to reduce the polygon count of the grass by working out where the grass couldn’t be seen by the camera. This was a painstaking manual process of trying to reduce 750 million polygons of grass. I decided to research how professional optimize their scenes and I came across this website which was very helpful to me: http://www.evermotion.org/tutorials/show/9296/3ds-max-working- with-big-scenes This was an architectural visualisation with tips and tricks on how to optimize a large scene. ● In the end, I worked out one of the texture files was being read by a Photoshop file when it could have been by a JPEG. The difference was 600MB to 10 MB with no difference in quality. ● Vray Proxies was another thing I thought would help a lot in reducing the file size but I never managed to get it to work properly before during my tests. However, looking at this video multiple times https://youtu.be/piqQkhMbCAU , I managed to get it working in our scene but it would still mean I’d have to select every single piece of geometry separately to get them to be VRay proxies. To try and find a way around this, I did some research and found this very interesting plugin called Instances to VRay Proxy which in a nutshell converts all instances of each object to proxy objects. This tool was so helpful it reduced our scene from 800 million polygons all the way down to 60 million polygons. The grass in itself was reduced from 750 million polygons to 668 thousand polygons. This all works because the proxy produces a .vrmesh file which essentially is a file with just that one object in it. Once this was all done, we asked Ian the technician to have a look at our scene whilst its rendering and thankfully, on all 16GB machines, it was using 95% of the RAM which meant there were no issues with page files. This cleared us from the issue of the day before and he gave us the go ahead to use the machines at university again to our delight
  • 23. 23rd April 2016 We tested out JM018 on the Friday evening to see how long the renders will take to finish but unfortunately the time per frame was still around 4 hours. What did make difference was that none of the computers we had rendered were giving out any page faults as it was using a lot less RAM than what it was originally all because of these proxy objects. As it was still taking this long per frame, it was important to us that we put renders on as many computers as we could so that we could finish our rendering on time. By the end of this day, we had 78 computers setup and rendering. 24th April 2016 Most of this day was just spent managing our renders and checking how many frames had been done and fixing any errors on the network manager. These issues tended to be file location errors or false IP Addresses. 25th April 2016 We arrived at university at around 6:30 in the morning on this day as we wanted to get in as early as possible to switch off all the renders for the students to use when classes started at 9. The reason why it always took so long every morning to synchronise the files was because Google Drive has a tendency to crash when multiple computers are uploading different files at the same time. By 9:00, we’d just about finished checking on all the computers. The number of renders completed for this weekend was around about 1000 which was very good going considering each frame took about 4 hours to complete.
  • 24. 26th April 2016 In addition to checking all of the computers we had left for the week, we decided to see if we could further speed up the rendering process by researching some more on different options. These were: ● GPU rendering with VRay ● Distributed rendering with VRay ● Cloud Rendering with render farms (ZYNC and Rebus Farm) The first thing we wanted to try was cloud rendering as we knew this would be the fastest option. https://www.zyncrender.com/ was the first one we registered to as they were offering 300 pounds worth of rendering free which was the best option we could find. The second best option we found was https://gb.rebusfarm.net/en/ which was another well-known render farm service. Both of these accommodated for 3DS Max and VRay which were what we needed. As we registered for these services at university, network restrictions prevented us from uploading our work. Therefore, we decided to put this on hold and explore another avenue. The next thing we tested out was GPU rendering as from what we’ve heard, it’s a lot faster than CPU rendering but this process if fairly new so it’s not as well recognized and debugged as the traditional route. The other issue with GPU rendering is that it doesn’t use RAM but it uses VRAM instead. Currently, most graphics card have only 1-2 GB of RAM which isn’t much considering our scene uses up almost all 16GB of RAM when rendering on the CPU. We decided to test it out anyway to see what would happen and it seemed to render one frame with lots of noise in about 5 minutes compared to the 3-4 hours per frame on the CPU. This seemed promising but then each time we tried, it seemed to get stuck and not complete the render. All this avenue seems promising in the future, the technology hasn’t caught up enough for us to be able to efficiently use it for our renders. The final thing we decided to test out was Distributed Rendering. This process works almost exactly the same as Backburner but instead of assigning each computer to a different frame, they all get assigned different ‘buckets’ on the same rendered image. This would be very helpful us because then we won’t lose any significant time as people log off some of our renders on the computers during the daytime. As each person logs onto a computer with a render on, we lose time ranging from a couple of minutes to 4 hours but if distributed rendering is on, all we’d lose is a bit of computing power. Here’s a video of distributed rendering working with each number being a different render slave: https://youtu.be/XPXiITMpHGE Unfortunately, this process didn’t work out for us either as the computers at uni weren’t set up to use distributed rendering. According to what I’ve found out on this link http://vray.info/topics/t0111.asp, you get 10 render slave licenses per workstation license. Therefore if this was set up, we wouldn’t have had to worry about our renders as we’d have more than enough computers to render our animation.
  • 25. 27th April 2016 As usual, today was spent managing all of the renders going on in the day and setting the ones which were cancelled overnight. However, over night, I had an idea on how to improve the animation of the wing as it’s flying through the scene. The idea was to create a very simple animation with an up down motion and speed this up so that it can be properly be seen in the viewport. This dragonfly will be rendered separately from the scene and then composited back into the main renders. By doing this process, hopefully motion blur on the wings will help to make it look more realistic and therefore improve upon the animation. However issues were encountered during the creation process: ● While trying to get this working in Maya, the file itself seemed to be corrupt in some way which stopped me from being able to save the new animation. ● The animation clip could be saved but when loaded into the main scene, none of the rotational data seemed to be there. ● The final issue we encountered was if the animation was sped up too much, some of the keyframes were lost as there were multiple keyframes between the frames. In the end, I managed to save the work I had done to it hoping that these problems will get fixed in the near future. At night, we both put on the renders with the computers which were free. 28th April 2016 Today was spent trying to optimize different camera shots to help improve the speed of the renders. This was done by selecting everything in the scene that the camera could see, invert the selection and delete everything else. This proved to be very helpful in the rendering times as now it only seems to take an average of 1 hour per frame rather than 3 hours. All of the renders were managed as usual with the network manager to sort them all out and all the files were uploaded to the Google Drive.
  • 26. 29th April 2016 This morning, I proposed an idea to Glen on how to fix the animation of the wings. The idea was: ● Use the baked animation of the Dragonfly in Max and remove all of the keyframes for the wings and create a new cycle. However, looking at the wings again, I created a motion trail which allowed me to see where the old animation cycled. This was very helpful as there was a slight pause in the animation between each wing cycle which I didn’t want. This is how it looked when I was working on it: By doing this, I could isolate the part of the wing animation which I needed to use, and duplicate it across all of the animation where the dragonfly is flying across the environment. The next challenge was to add motion blur to the wings as I had failed to get this working in Vray. In mental ray and in scanline, adding motion blur is fairly simple as there’s a setting in the object properties panel to add motion blur as well as in the renderer settings. Once this was done and I was happy with the animation I had created, I decided to do some test renders to see how it would turn out. Here is a video of what it looked like with motion blur: https://youtu.be/wv7VGJXFFLo After that, I decided to do a full HD render and put that into Photoshop with my final image. This allowed me to see how much I’d be able to fix by applying this process to my animation.
  • 27. 30th April 2016 As it’s the weekend again, I went into university and made sure I was using as many computers as possible to render from. This in the end came to 34 computers as the rest were being used by other students. I then decided that another key section of my renders should be added to the queue as upon my calculations, most of the frames should be finished rendering by Monday evening. The part I wanted to render was between frames 1650-1900 as this is the part where the Dragonfly flies between a branch and different sections of a tree. Here’s an updated video of where I’m at the moment: https://youtu.be/xWw2MzpYpFk 1st May 2016 Today I decided to not go into university as most of the computers rendering should hopefully be left on as not many people go into university on the weekends. To my surprise, the original 1900 frames added a couple weeks back had finished rendering and the other two tasks assigned were well on their way to completion. I therefore decided to put on a task for the forest camera which is the only camera which hasn’t started to render yet. This scene however was optimized at the beginning of the week which meant each frame took approximately 1 hour to render rather than 3. 2nd May 2016 In the afternoon of bank holiday Monday, all of the frames for the tasks were completed and all of the computers were sitting idle. I also noticed that my computers had also finished rendering the Lake Camera which was a pleasant surprise. As Rhys was at home this weekend, I decided to check his computer too and saw that Pine Tree Camera was nowhere near done in completing its task. I then decided it would be more beneficial to cancel that render and put on the remaining frames on the computers at university. According to my calculations, Rhys’s computer had done 86 frames in a week and with the 31 computers left idle at Uni the remaining 114 frames should be completed within about 4 hours. These were done in the evening and so, we decided to quickly check what we had so we could put on another render for the missing frames in the evening of that day. 3rd May 2016 In the morning, we both went to Uni and saw all the frames we had assigned to be finished. This meant that we thought we had finished with all the frames for the animation but the only way to check this was to download all of our files onto a local hard drive where we could make sure we had all we needed. While we were checking, Rhys noticed that some of the camera shots had different lighting to the rest of our scene which was odd. We left this for the moment as we had to render all of the rest of the missing frames from the main camera which we knew was working.
  • 28. 4th May 2016 After we went in early in the morning and checked on all the renders and synchronized all the files, we wanted to make sure we knew what the issue was with the other camera shots. What I did to try and diagnose this problem was open the reed camera file which was working and compare it with the pine tree camera file. What I found was that while I was optimizing the scenes to try and improve on render time, I had accidentally deleted the VRay Sun which lit up all of our scene. Thankfully, this was an easy fix as all I had to do was merge the VRay Sun from a working file into the broken files and the test renders all seemed to work. Here is a comparison of 2 frames under these different lighting conditions: As all of the other renders had finished in the evening so I put on the fixed camera shots in the network manager. 5th May 2016 By the morning of the 5th of May, all of the fixed camera shots had completed so all that was left to do was to find a computer at university with enough storage to hold 300 GB of images so we can continue our work from the rough cut. We found one and waited about 4 hours for the files to synchronise onto that computer’s hard drive. While we were checking one of our renders, one of the students needed help with one of his renders as he’d only used mental ray before and he wanted his renders to look more realistic. We therefore helped him set up VRay and create some water for him. The left render is Mental Ray and the right one is Vray. This helped solidify our knowledge of Vray and realistic water.
  • 29. 6th May 2016 On this day, we came in later than usual as we had no renders to check and we needed a bit of a break. The first thing we did when we came in was check the raw footage in Premiere to make sure we had everything we need. This included: Camera Frame Numbers Zoom Camera 0-450 Main Camera (450-1193) (1261-1501) (1600-1900) (2501-4900) Forest Camera 1150-1350 Pine Tree Camera 3000-3230 Swoop Camera 3260-3300 Reed Camera 3500-3580 Lake Camera 3998-4010 Wing Motion Blur 900-4100 Once all the footage was checked and played, we noticed that the original footage we’d rendered 3 weeks ago had issues in it. This was mainly due to us not having the network manager working at the time causing us to try and workaround a mess of renders which I think meant we sometimes didn’t open the exact same file meaning some of the renders were slightly different. This is how that section looked: https://youtu.be/06efmBl4uTw As it was coming up to the weekend, we decided to grab the chance to re-render those 450 frames and so we managed to get access to 50 computers to render from. Another issue we had was lining up the wing motion blur footage with the right frames of the main camera animation. Lining it up to the raw footage was simple as none of it was cut so we placed that layer on frame 900 which lined up to frame 900 on the main camera. However, as the footage already had a rough cut and a beauty cut, there were issues lining these up. This was because: ● Adobe Premiere recognized the footage as 25 frames per second when it was rendered out at 30 frames per second. ● Lining it up by eye was extremely difficult as we had to get the exact frame where they lined up. ● The number of different layers in the file was a mess so it was hard to see what you were doing.
  • 30. To fix this, the first thing I did was delete any layers we didn’t need including the rough cut. This left us with 5 video layers and 1 audio layer lined up like this: Video 5 Uncut Motion Blur Camera Video 4 Uncut Main Camera Video3 Workstation where footage was cut up Video 2 Motion Blur Cut Video 1 Beauty Cut Audio 1 Music This made it easier to work out what we were doing. Now this was sorted, we spent about an hour trying to work out how to implement our Motion Blur footage to our Beauty Cut. What I came up with was that the sequence was playing at 30 frames per second when the footage was interpreted at 25 frames per second. This caused the timeline to change and not align to the frames we rendered on. However, changing the sequence settings to 25 frames per second fixed this problem. The next issue was trying to align the motion blur wings to the beauty cut. Nothing I tried seemed to work but then I had the idea of using blue tack on the screen to give me reference points on where exactly parts of the geometry were located. This process seemed to work and I decided to record how this process works: https://youtu.be/lPEaNkd-pZQ 7th May 2016 Today was spent managing our final renders which are now just over 50% done in about a day which means that hopefully sometime tomorrow afternoon, the rendering should be truly finished. We then spent our time fine tuning our rough cut by reducing the opacity of the motion blurred wings and finding some sound effects to be added as well as working out how to remove our old dragonfly from the motion blurred animation.
  • 31. 8th May 2016 Today, all of the renders we put on the Friday had completed and so we decided to synchronise all of the computers with the files and log off all of the computers. However, the security guards had issues going into the computer room at CC020 which meant that the files rendered there can’t be uploaded until Monday morning. The Lake Camera also had issues as although the lighting was now working, there was no Dragonfly present. This wasn’t too big of an issue as there are only 13 frames to render and so I fixed this issue and put on a new render in JM018. As I was fixing all of this, Rhys was researching on how to get this work from Premiere into After Effects in order to do some colour grading. He worked out that the simplest would be to just render out the Beauty Cut from Premiere and import it into the file we had in After Effects. We also did some colour grading in After Effects to help improve on our renders and focus the viewer's attention to what’s important. Here’s how it came out: https://youtu.be/QrKqxykSsQE. The next thing we decided to do was test out how it looked with pixel motion blur. What this does is adds a slight motion blur to anything that’s moving in the camera view. This helps to stop the viewer get disorientated on what’s happening on the screen. Here’s how that version turned out: https://youtu.be/S-vdA9p2334 We then went back into Premiere and tested out some sound effects to the footage to make it more interesting. The parts we focused on this day was getting a good opening piece of music as well as giving sound to the beat of dragonfly wings. 9th May 2016 This morning, Rhys went into university to synchronise our final files. As he was doing this, I was moving the files uploaded into their respective folders onto the google drive for the last time. We now had all the files we needed to work from home and decided to spend the rest of the day editing the footage. This is what we came up with: https://youtu.be/xujpUwQiFus 10th May 2016 Once completed, we showed this to our Tutor who was pleasantly surprised how far we had come. He had a couple of minor fixes to the video which we added making the video look a lot more dreamy. Here is our final cut: https://youtu.be/vNMN4TBeFfY