Quick draw - Solomon's knot motif
•Télécharger en tant que PPTX, PDF•
0 j'aime•128 vues

Solomon's knot is one of the most common motifs seen in Roman floor mosaics. There is a quick and simple method to draw it out without using a compass or ruler. Do it a few times and you will be surprised at how easy it can get.

Recommandé
Contenu connexe
Tendances
Tendances (20)
Dernier
Dernier (20)
Quick draw - Solomon's knot motif
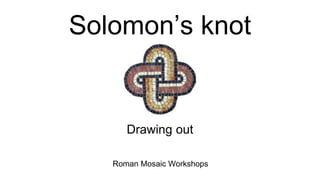
- 1. Solomon’s knot Drawing out Roman Mosaic Workshops
- 2. The pattern is two chain links, interwoven.
- 3. The geometry is four circles
- 4. Drawing out This exercise is about how you can draw out a Solomon’s knot pattern without using a ruler or compass. Do not try to be too precise, just have a go. Try to keep in mind the shape you are drawing rather than focusing on just the lines. The more times you practice this the easier it gets.
- 5. 1. Draw a small square in the middle of the box
- 6. 2. Draw four more squares, each one halfway between the centre one and the edge
- 7. 3. Draw a line going the right side of the top square straight down to the right side of the centre square. Repeat this for the other three.
- 8. 4. Draw a line that is parallel to one of your first lines.
- 9. 5. Draw in a curved line which goes across the top, touching the edge.
- 10. 6. Draw in the other three curves
Notes de l'éditeur
- How to draw out a Solomon’s knot motif. This is about drawing it out without using any rulers, compasses, just work by eye. It is easy enough to do and the more you repeat this exercise the better you get.
- The pattern is what shapes the strand are (two chain links) and how they go together (interwoven)
- The geometry is different from the pattern and is what shapes or lines are used to create the whole pattern. Here the pattern is made up by using four circles.
- Emphasise that this is a rough drawing exercise and that they do not need to be precise. The more times they can do it the better.
- Imagine diagonal lines going from each corner and where they cross is where the square goes. To get the square the right size they need to imagine that there will be 23 side to side (the middle square is number 12).
- These other squares need to be at the midpoint between the first one and the edge. As before have the children just guess rather than get out a ruler. This helps them to develop and eye for the space needed.
- Start with the top one, make sure the line is on the right side of the square. Repeat this step for the other three lines. It may help if, after doing the first line the children rotate the page anticlockwise before drawing in the next one. This way they will draw in the next lines looking at the same orientation.
- This line goes from one of the outer squares straight up, parallel to the inner line. End it in line with where you ended the first line. Repeat this for the other three. Get the children to rotate the page each time to draw in the others.
- Point A, where the line starts, it curves up to the top in a line with the centre squares. Then it curves down to join to the line on the right drawn in the previous step. The curve needs to ensure that there is an equalt space between the two lines.
- Draw in the other three in exactly the same way again. The idea is to repeat this exercise so the children can see how many times it takes before they can comfortably do it without the step by step guide.